1
Contents
Product and Images…………………………………………………………………………..1 Notes on Dash Flash………………………………………………………………………….2 Dash Flash Boost Set Up…………………………………………………………………….3 Dash Flash AFR Set Up………………………………………………………………………4-5 Dash Flash Belt Temperature Set Up………………………………………………………5-6 Liability Statement……………………………………………………………………………..7
2
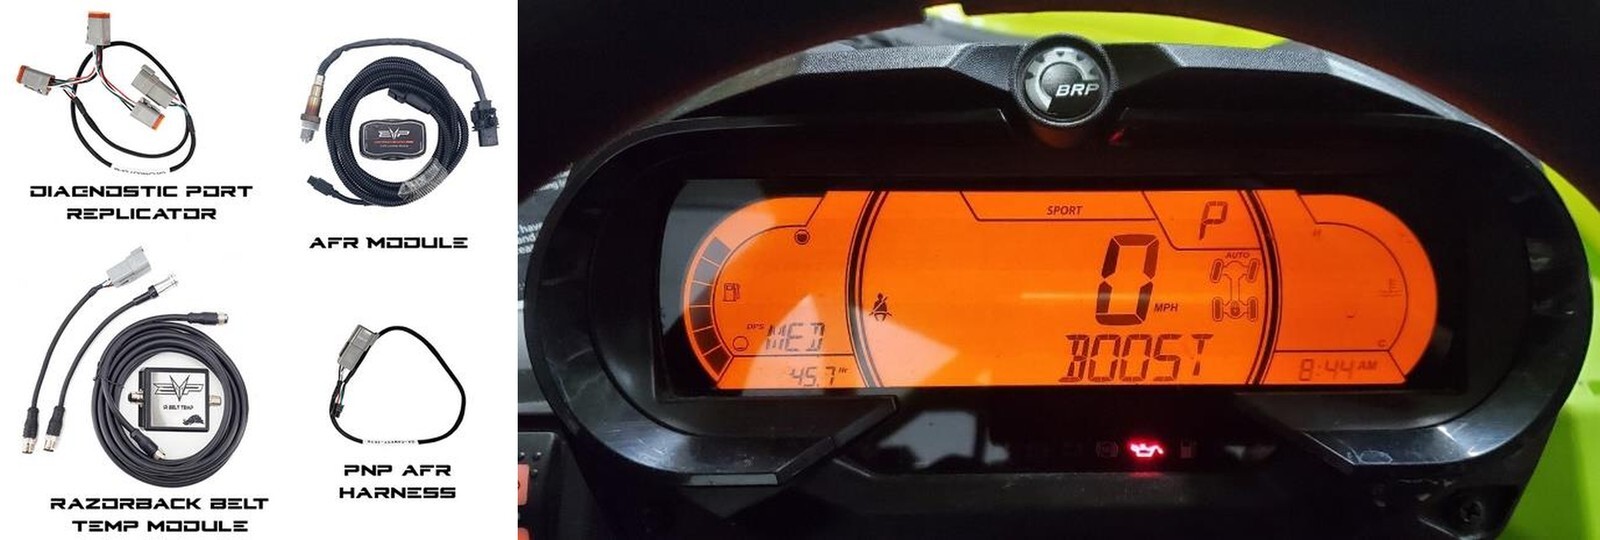
Instructions for Boost Flash 2017-2019
- Reinstall your Dash Cluster into your vehicle after receiving it back from us.
- To display boost on the top spot of your dash, press the “M” button on the cluster once – this will cause the top values to blink. Then press the S button until you see boost or 000 displayed. The values will stop blinking in about 5 seconds and boost will be stored. If you want boost displayed on the bottom set of values, press the M button twice then repeat the steps above. (Figure 1-2)
“M” Button
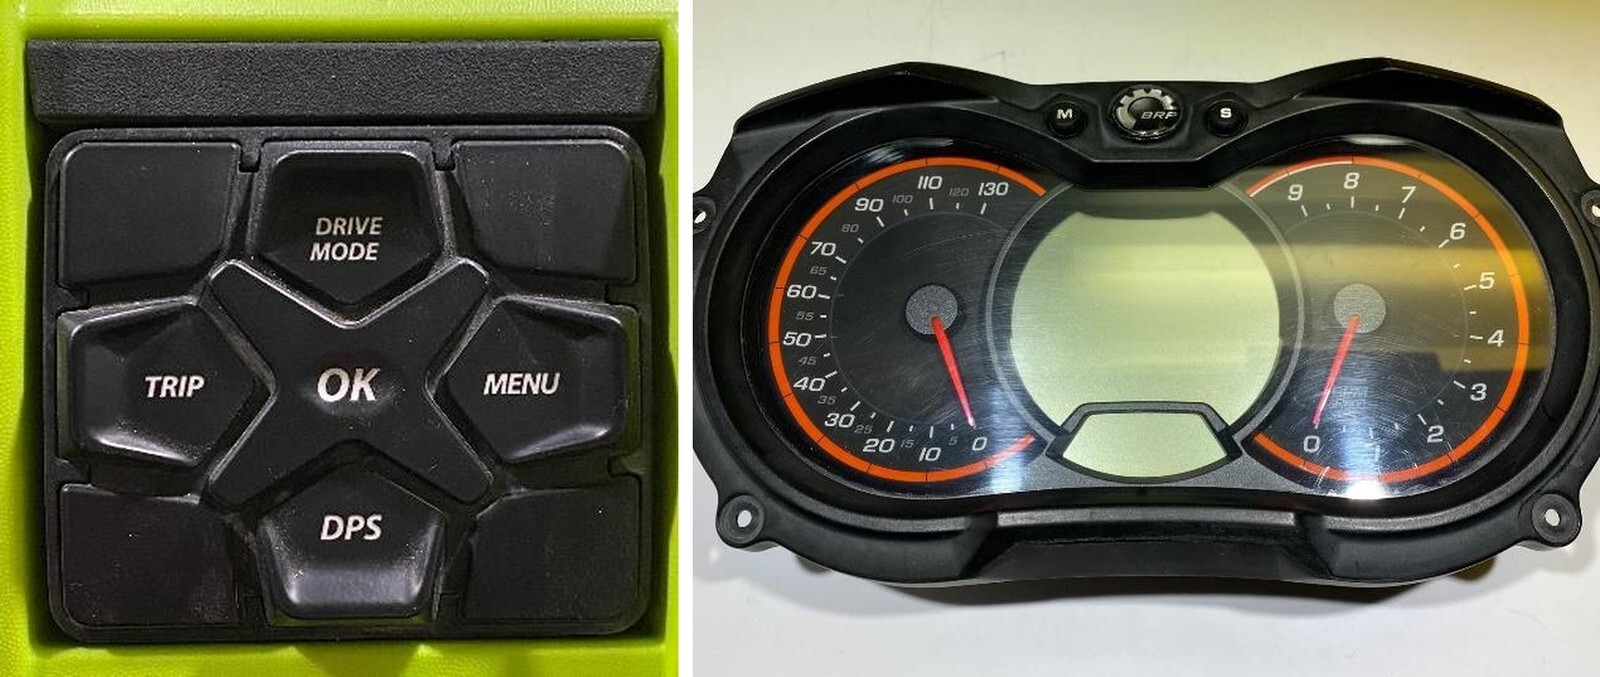
Instructions for Boost Flash 2020+
- Reinstall your Dash Cluster into your vehicle after receiving it back from us.
- To display boost on the top spot of your dash, press the “Menu” button on the button cluster. This will cause the top values to blink. Keep toggling through until you see boost displayed on the dash cluster. (Figure 3-4)
3
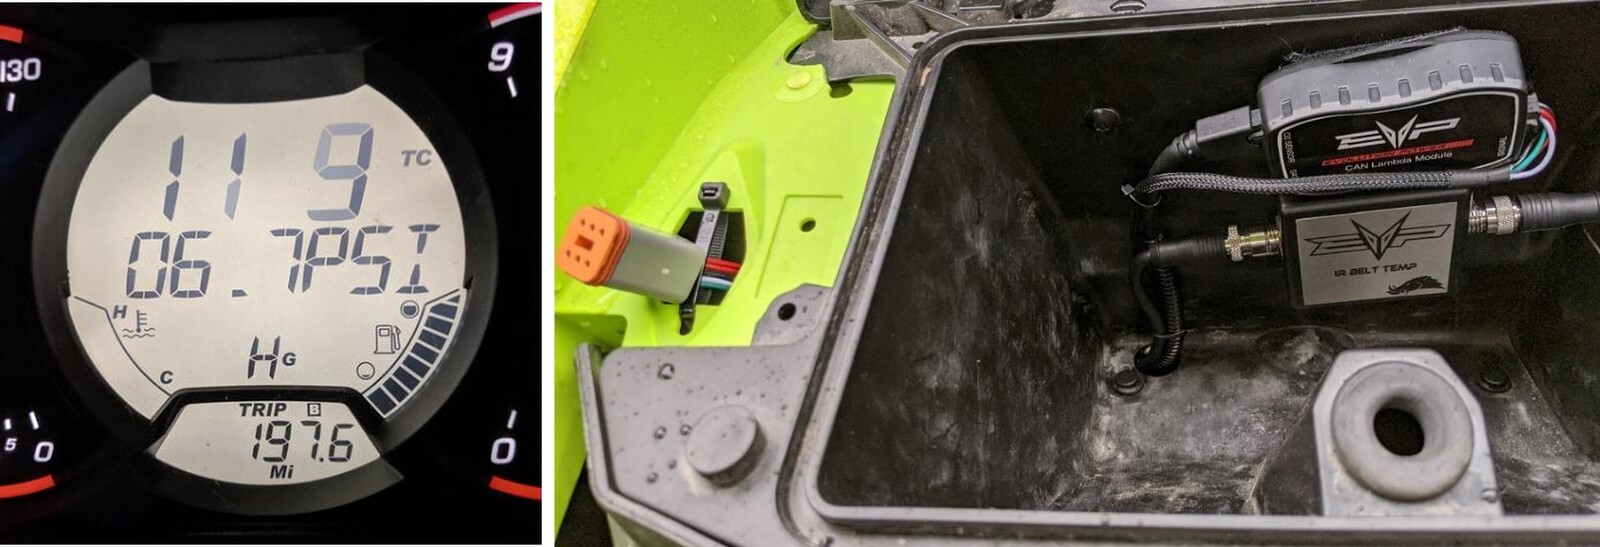
Instructions for AFR Module
- Reinstall your Dash Cluster into your vehicle after receiving it back from us.
- Weld bung into exhaust system (if your exhaust has only one AFR sensor port). Instructions are on our website “Auxiliary 02 Bung Instructions”
- In the glove box, drill a hole to run the AFR, Belt temp, and Diagnostic port replicator.
- Run the AFR wiring harness from AFR sensor through the firewall, underneath the center console and up to the glove compartment. Zip tie the wiring harness away from heat sources and rotating parts.
- Using Velcro, install AFR module in glove compartment (AFR Module is not waterproof and must not be exposed to water)
- Plug in EVP port replicator and run auxiliary ports into Glove compartment.
- Plug in AFR module into one of the free ports on the port replicator. (Figure 5)
Figure 5
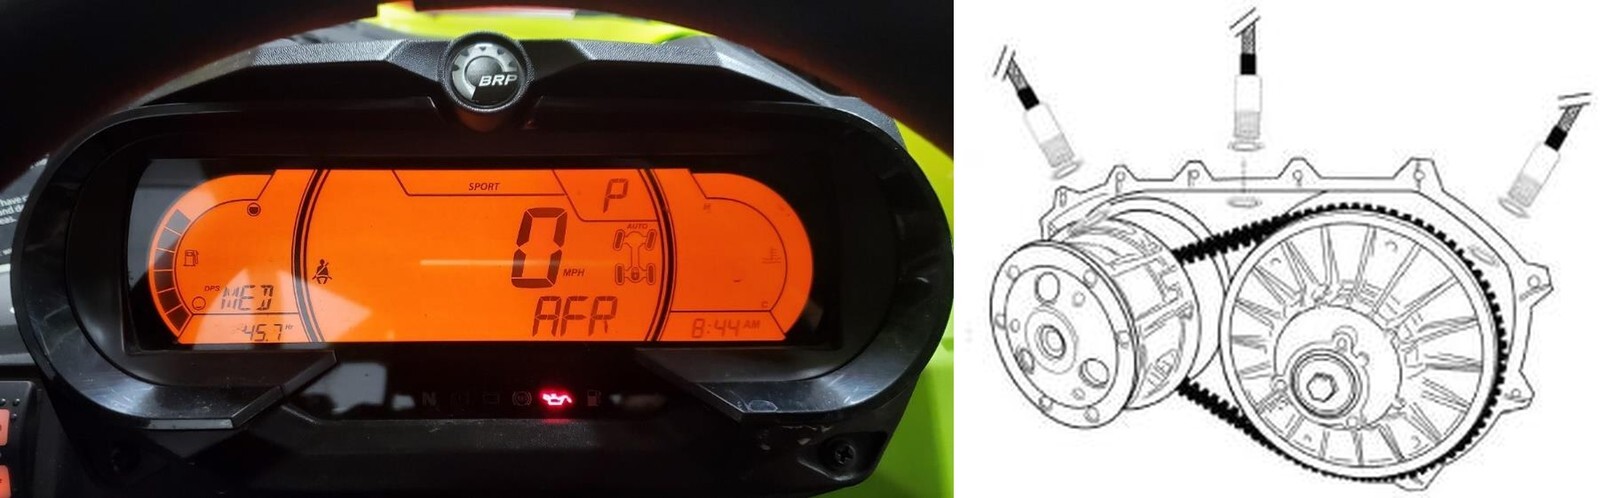
Displaying AFR on 2017-2019 Dash
- To display AFR on the top spot of your dash, press the M button on the cluster once – this will cause the top values to blink. Then press the S button until you see 58 3 (this is the highest AFR value – you will only see this if the engine is not running) displayed. The values will stop blinking in about 5 seconds and AFR will be stored. If you want boost displayed on the bottom set of values, press the M button twice then repeat the steps above.
Displaying AFR on 2020+ Dash
- To display AFR on the top spot of your dash, press the “Menu” button on the button cluster. This will cause the top values to blink. Keep toggling through until you see AFR displayed on the dash cluster. (Figure 6).
4
Figure 6
Instructions for Belt Temp Module
- Reinstall your Dash Cluster into your vehicle after receiving it back from us.
- Remove clutch cover and drill a ½” hole into the clutch housing directly above the center of the belt. The hole should be perpendicular to the surface of the belt and as close to the center between the primary and secondary clutches. 12 O’clock Position.
10 O’clock Position.
3 O’clock Position.
Figure 7
- Use the supplied locknuts to secure the sensor – use Loctite on the nuts.
- Run cabling from belt temp sensor through the firewall, underneath the center console and up to the glove compartment.
- Using Velcro, install belt temp module in glove compartment (the belt module is not waterproof and must not be exposed to water)
- Plug in EVP port replicator and run auxiliary ports into Glove compartment.
- Plug in AFR module into one of the free ports on the port replicator.
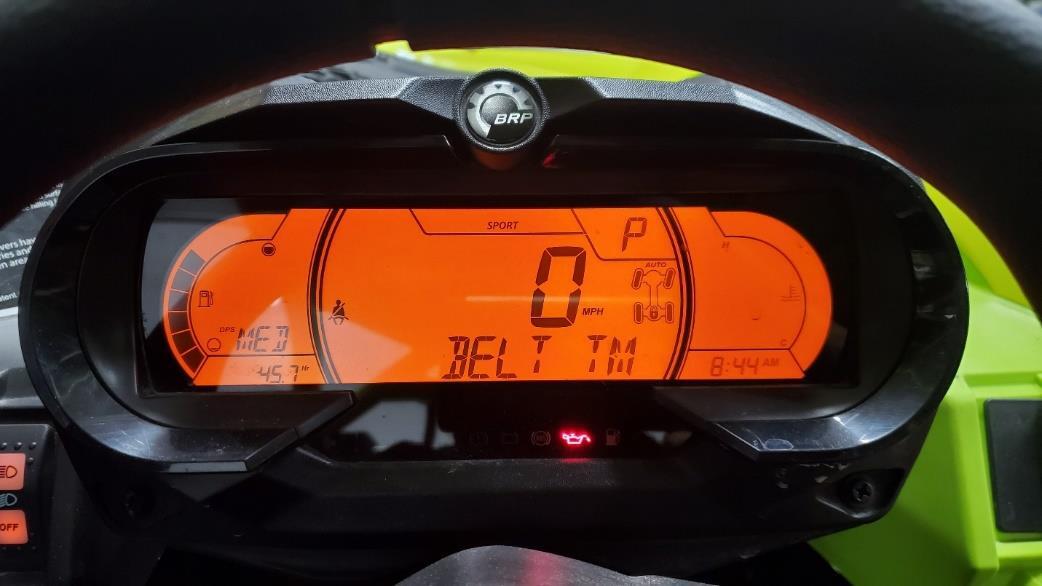
5
Displaying Belt Temp on 2017-2019 Dash
- To display Belt Temp on the top spot of your dash, press the M button on the cluster once – this will cause the top values to blink. Then press the S button until you see Belt Temp value. The values will stop blinking in about 5 seconds and Belt Temp will be stored. If you want Boost or AFR displayed on the bottom set of values, press the M button twice then repeat the steps above.
Displaying Belt Temp on 2020+ Dash
- To display Belt Temp on the top spot of your dash, press the “Menu” button on the button cluster. This will cause the top values to blink. Keep toggling through until you see Belt Temp displayed on the dash cluster. (Figure 8)
Figure 8
6
Note: This product is exempt from the emission standards and related requirements of 40 C.F.R. § 1051 as provided by 40 C.F.R. § 1051.620, and California law [e.g., vehicle code§§ 27156 and 38391]. This product is sold only for use in connection with EPA certified, purpose-built, nonroad vehicles used solely for closed course, nonroad competition/racing and not used for any recreational purpose or on public highways or right of ways maintained by and open to the public. This product is sold only in connection with machines that do not fall under state and/or federal noise or emission standards/regulations. Purchasers who/that purchase this product represent and warrant that the product is purchased only in connection with EPA -certified, emission-regulations-exempt and noise- regulations-exempt competition/racing vehicles as interpreted under applicable state and/or federal law. Questions: Call Evolution Powersports at (715) 247-3862. 7