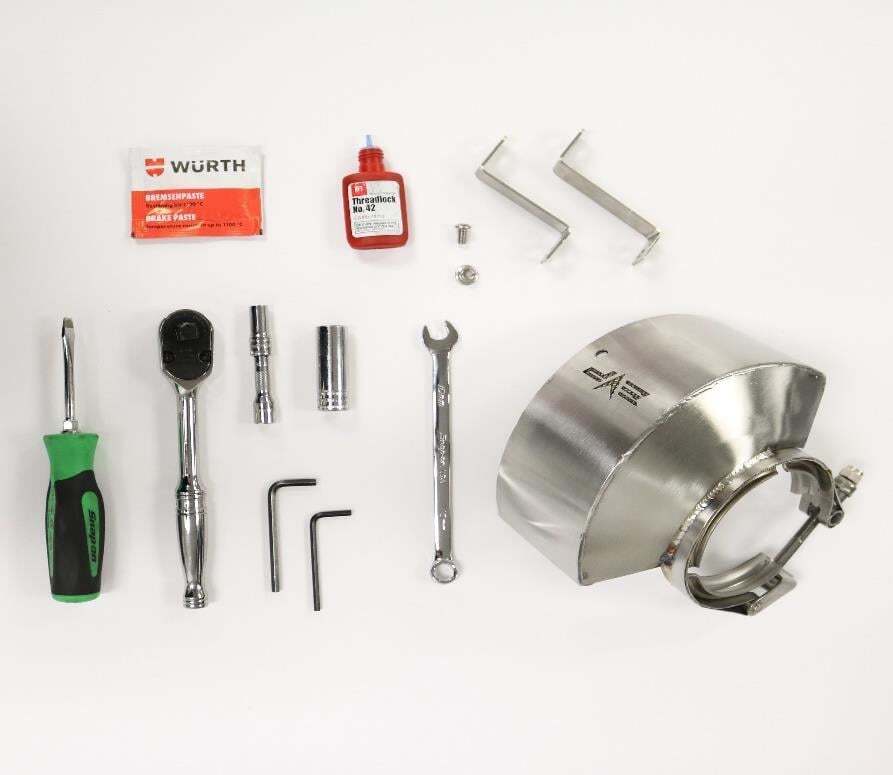
What's in the Box
Installation
1
Remove the installed V-band clamp bolt. Depending on the age of the machine, use some penetrating lubricant on the threads and MAP gas to loosen the clamp. Do not pry against the sealing surface of the turbo exhaust flange.
2
Inspect the turbo flange for any damage or scrapes. If thereare any visible damage, repair before installing the new V- band heatshield clamp. Apply a small amount of high heat anti-seize around the turbo flange, this will helpwhen aligning after the clamp is installed.
3
Slip new V-band clamp over turbo and exhaust flange. Align the clamp bolt so the nut can be started on the bolt threads. The nut included with the clamp is a onetime use part. A small amount of anti-seize is recommended on the bolt threads.
4
Once the V-band clamp is around the flanges, tighten the nut snug so the clamp canstill be rotated.
5
Rotate the heatshield clamp so the EVP logo faces the front of the machine Dynomite Turbo Heat Shield.
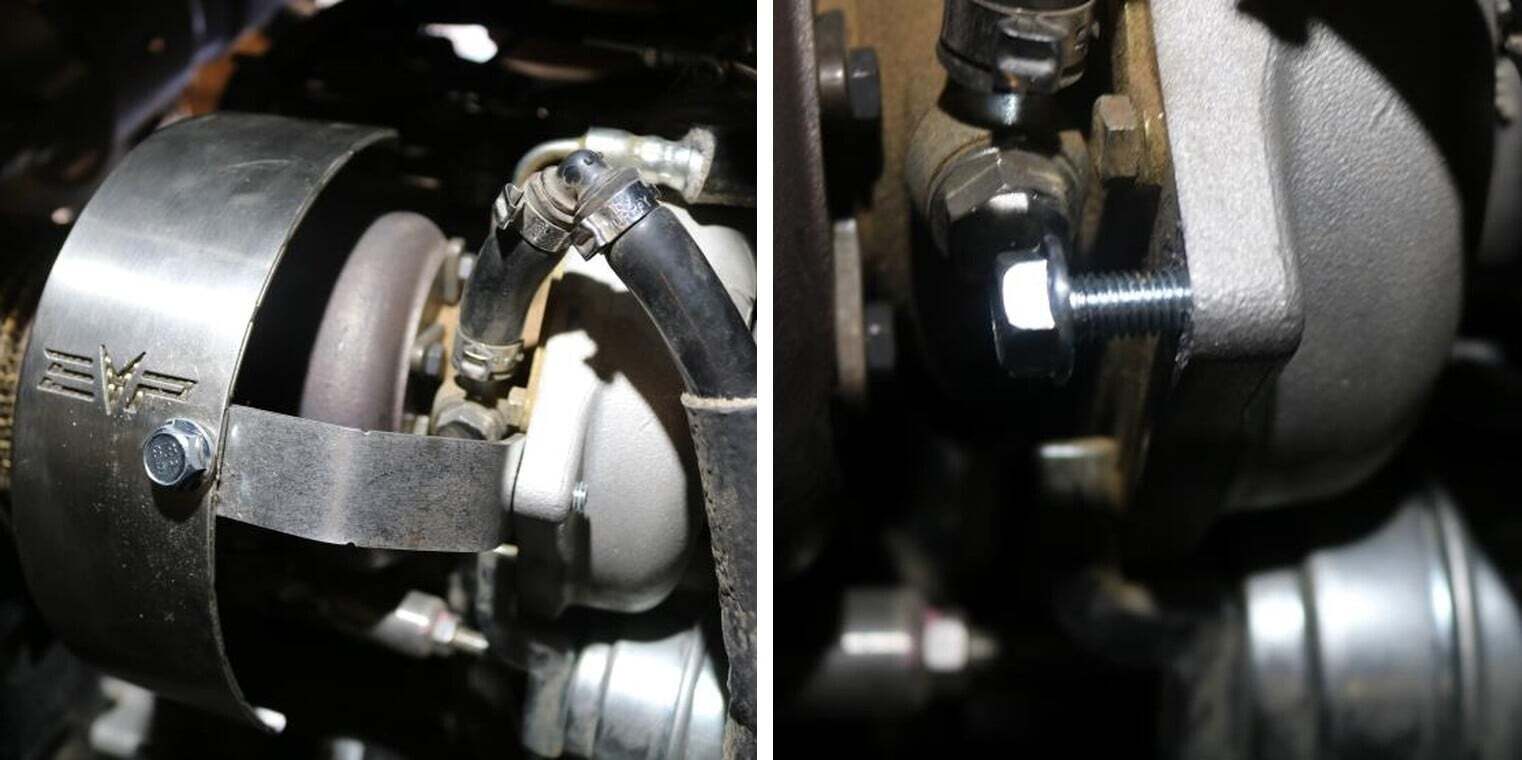
1
Use the supplied DM bracket with (1) hole on each end. Install the 6mm button head bolt and flange nut to the heatshield. Use Loctite. (Figure 1).
2
Use the supplied 8mm bolt and attach the heat shield bracket to the turbo. Loctite this bolt. You may need to clock the heatshield bracket. (Figure 2).
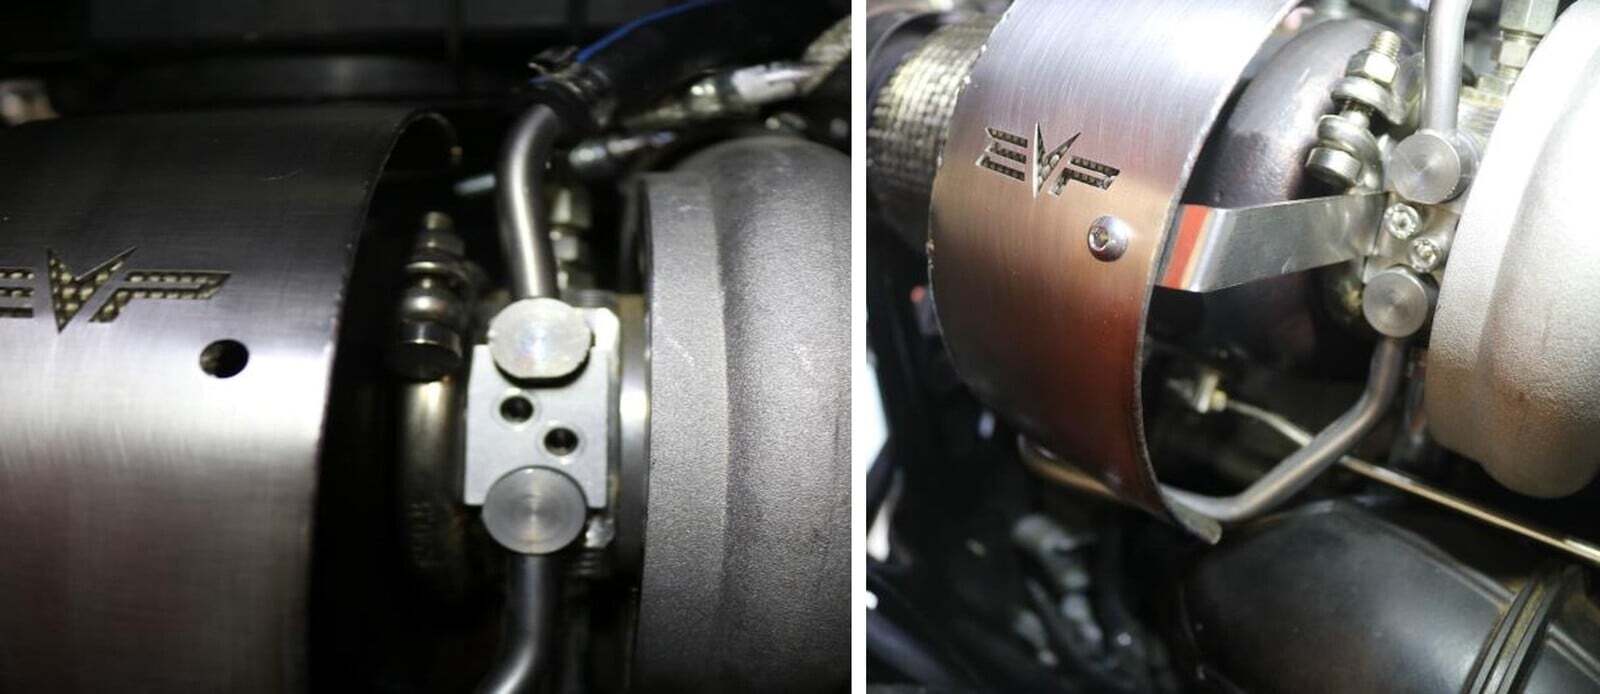
2
Using the supplied stainless bracket with (3) holes, (2) holes on one end will be placed on to the turbo. Between the two coolant lines. Re-install the (2) Allen bolts (See Figure 1).
3
Install the supplied (1) 6mm hex bolt and flange nut through the hole in the heatshield. Loctite this bolt.
4
Tighten the (2) coolant lines Allen bolts, (1) V-band nut and (1) 6mm button head bolt and nut. (Figure 2).