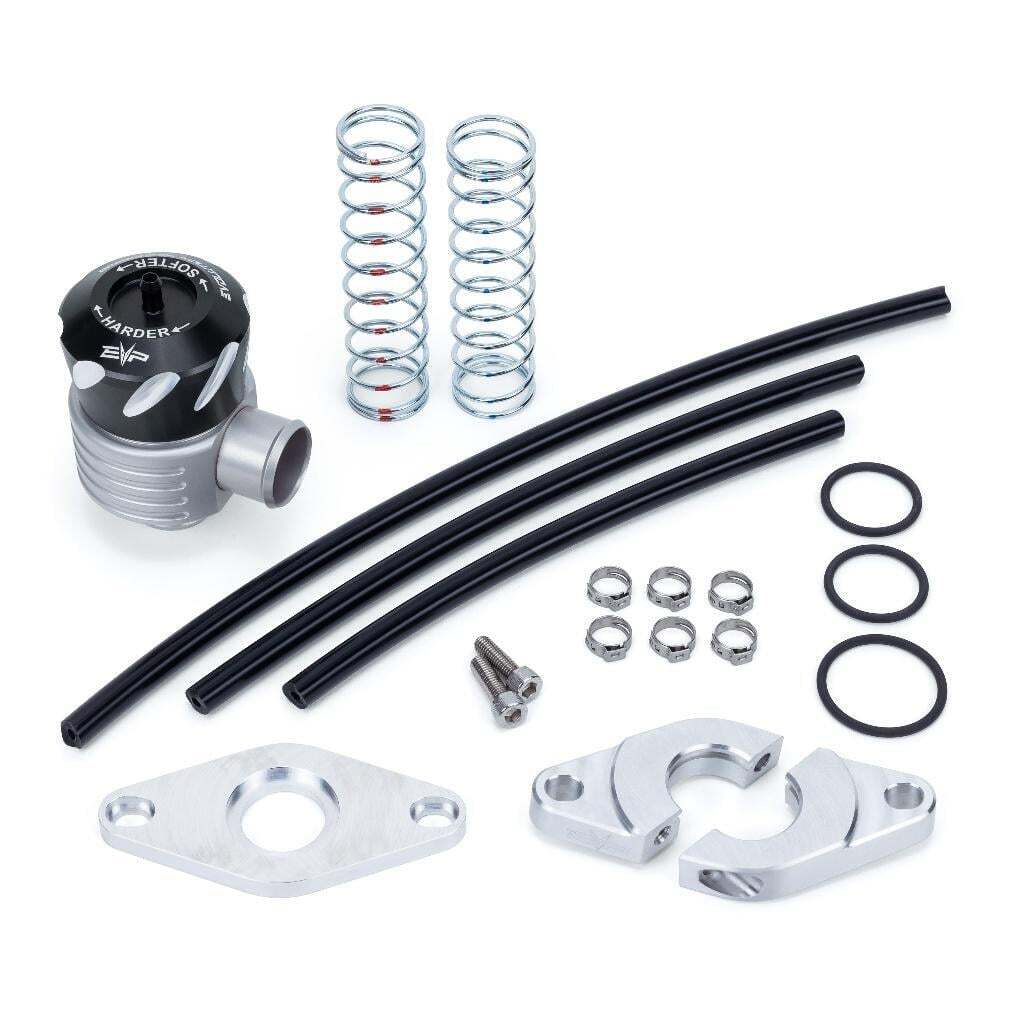
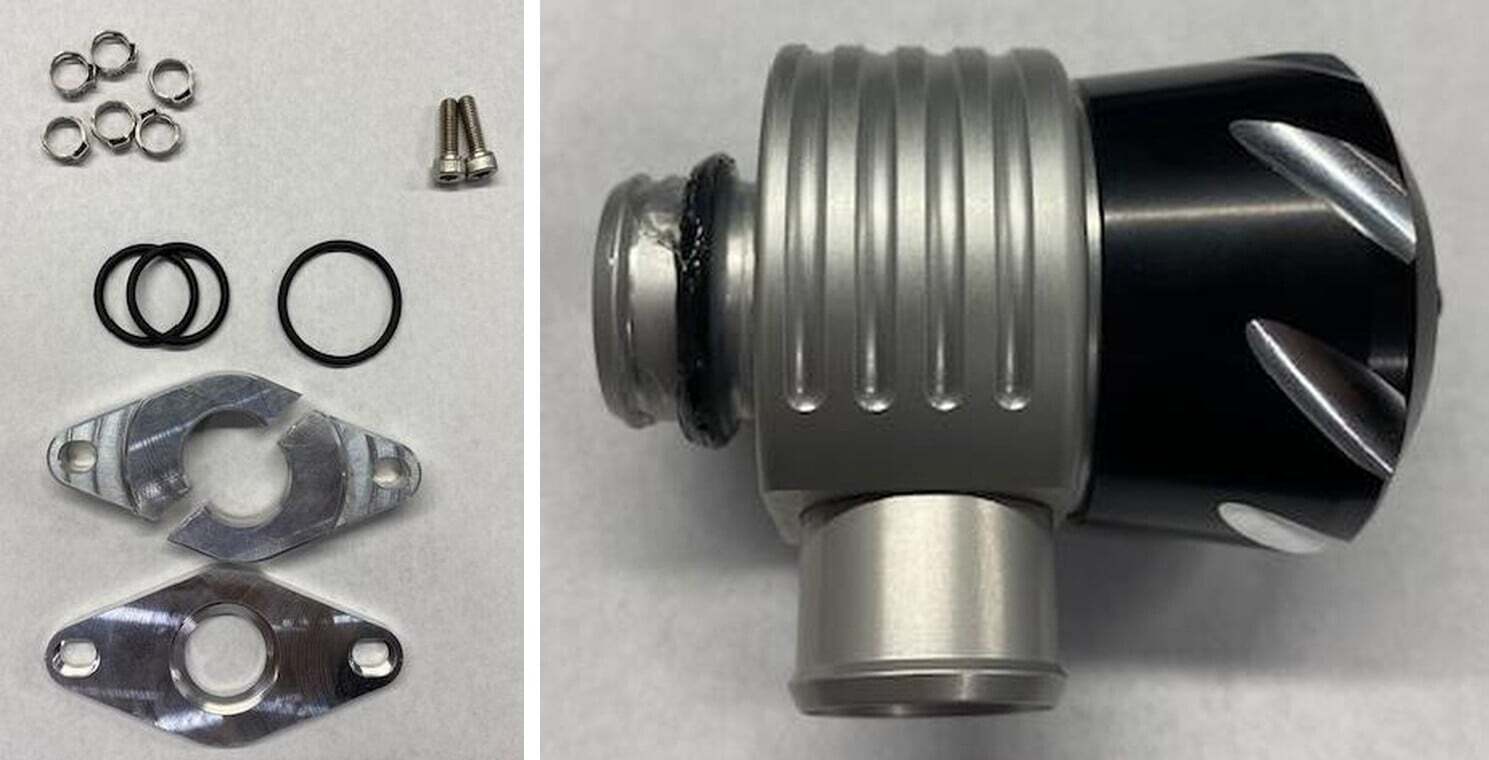
What's in the Box
Installation
1
Remove the bed. (20) push darts and (2) 10mm screws. Blow compressed air around the engine and BRV location to remove debris.
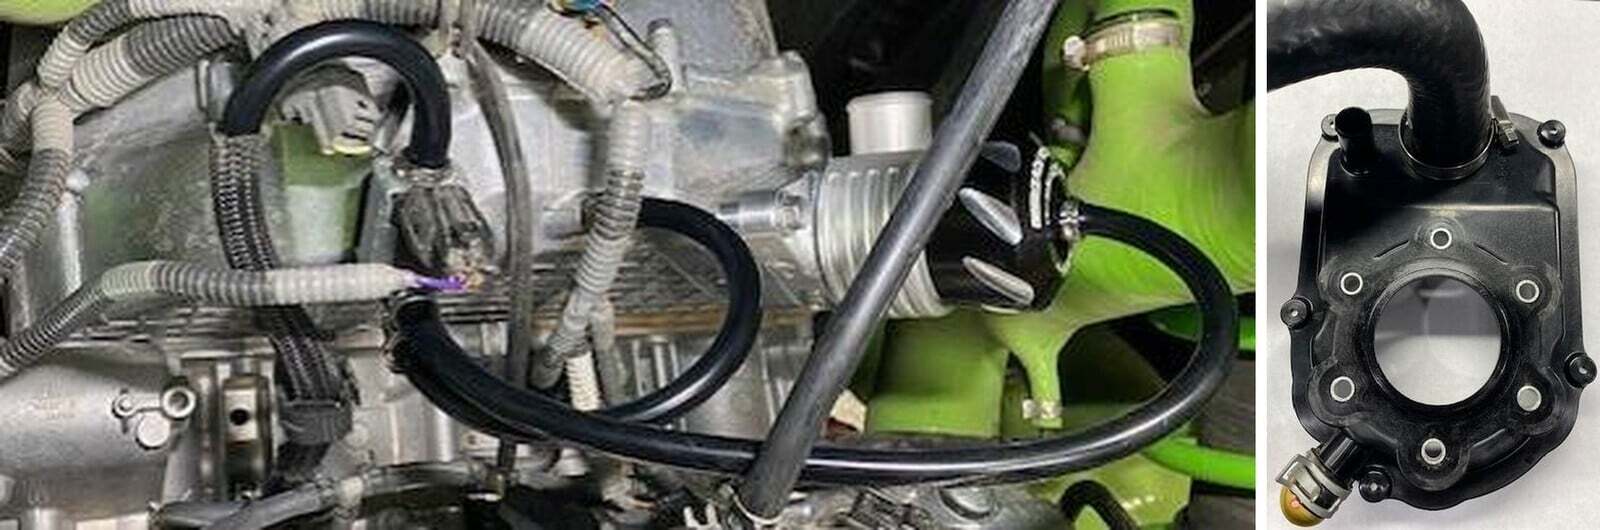
2
Remove the worm drive clamp on the discharge tube on the OEM BRV. Remove the self-tightening clamp on the boost reference line. Remove hose.
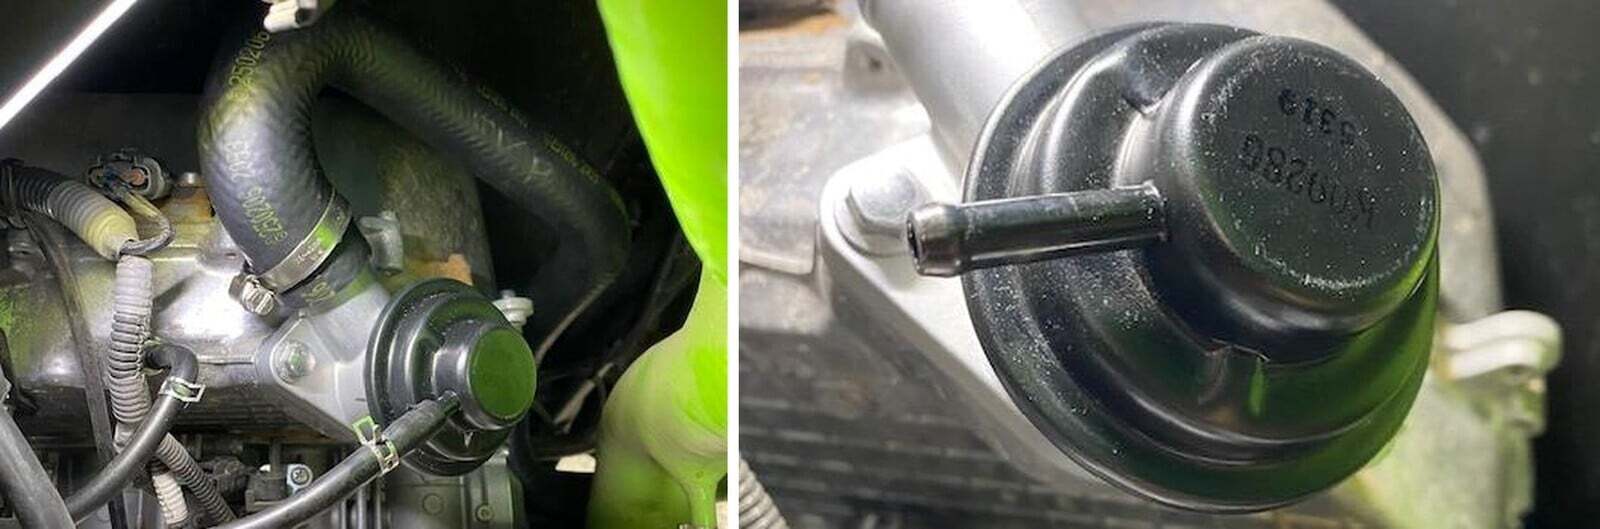
3
Remove (2) 10mm screws holding the BRV to the plenum. (other screw not shown). Remove the BRV and gasket.
4
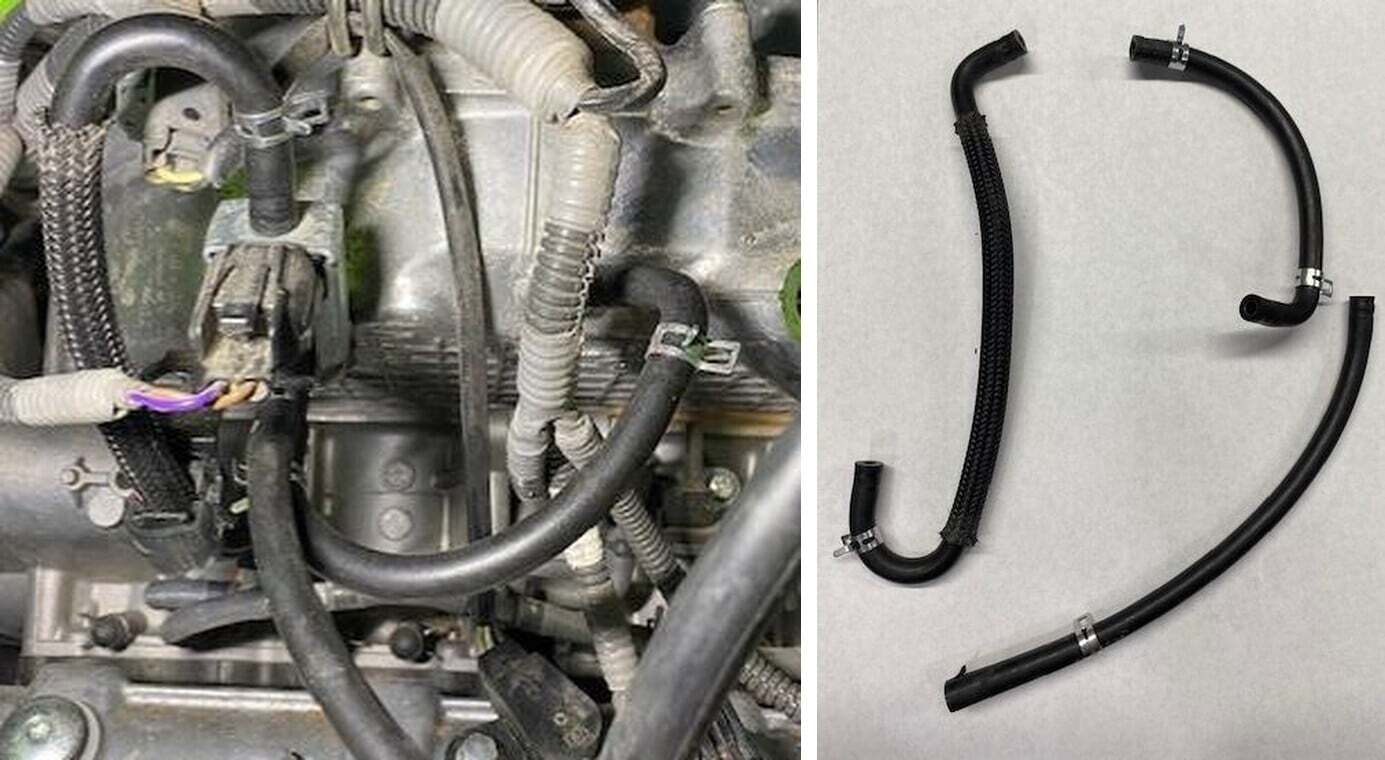
Remove all (3) boost lines and (6) self-tightening clamps from the solenoid. It may help to disconnect coil pack wires.
5
Hardware kit shown below.
6
Install one of the smaller O-rings onto the lower port of the BRV. Apply a generous amount of dielectric grease.
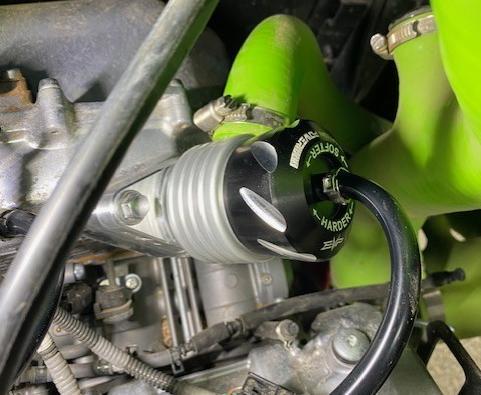
7
Grab the two-piece clamp. Install a generous amount of dielectric grease to the O-ring groove.
8
Install the two-piece clamp around the lower portion of the BRV. The O-ring groove will be on top allowing the lower lip of the BRV to stick out of the clamp. Make sure the O- ring is not pinched and in the groove. Install the other side of the clamp.
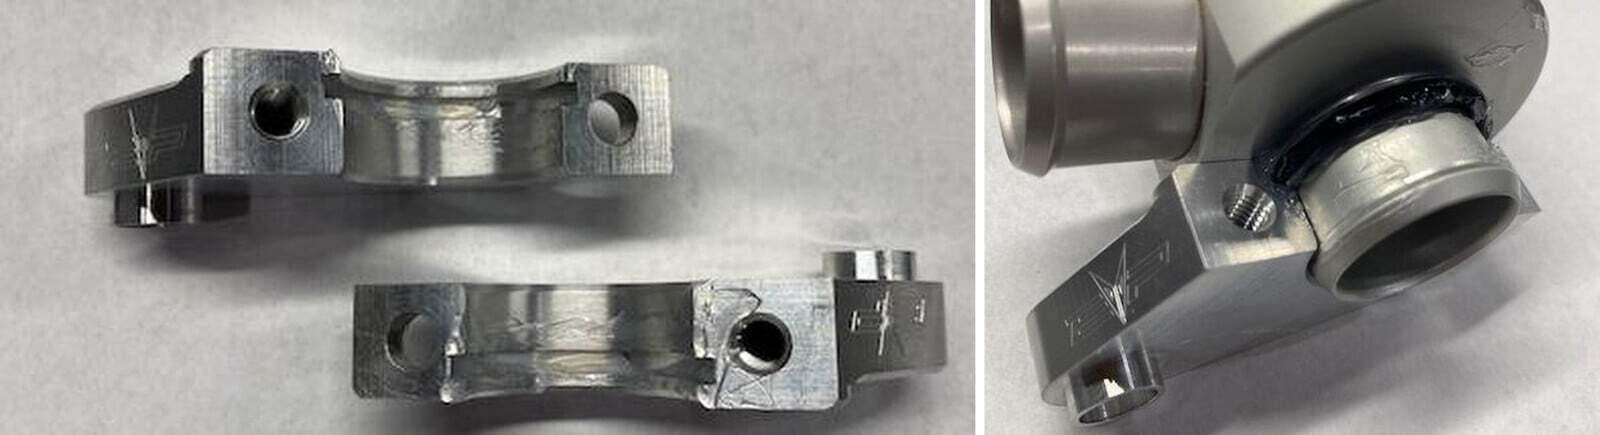
9
Fasten the clamps together using M6x20mm screws. Fasten both sides equally until the mating surfaces meet. Wipe away excess dielectric grease. These screws should be tight. The BRV will still spin 360 degrees with the clamp all the way fastened.
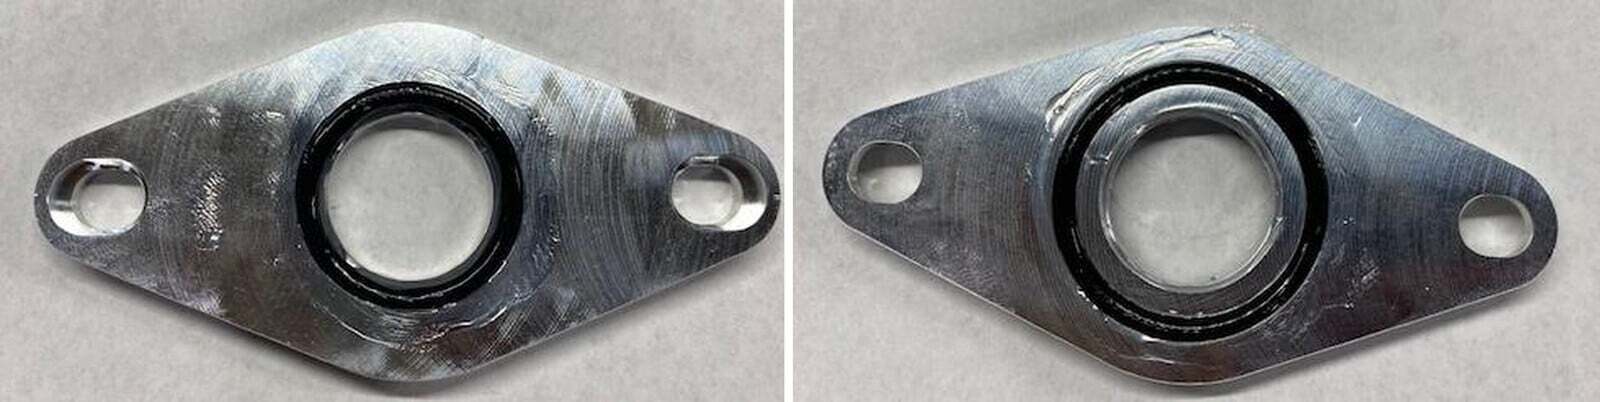
10
Install the smaller O-ring into the lower mounting plate. Flip it over and install the larger O-ring. Use dielectric grease.
11
When installing the BRV to the plenum the upper and lower plates will mate. Use the OEM 10mm screws to install. Don’t tighten all the way.
12
Before installing new vacuum line, remove the sleeve of the OEM hose and install it onto the 10inch hose. You must compress the sleeve to install.
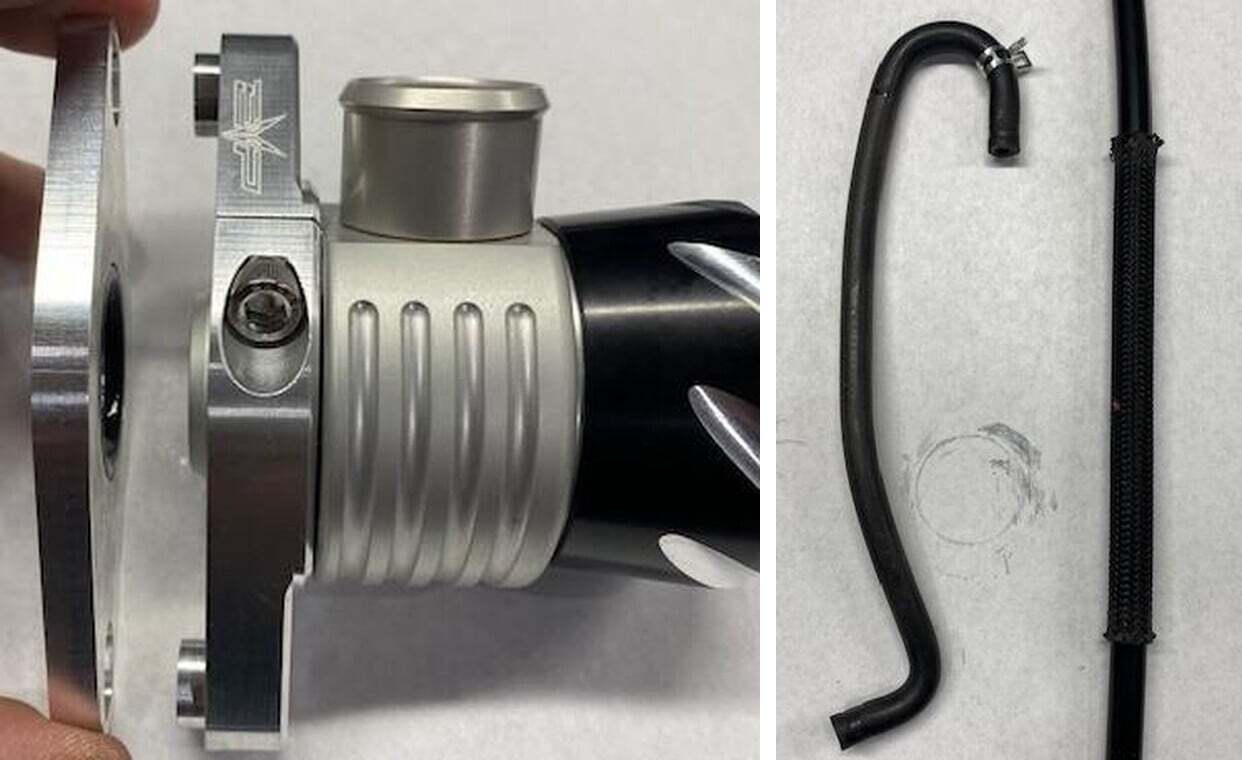
13
Install the new vacuum hose as shown below. Use pinch clamps on all hoses.
- 8-inch hose: Plenum to lower port on solenoid.
- 10-inch hose: Throttle body “T” to top port on solenoid.
- 13-inch hose: BRV to middle port on solenoid.
14
If you are reusing the OEM discharge hose, skip to step 15. If you are installing a new silicone discharge hose, loosen the worm drive clamp located near the compressor cover. Photo below is off the vehicle. Install the new hose to this port.
15
Rotate the BRV so the discharge port is in the correct position. Install the discharge hose and fasten down the worm drive. FINAL STEP: Fasten the (2) 10mm BRV mounting screws. The BRV will no longer rotate.