Installation instructions for the EVP 9000/1100T V-Flow Cold Air Intake, which eliminates the factory filter and relies on the factory Frogskinz mesh for filtration. This intake is for snow use only.
9000/1100T V-Flow Cold Air Intake
The factory Frogskinz mesh is very water resistant when these instruction are followed carefully, however, the snowmobile should not be ridden in the rain uncovered or trailered uncovered where there is the possibility of large amounts of water getting onto the Frogskinz.
For Deep Snow use or in situations where it is likely that the snowmobile could be rolled upside-down, we HIGHLY recommend a roll over valve kit - we have these in stock, please call to order – SEE ROLL OVER VALVE INSTALLATION SECTION AT THE END
- Remove the clutch and exhaust side panels and the 6 screws that secure the hood to the chassis
- Remove the windshield and the 4 large head torx screws that hold the instrument cluster to the dash pod. Unplug and remove instrument cluster
- Unplug the connection on the back of the key switch and disconnect the wires on the back side of the power outlet
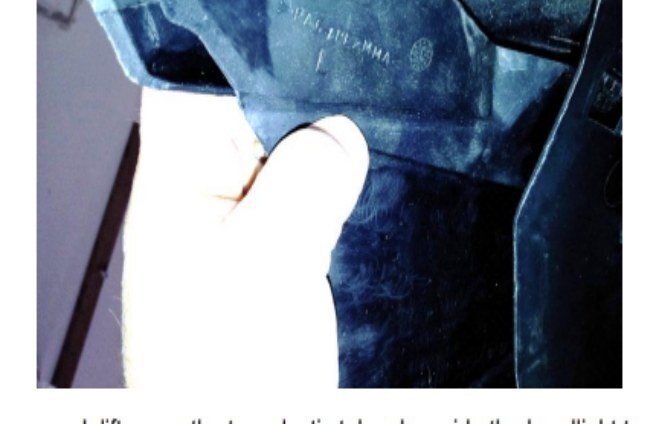
- Remove the plastic dash pod that covers the headlight and contains the Frogskinz mesh. This is accomplished by removing the 2 torx screws on the back bottom of the hood.
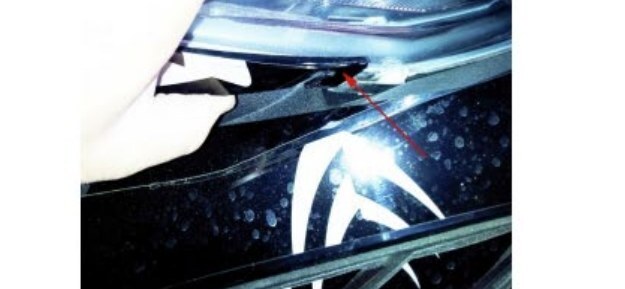
- Once these are removed, lift up on the two plastic tabs alongside the headlight to remove the dash pod. (see picture on next page for reference)
- Remove the 2 rubber boots that the male parts of the dash pod slid into on the hood
- Unplug the main large connector underneath the dash.
- Unplug the head light assembly. Remove the head light assembly by removing the two large torx head screws.
- Remove the hood plastic side panels by removing the 4 side screws (2 per side) and swing the back of the hood panels away from the center dash. Once they are swung out approximately 90 degrees, you can remove them as the tabs in the front can now slide out.
- With the hood on a flat surface, remove the 9 medium head torx screws from the top of the hood that hold the bottom of the air box onto the hood. Remove the bottom of the air box.
- Position the V Flow Cold Air Intake so that the two ends will fit into the holes that the dash pod slid in to
- The single side with the smaller diameter "leg" should be on the left side of the hood when the hood is right side up and facing forward. Insert the two ends through the dash holes. This is made easier by spraying lubricant onto the silicone. If you cannot slide the ends through using a lubricant and some effort, the dash holes may need to be enlarged with a dremel.
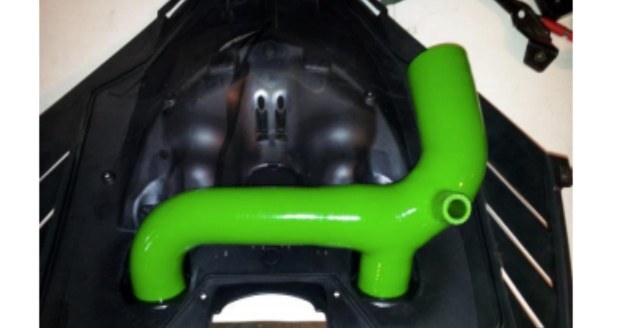
- The intake should look like the picture above when inserted through the dash holes. Do not put the air box cover back on.
DASH POD PREP:
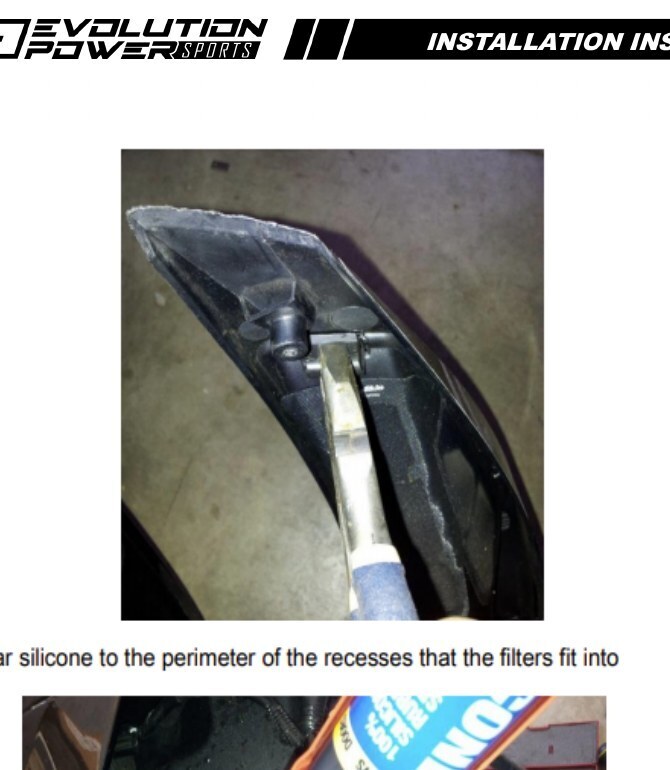
- Using a hacksaw, cut 5/8" off the male end of each dash pod - see picture below
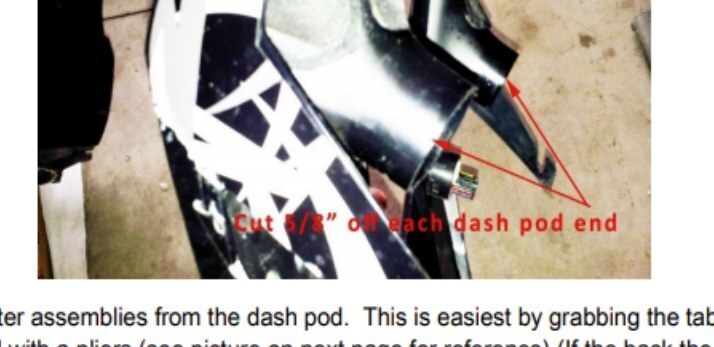
- Remove the 2 top filter assemblies from the dash pod. This is easiest by grabbing the tab on the underside of the pod with a pliers (see picture on next page for reference) (if the back the hood does not do not sit flat on the fuel tank cover, you may have to trim a little more of the pods referenced above)
- Apply a bead of clear silicone to the perimeter of the recesses that the filters fit into
- Reinsert filters – make sure they sit flush onto the dash pod. Clamp as necessary to keep them in place and flush until the silicone dries
- Make sure there are no holes or places where the Frogskinz mesh is not attached on the bottom side. Remedy with silicone caulk.
- Spray the top Frogskinz mesh filters with dry silicone lubricant. This will further enhance the water resistance of the material
- Reassemble the hood, pod, instruments and windshield.
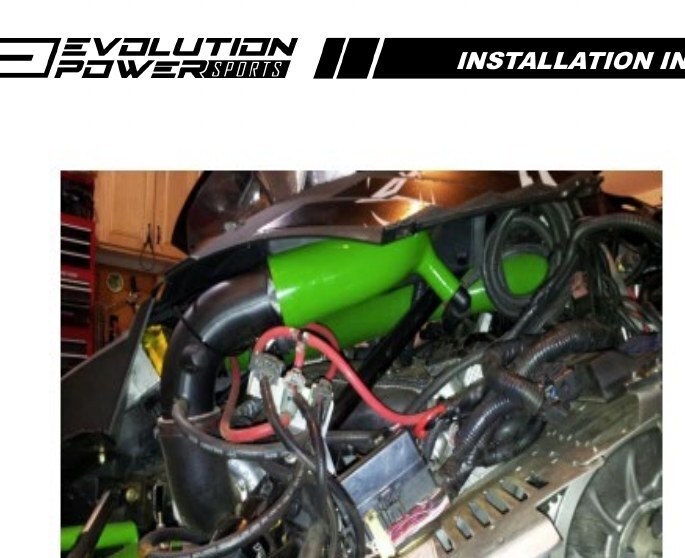
- Install the hood onto the snowmobile - fit the factory plastic elbow into the EVO Cold Air Intake. No clamps are necessary.
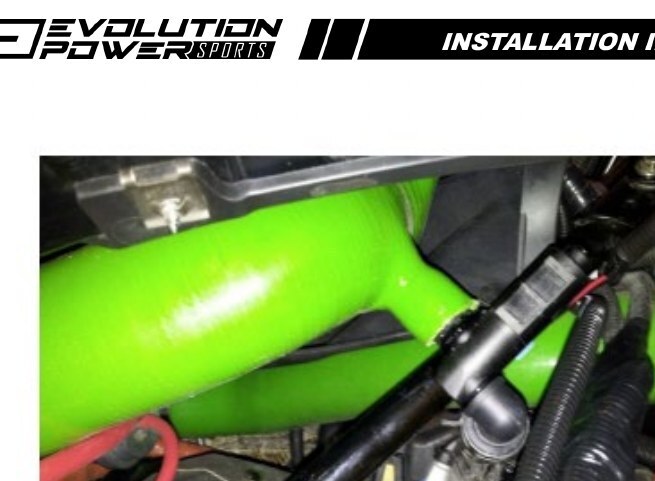
- Insert the breather tube fitting into smaller diameter leg coming off the bottom of the EVO cold air intake (see picture on next page for reference)
- Rotate the factory breather line and roll over valve so it looks like the picture below
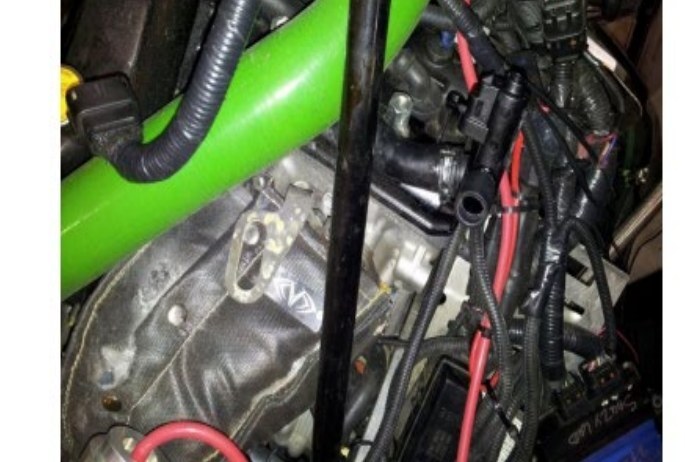
- Install the roll over valve into the breather port on the EVO cold air intake. Make sure the roll over valve does not contact the engine. Some trimming of the EVO cold air intake breather port may be necessary. No clamp is necessary. See picture on next page.
- Reassemble all items removed previously for this installation.
Thank you for choosing Evolution Powersports products. If you require further assistance, please call our Tech Support @ (715) 247-3862
Note: This product is exempt from the emission standards and related requirements of 40 C.F.R. § 1051 as provided by 40 C.F.R. § 1051.620, and California law [e.g., vehicle code§§ 27156 and 38391]. This product is sold only for use in connection with EPA certified, purpose-built, nonroad vehicles used solely for closed course, nonroad competition/racing and not used for any recreational purpose or on public highways or right of ways maintained by and open to the public. This product is sold only in connection with machines that do not fall under state and/or federal noise or emission standards/regulations. Purchasers who/that purchase this product represent and warrant that the product is purchased only in connection with EPA -certified, emission-regulations-exempt and noise-regulations-exempt competition/racing vehicles as interpreted under applicable state and/or federal law. Questions? Call Evolution Powersports at (715) 247-3862.