Torx Drivers Metric Allen tools 10, 13, 24 mm Sockets
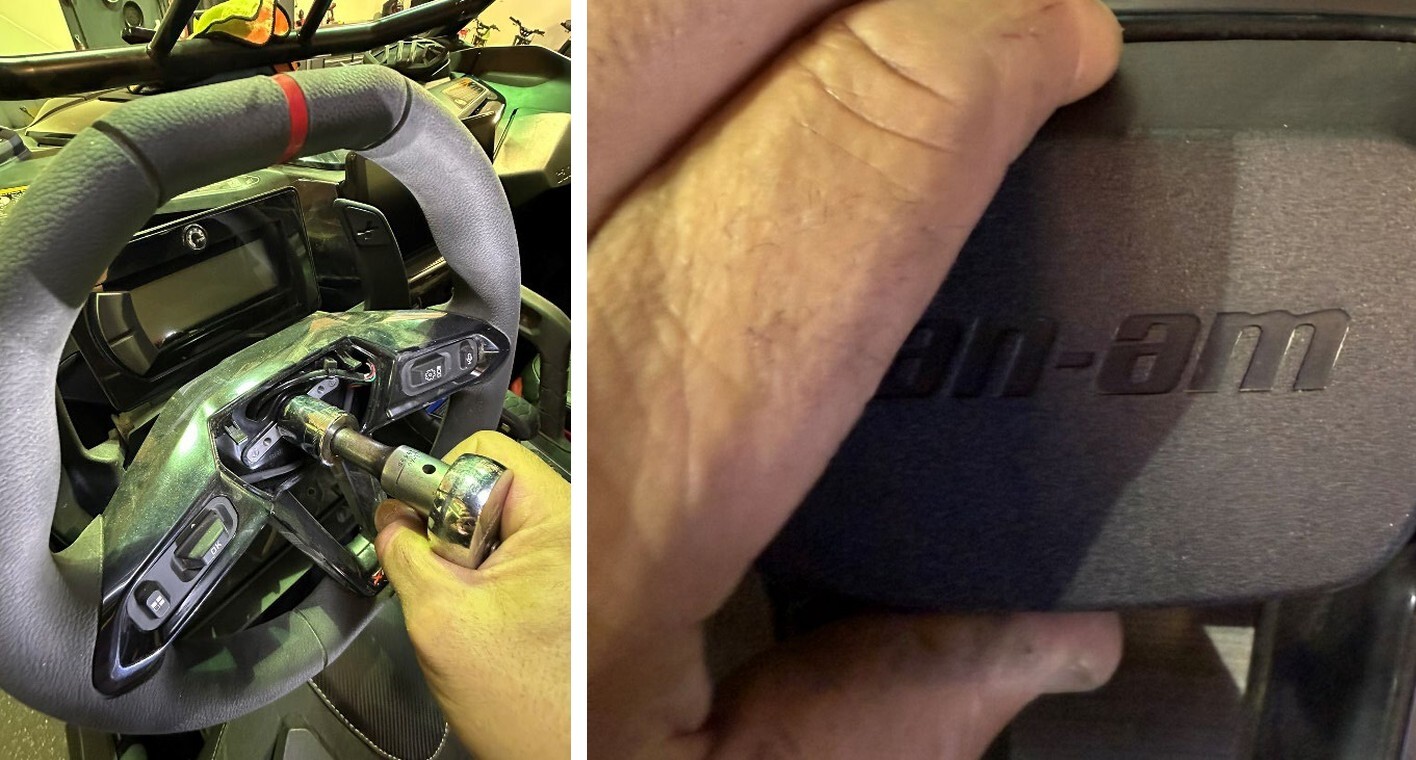
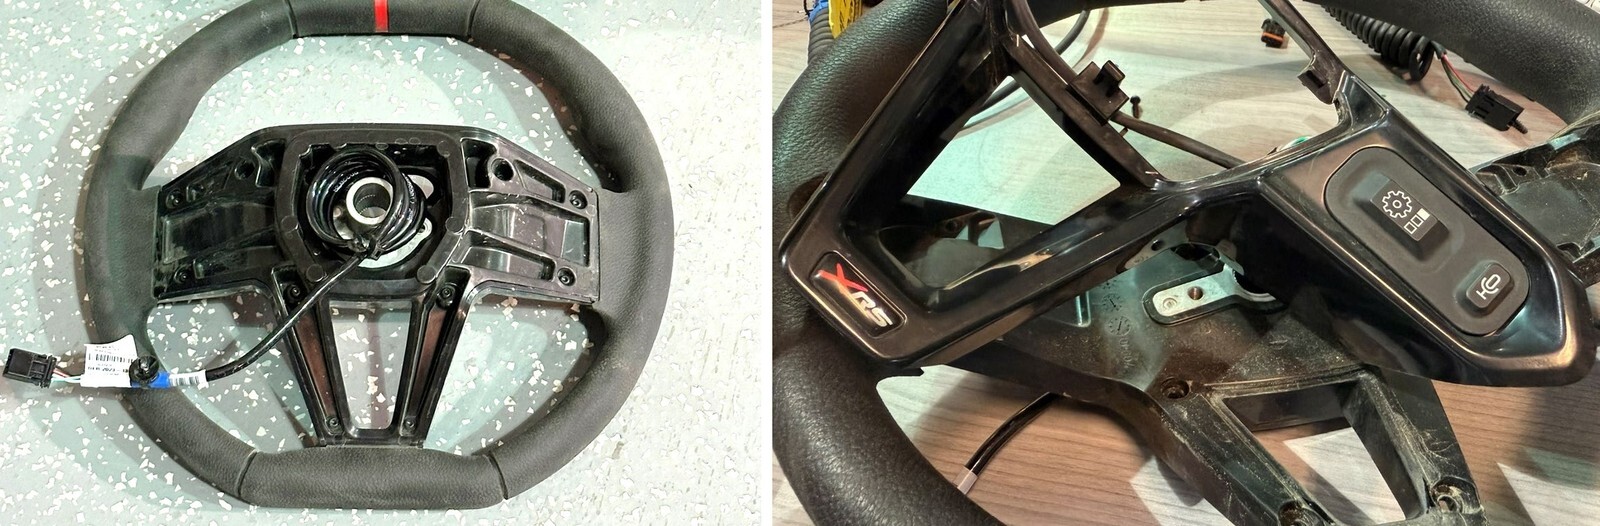
Squeeze the center cap of the steering wheel where it says can am on the top and bottom to remove the center cap which will expose the 24mm nut that attaches the steering wheel to the steering shaft
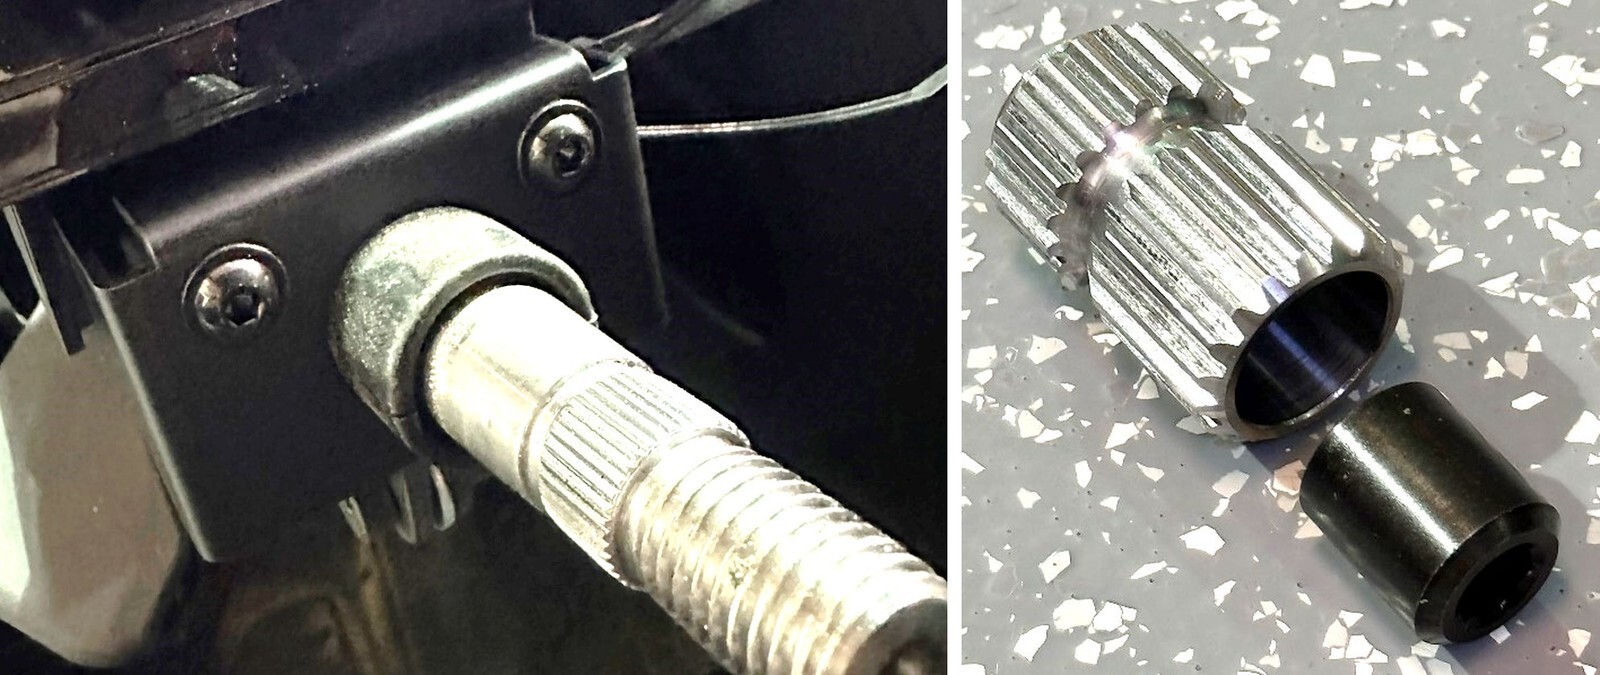
With a 24 mm socket remove the nut that attaches the wheel to the steering shaft
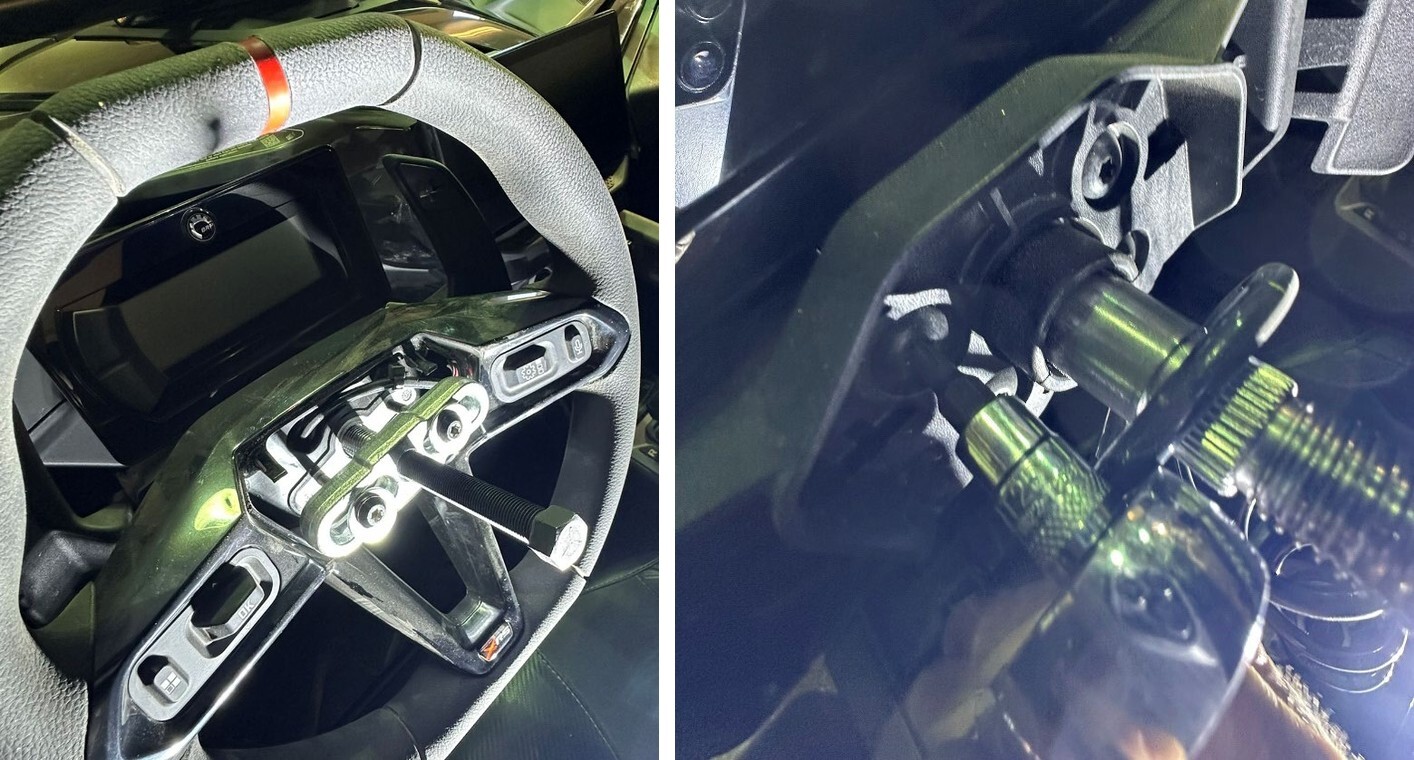
Use the EVP steering wheel puller or another suitable steering wheel puller to remove the steering wheel. Insert the (2) M6 outside screws into the holes in the steering wheel and tighten about five turns each then with a small impact gun and a 13 mm socket tighten the center screw which will contact the center of the steering shaft. Steering wheel will pop off. Once the steering wheel is off place the steering wheel on the seat because you will have to disconnect the electrical connection after we remove the gauge cluster in the next steps.
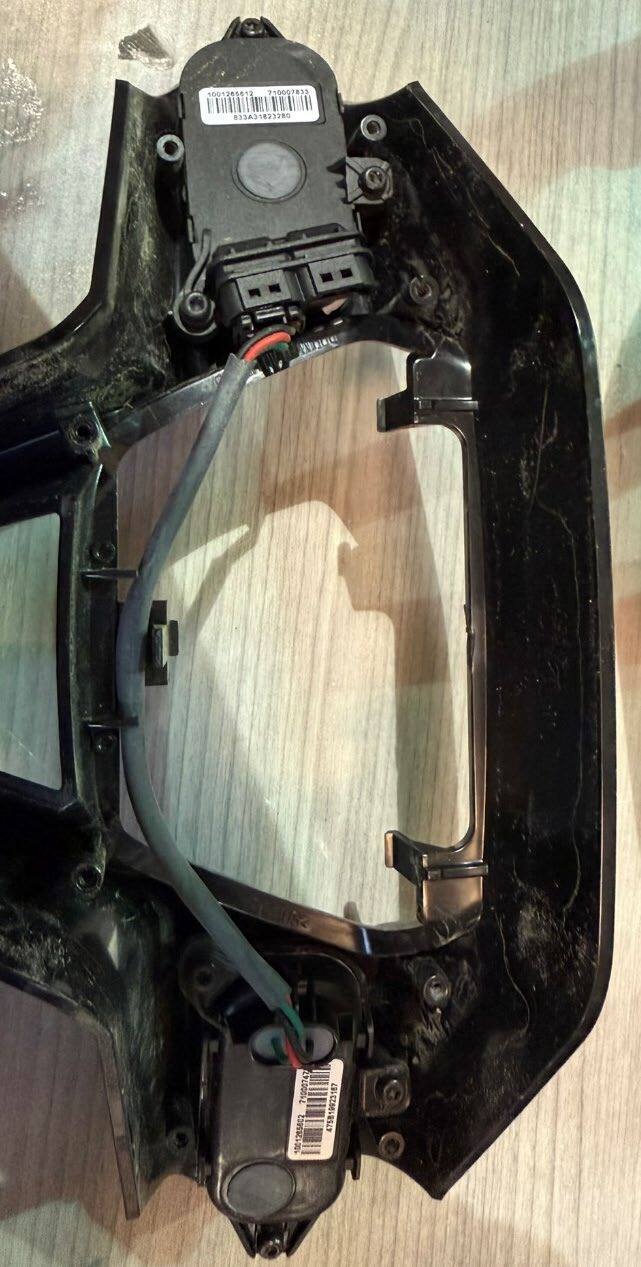
With a T25 torx socket remove the four screw screws, which attach the OEM fixed paddle shift mechanism to the steering column. You will need to cut the zip tie which holds the wiring harness in place.
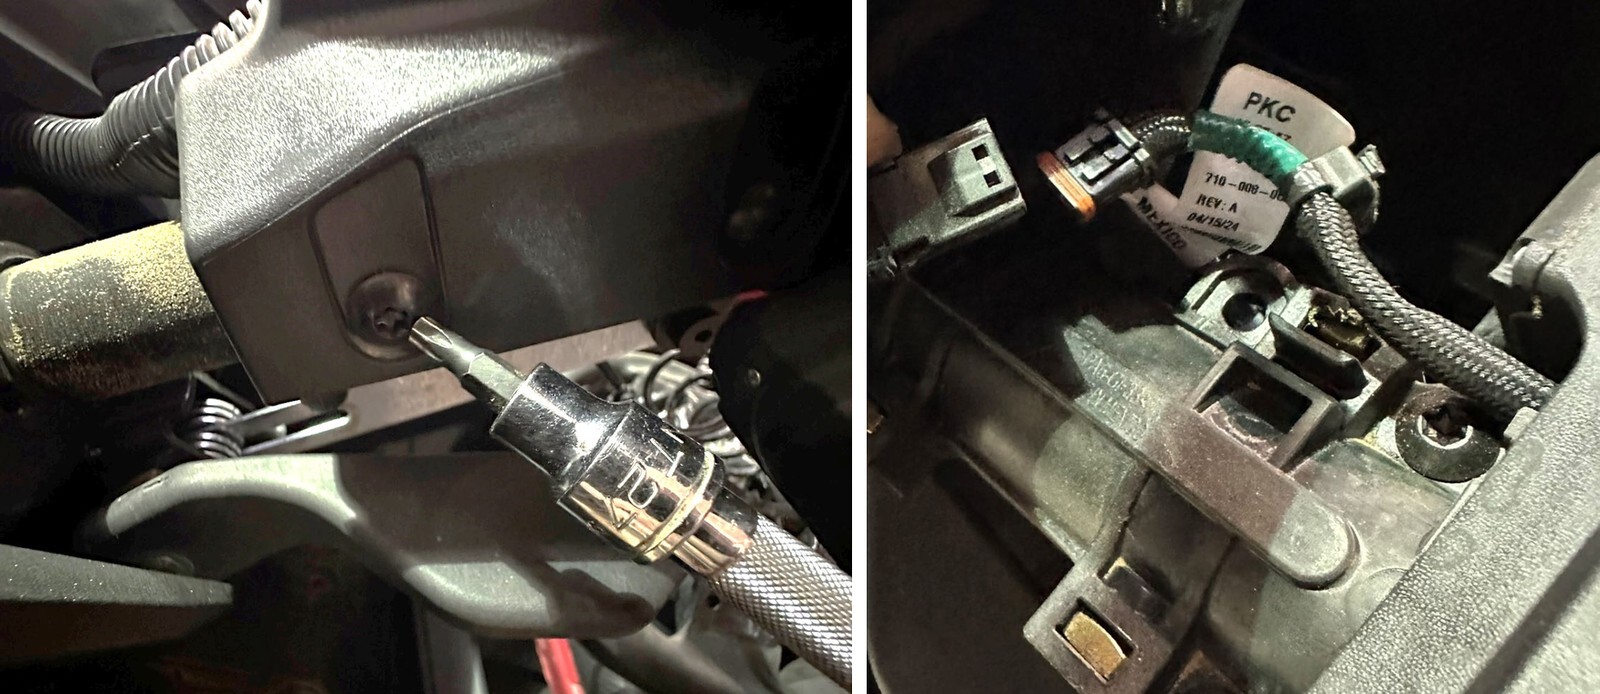
With a T27 torx, loosen the left (2) and right (2) screws that attach the gauge cluster to the steering column. Is recommended to remove these with a hand ratchet and not an electric ratchet.
Once the (4) T27 screws are removed, you will be able to disconnect the OEM paddle shift mechanism from the wiring harness underneath gauge cluster. Cut the zip tie that secures the wire harness
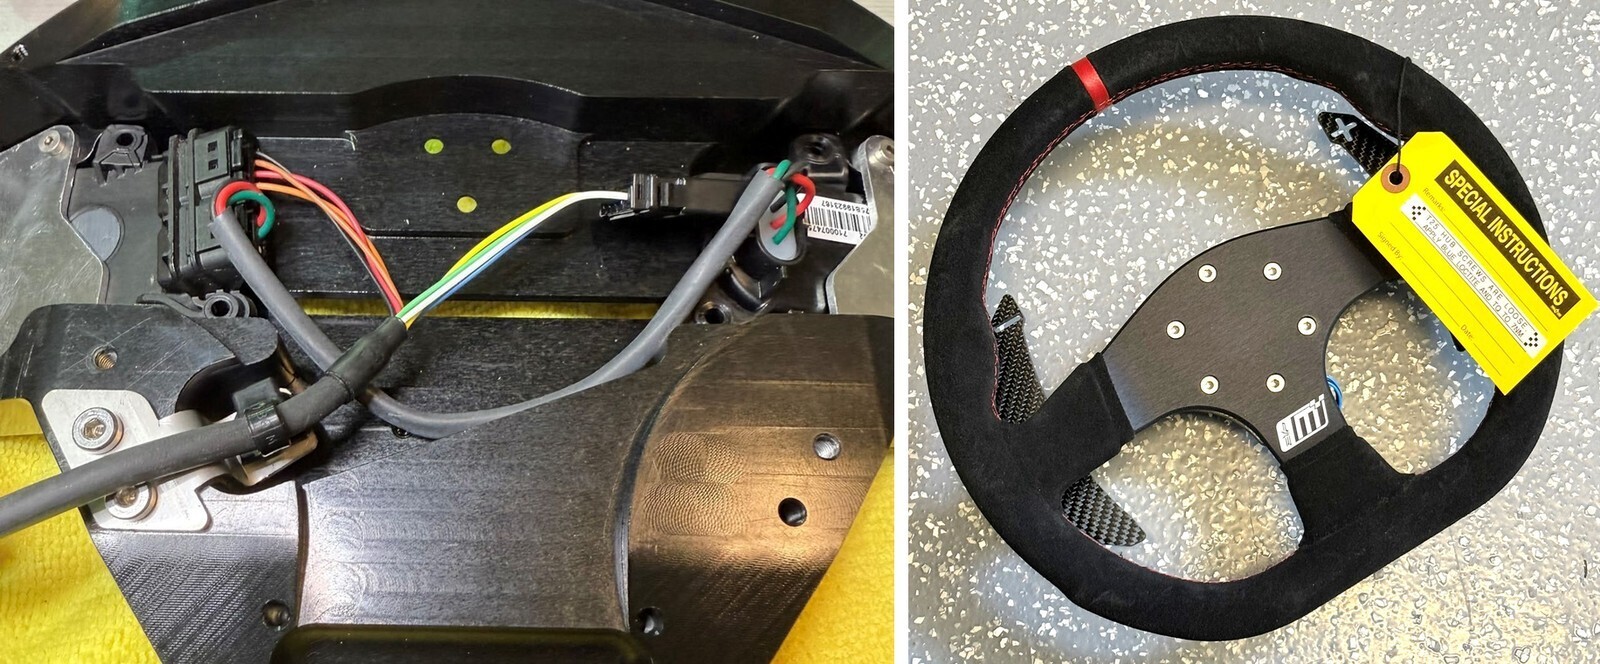
If you have an OEM deluxe steering wheel with the integrated buttons, locate the steering wheel harness on the right side of the steering column, which is zip tied in place. Cut the zip tie and disconnect the steering wheel wiring.
Depending on which steering wheel you are installing, it will determine the next steps. Please follow the steps associated with the steering wheel you are installing.
Multifunction wheel
Remove the multifunction buttons from the OEM steering wheel. Cut the zip tie that holds the wire harness on the front side of the steering wheel With a T10 torx remove the (10) T10 torx screws on the backside of the steering wheel. This will allow you to remove the front side beauty plate to expose the OEM switches.
While lifting off the front beauty plate which houses the switches, disconnect the wire harness that runs through the steering wheel and remove it from the right side switch.
With a T10 torx, remove the (6) left and right screws that attach the switches to the steering wheel beauty plate
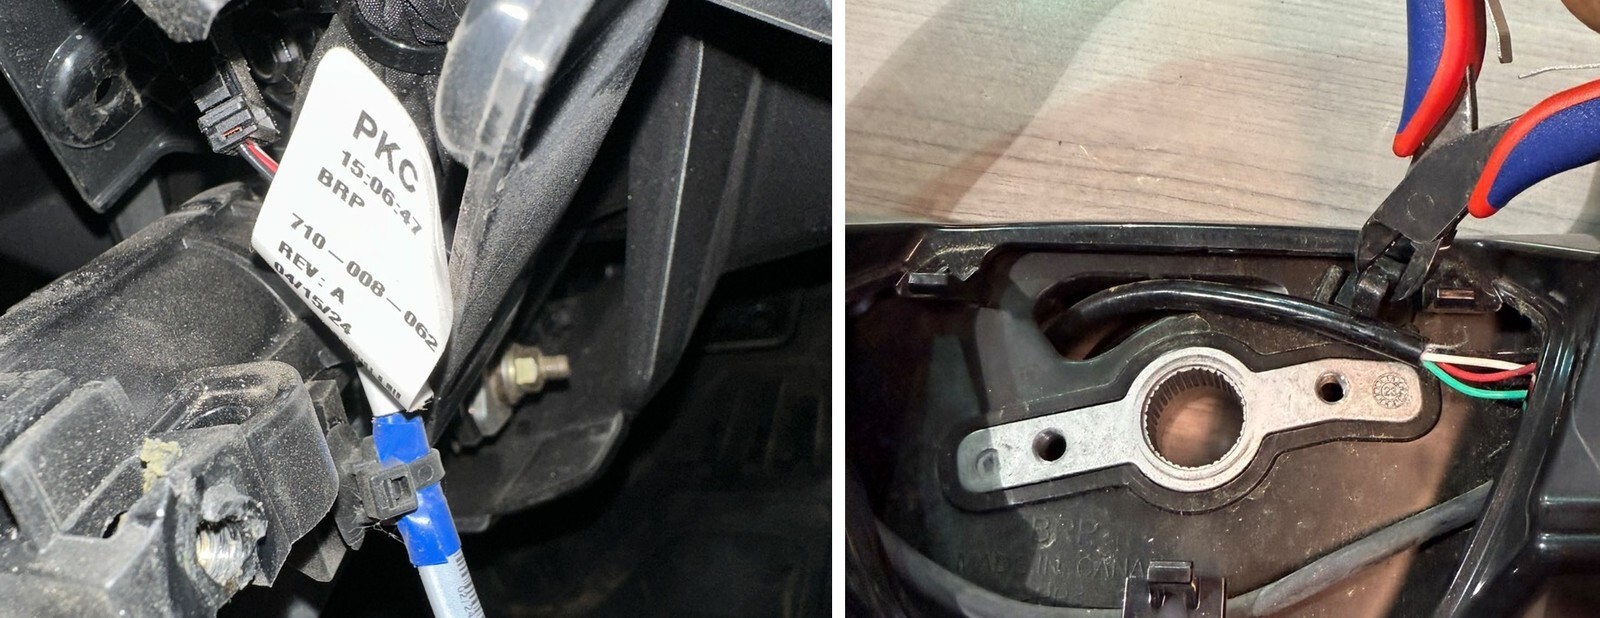
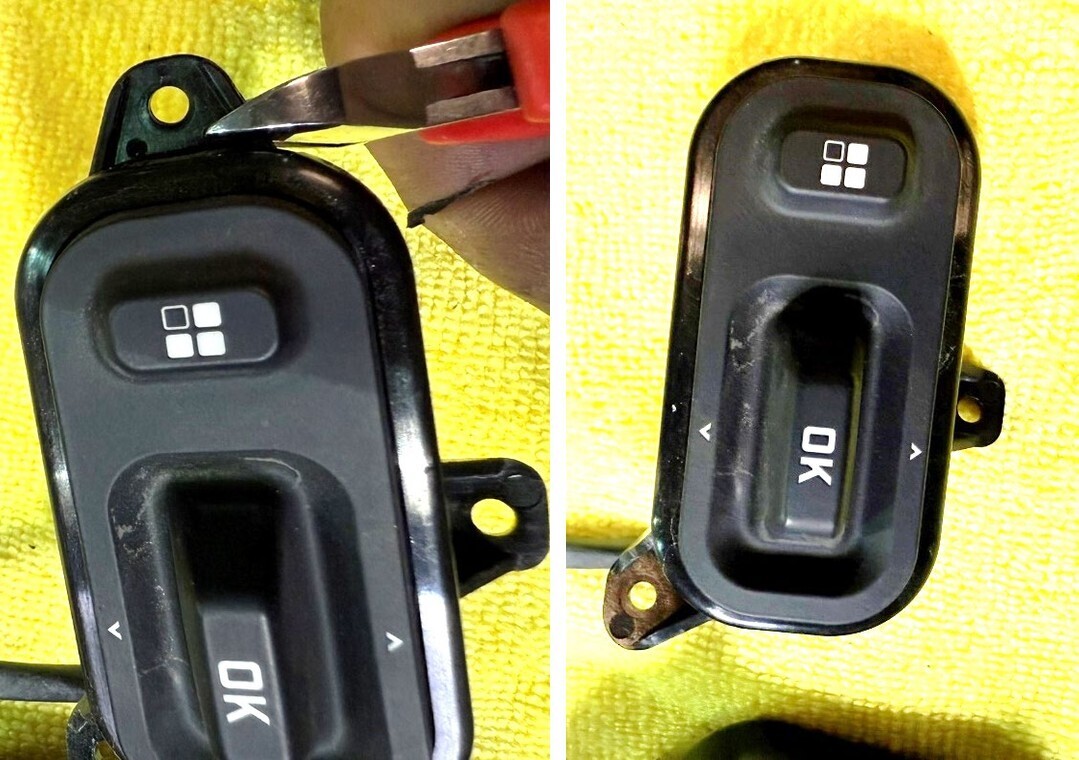
With a pair of sharp side cutters, remove the outer mounting tabs from both of the OEM buttons as shown in the photo.
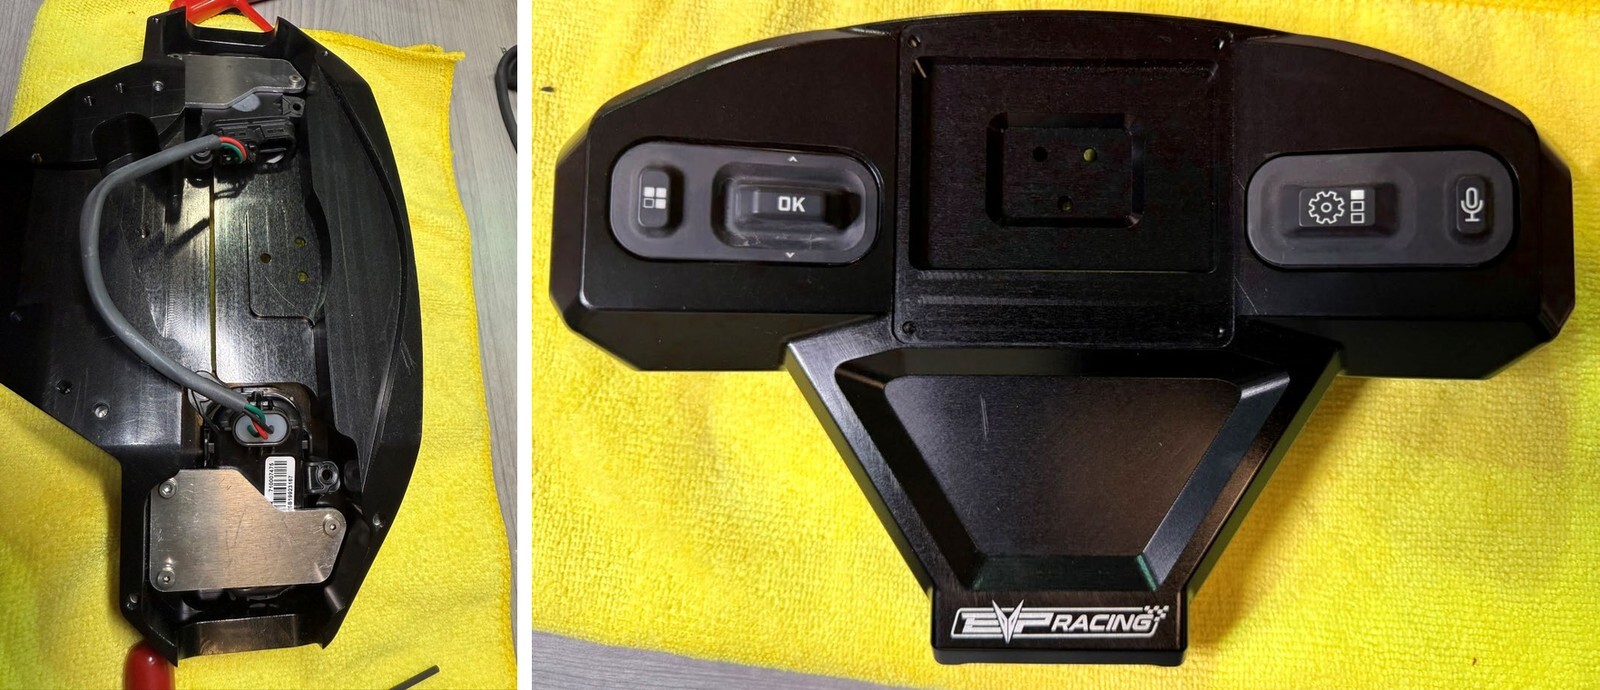
On a clean, soft surface place the EVP billet steering wheel button adapter face down. Place the OEM buttons in the billet adapter and make sure the orientation is the correct way. Install the supplied mounting plates as shown in the photo and secure with the included M3 hardware. You can use a small amount of blue Loctite to prevent the screws from getting loose. You will
use a 2 mm Allen wrench to tighten the (6) screws that hold the backing plates to the billet button adapter. Do not tighten these yet because you will want to align the buttons in the center of the openings before you tighten them down.
With the included eight wire curly cord wiring harness, plug the male end into the OEM steering wheel button as shown in the photo
Install the included strain relief bracket with included Christmas tree zip tie to the billet steering wheel adapter as shown tighten the included 4 mm screws with a 2.5 mm Allen key. Secure the wire harness with the zip tie as shown in the photo. Trim the excess zip tie with a set of flush cuts
Next install the EVP carbon paddle adapter to the back of the steering wheel. Install the supplied T25 screws and use a little bit of blue Loctite and tighten the 7 NM
Next, take your EVP steering wheel with the carbon paddle set up and splined quick release of adapter, and place it face down on the billet button adapter. You will need to connect the paddle wiring harness to the open end of the wiring harness in the billet adapter. You will lift steering wheel up, plug it in and neatly tuck the wires back down inside before putting pressure on the steering wheel to get it to sit down in place. It is a tight fit, but you will want to get the steering wheel centered before applying pressure to the steering wheel to get it to sit down flush onto the billet button bezel.
Once set into place use the billet rear clamshell plates to secure the steering wheel to the billet button adapter. Install the rear clamshells with the supplied M4 for hardware. You want to put pressure down on the back of the steering wheel while starting the clamshell screws. Start each one before tightening any of them and make sure they’re all started and then go around in a circular sequence and start tightening them a little bit at a time until they’re all tight.
Install the carbon fiber, beauty plate with the supplied M3 screws and tighten with a 2 mm Allen wrench. Be careful not to make them too tight and you can use a little bit of blue Loctite to secure them.
Race wheel
Tighten the EVP quick release T25 Hub screws and use a little bit of blue Loctite and tighten to 7 NM
BOTH RACE AND MULTIFUNCTION STEERING WHEEL INSTRUCTIONC CONTINUED
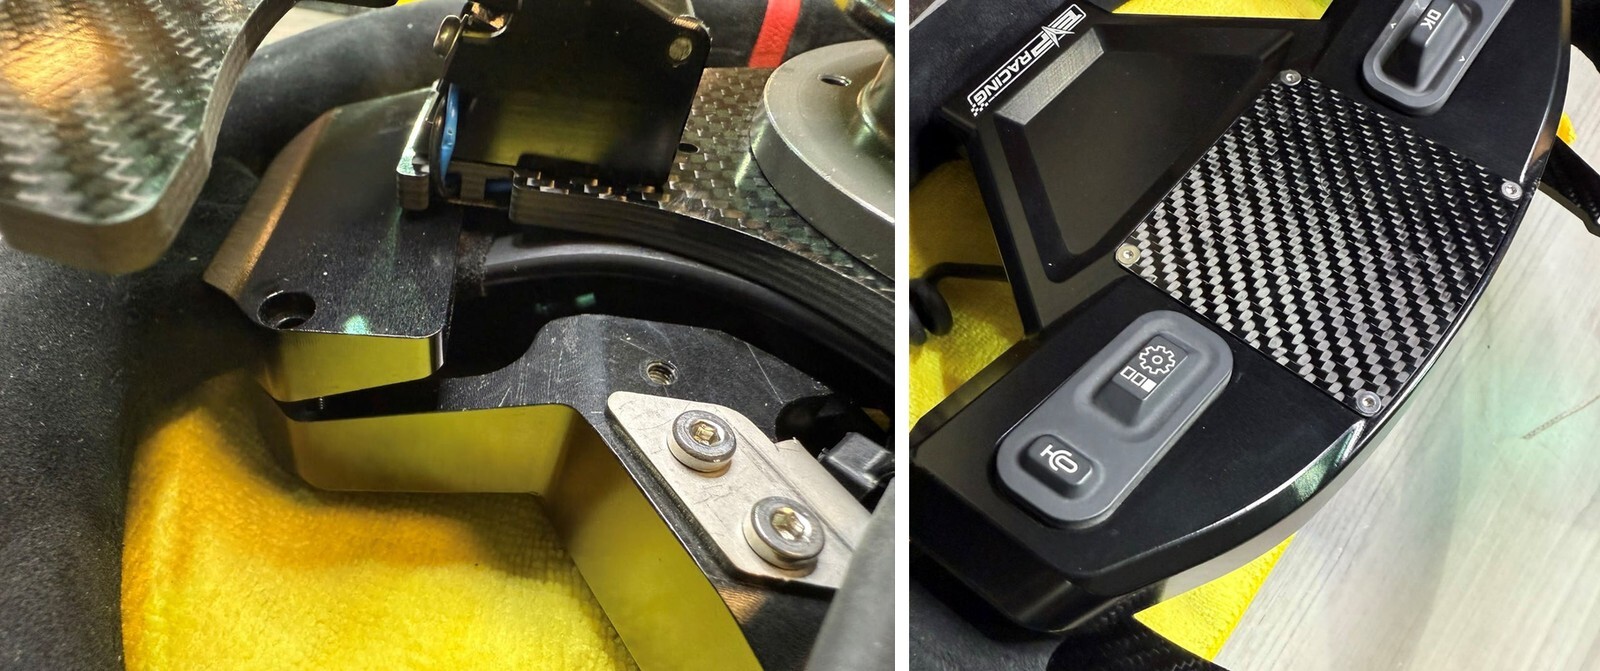
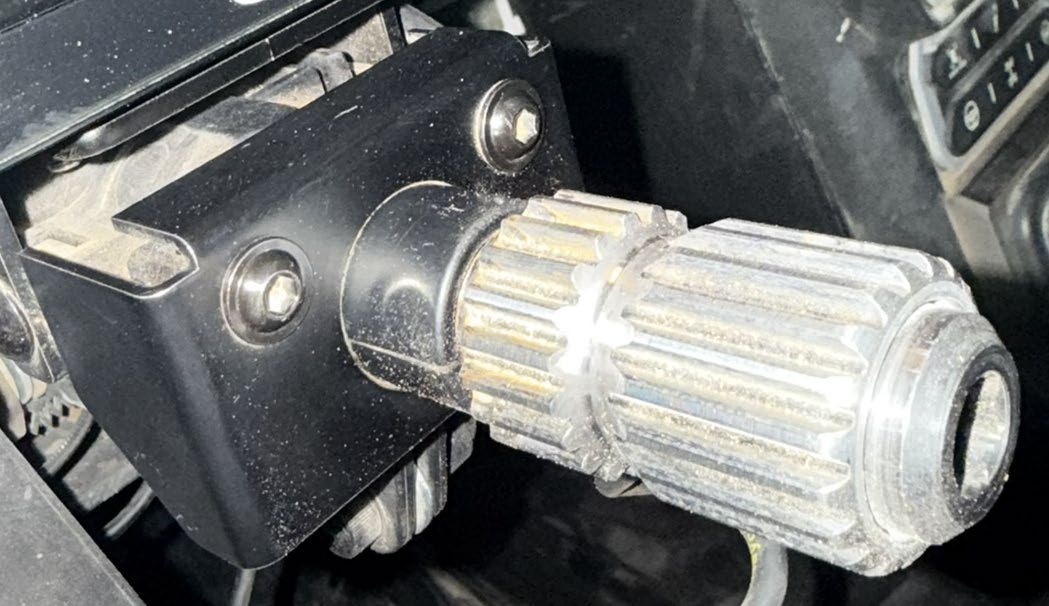
Install the rectangular steering column beauty plate with the supplied black stainless M6 button head cap screws. On the right side of this beauty plate there is a hole for the included Christmas tree zip tie. This is the strain relief for the curly cord that is attached to the steering wheel.
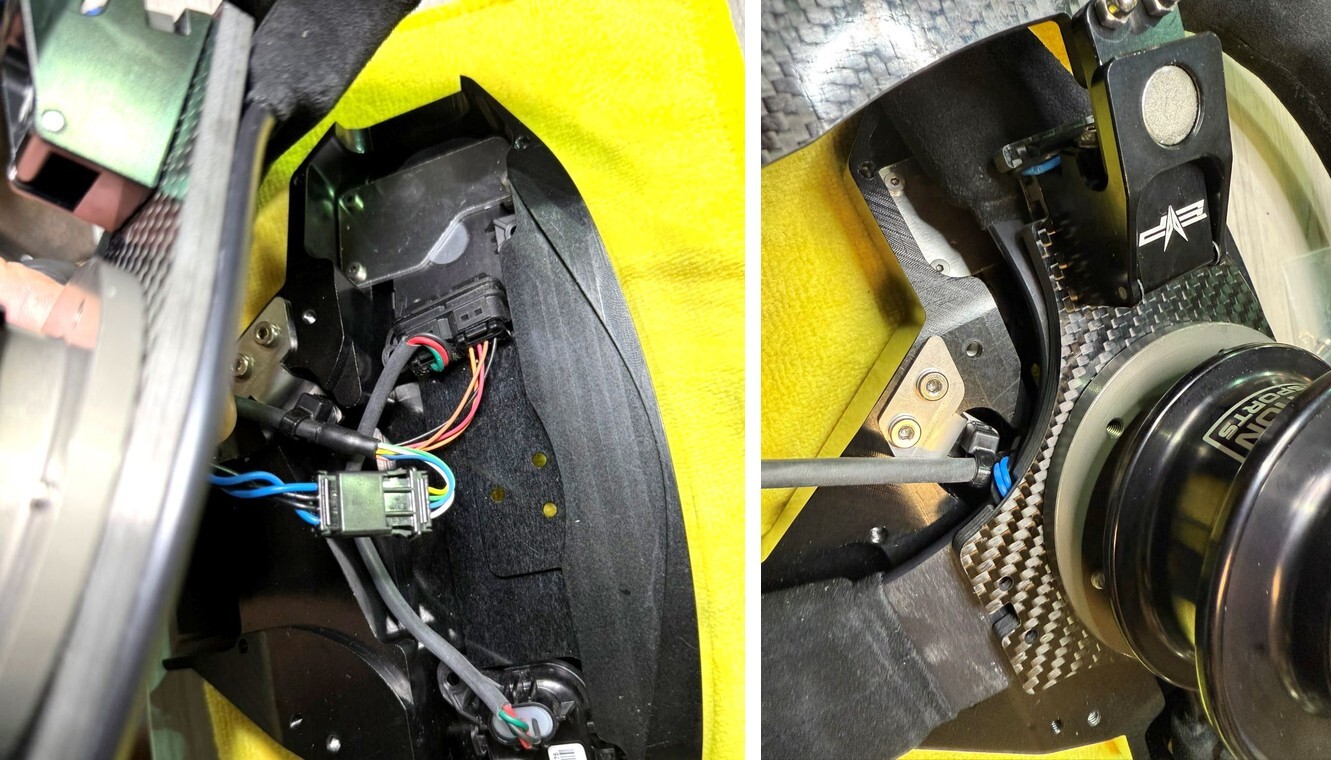
Connect the four pin connector from the steering wheel curly cord to the OEM wire harness we disconnected in an earlier step for the OEM fixed paddles. The curly cord connects directly into this four-pin paddle connector. If you are installing a multifunction steering wheel, connect the second 4pin connector from the curly cord into the OEM wire connector we disconnected earlier in the instructions. One secured, route the wire harness neatly beneath the gauge cluster and re-mount the cluster with the OEM hardware. Once you have everything mounted and wires routed properly, use the included christmas tree zip tie and secure the curly cord to the beauty plate. This is a strain relief and will prevent the curly cord from getting disconnected from the factory harness. Trim the excess zip tie. It is important that the wire harness is secure and can’t move, but not so tight it pinches the wires inside the outer sheathing.
Next install, the EVP splined coupler to the steering shaft. With a 10 mm Allen socket, Use the supplied barrel nut to secure the spline adapter to the steering column. Install the EVP race steering wheel onto the spine adapter.
Note: This product is exempt from the emission standards and related requirements of 40 C.F.R. § 1051 as provided by 40 C.F.R. § 1051.620, and California law [e.g., vehicle code§§ 27156 and 38391]. This product is sold only for use in connection with EPA certified, purpose-built, nonroad vehicles used solely for closed course, nonroad competition/racing and not used for any recreational purpose or on public highways or right of ways maintained by and open to the public. This product is sold only in connection with machines that do not fall under state and/or federal noise or emission standards/regulations. Purchasers who/that purchase this product represent and warrant that the product is purchased only in connection with EPA -certified, emission-regulations-exempt and noise- regulations-exempt competition/racing vehicles as interpreted under applicable state and/or federal law. Questions: Call Evolution Powersports at (715) 247-3862.