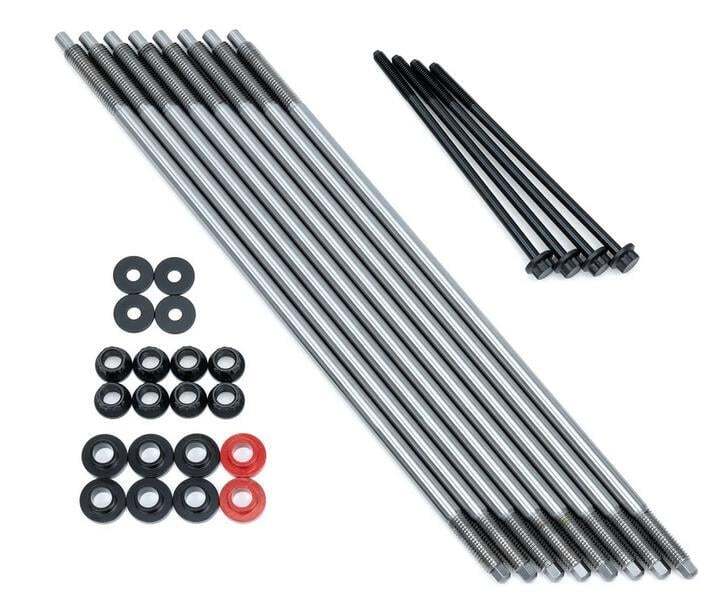
What's in the Box
Installation
1
Install the square nut into the alignment tube.
2
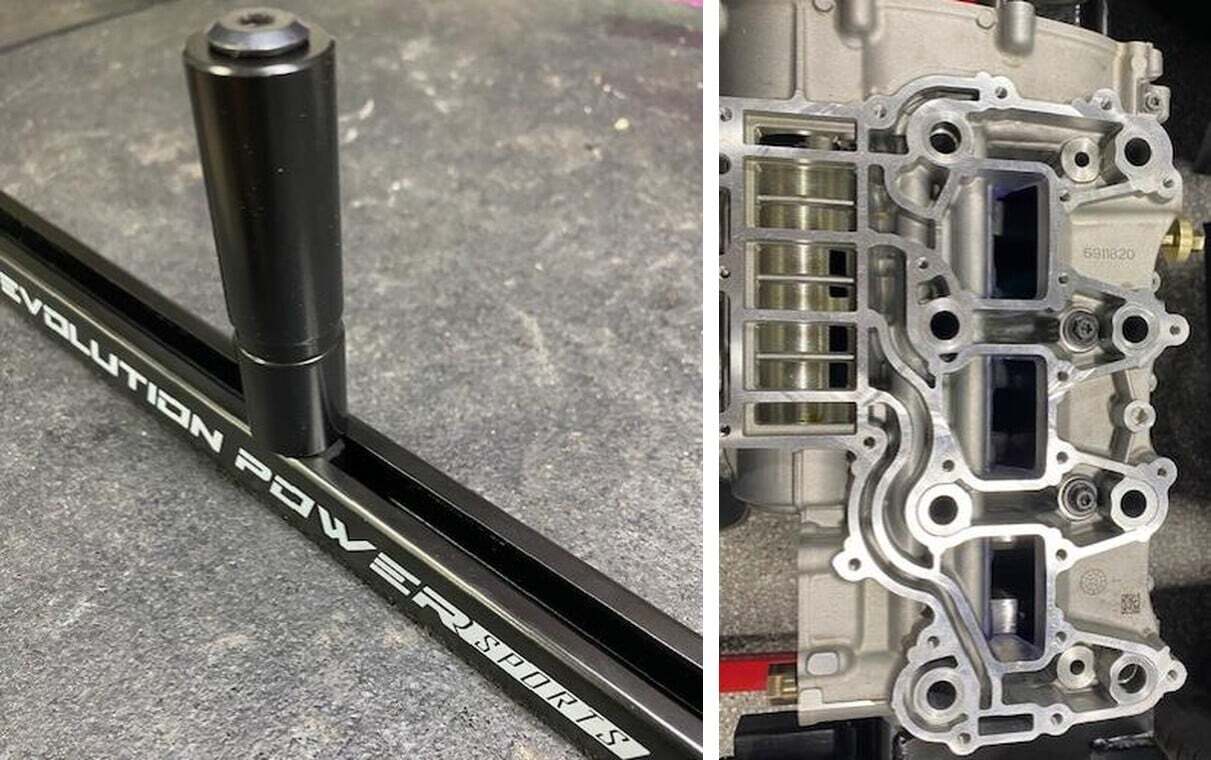
Install the M6x80mm screw through the arrestor. Thread the screw into the square nut.
3
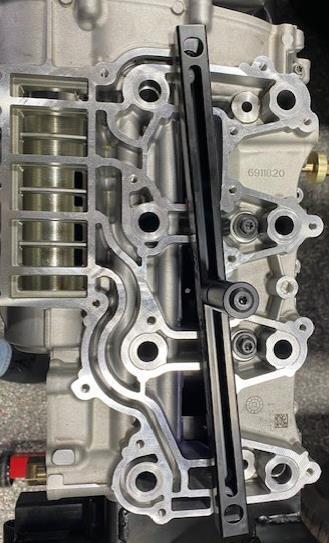
Install the alignment tube onto the engine block. (engine shown upside down). Install (2) M6x12mm screws into the circled holes. No torquing required.

4
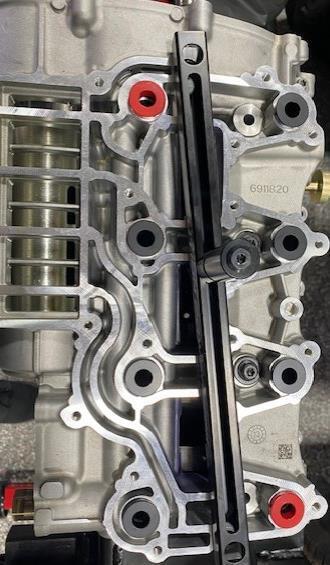
Clean the surface area around the stud holes (no oil). Install the supplied sleeved washers. Notice (2) RED washers will be in upper right and lower left holes. These holes are slightly larger. If the sleeved washers don’t fit, you are in the wrong hole. Install the (6) BLACK washers as shown. No assembly lube should be added at this time.
5
Install the head studs through each sleeved washer. No assembly lube should be used at this point. Hand tighten all studs until they bottom out into the head.
6
Once all head studs are hand tight. With a torque wrench and 7mm socket torque all studs to 15 ft-lb in sequence.
7
Apply assembly lube to the top threads of the head stud and upper portion of the sleeved washer with a brush. Install nuts and hand tighten.
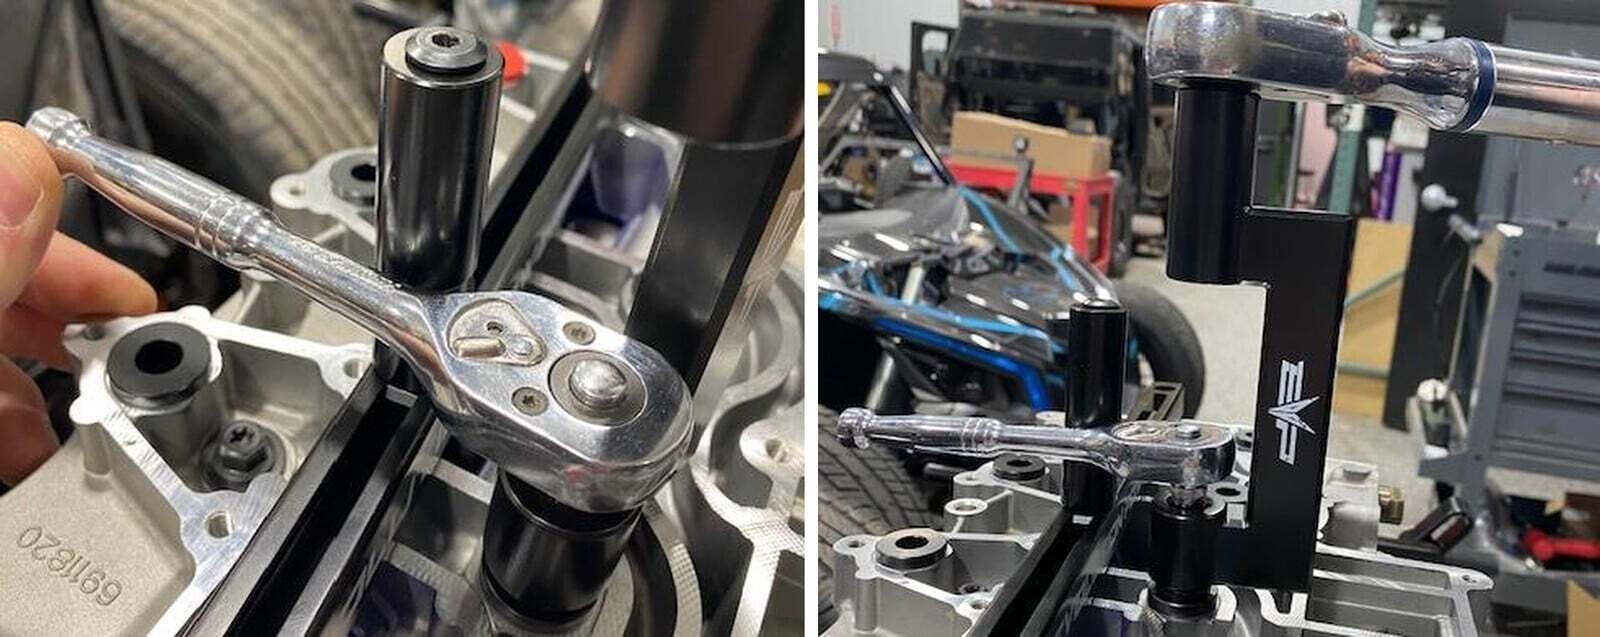
8
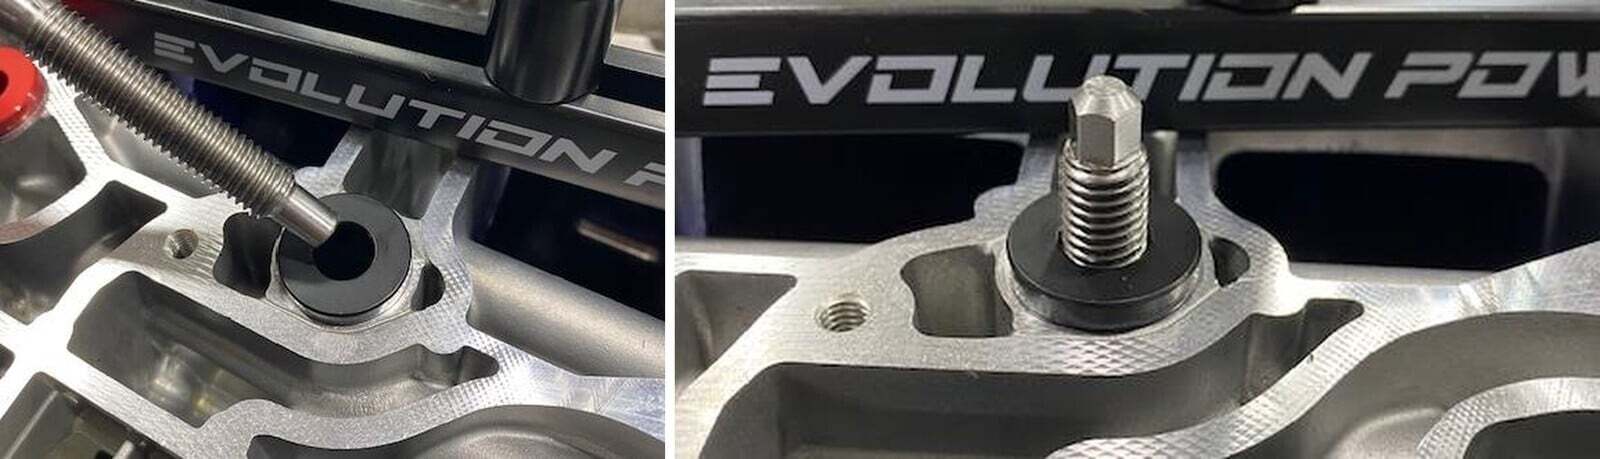
Install the 12-point socket onto the head stud nut. Install a 1/4" rachet with 7mm socket onto the top of the head stud. Preload the 1/4" rachet with 7mm socket slightly, slide the arrestor to the 1/4" rachet and tighten the arrestor post.
9
Install a 1/2" torque wrench to the 12-point socket. Now you can torque each nut in sequence. Once complete, loosen arrestor and slide to the next stud and re-setup the tool.
10
Torque steps and sequence below.
1
25 ft-lb.
2
50 ft-lb.
3
75 ft-lb & confirm 3 times Figure 12.
11
Install the expansion screws with washers, no assembly lube necessary.
1
44 in-lb.
2
180 in-lb Figure 14.