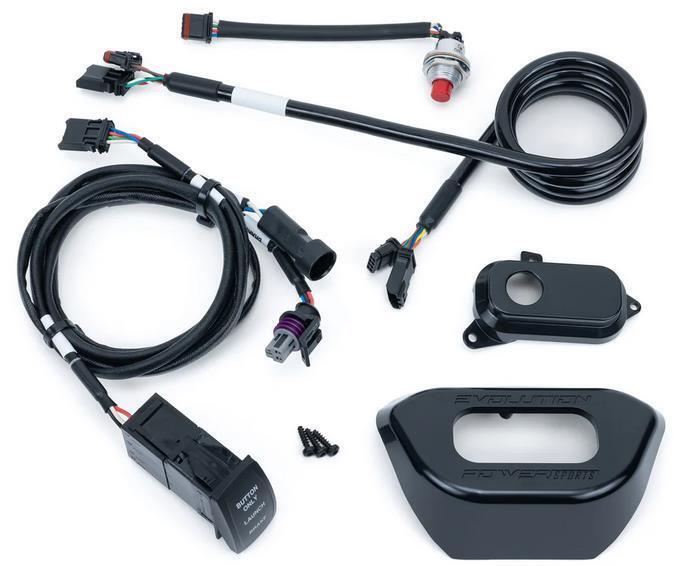
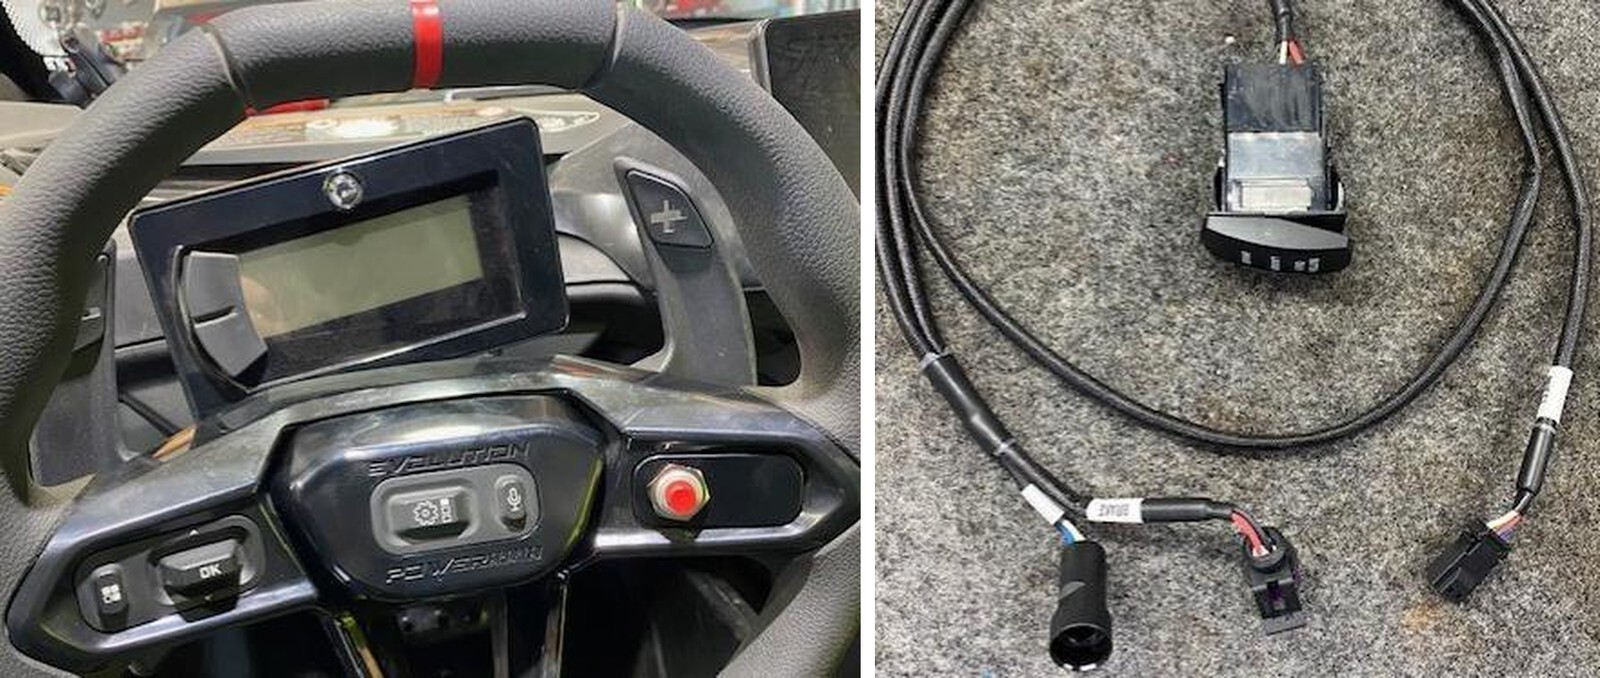
What's in the Box
Installation
1
Remove (4) T-30 screws holding the gauge cluster to the steering column.
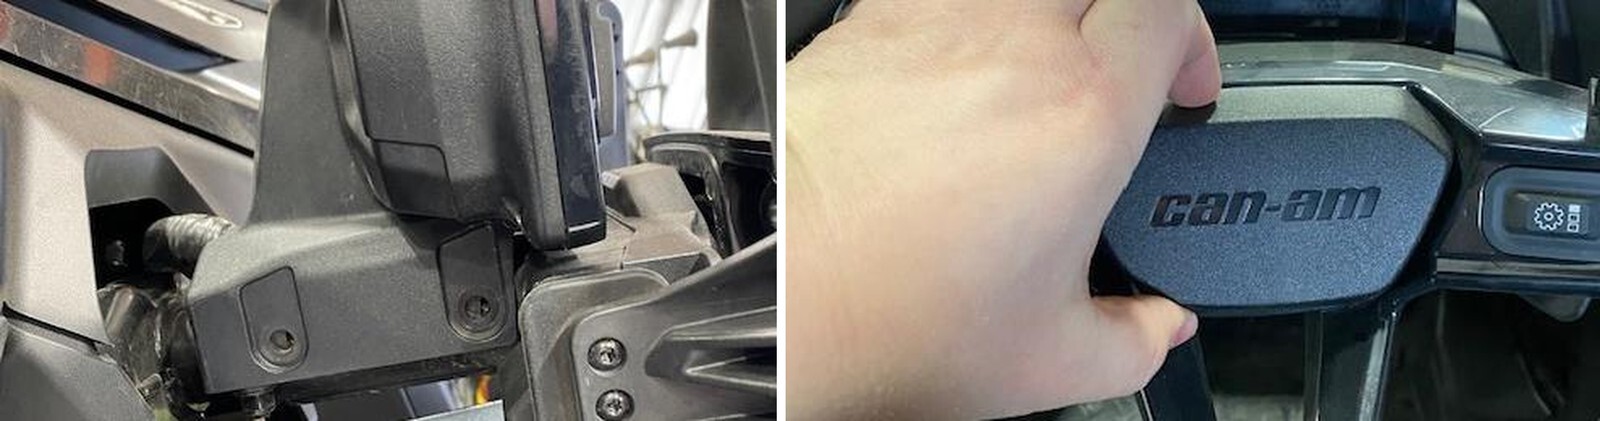
2
Squeeze the center cap on top and bottom, remove.
3
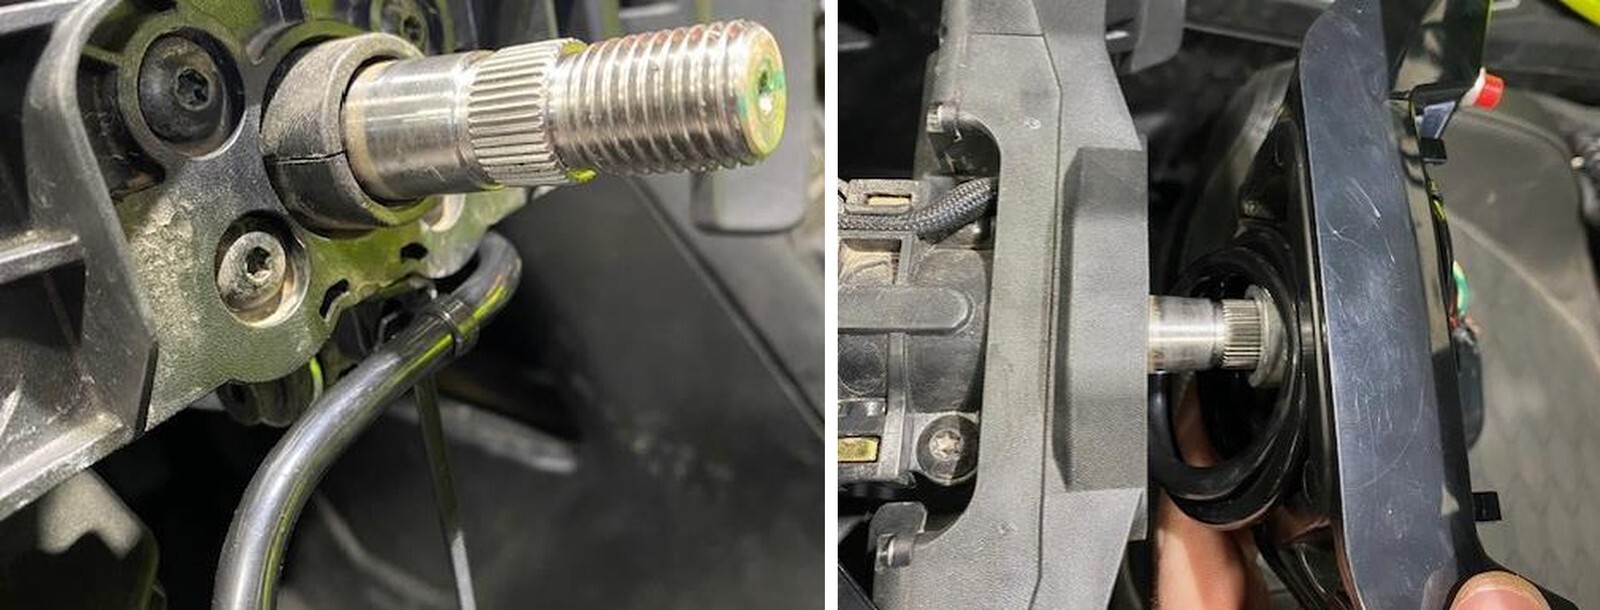
Remove the 24mm nut holding the steering wheel on.
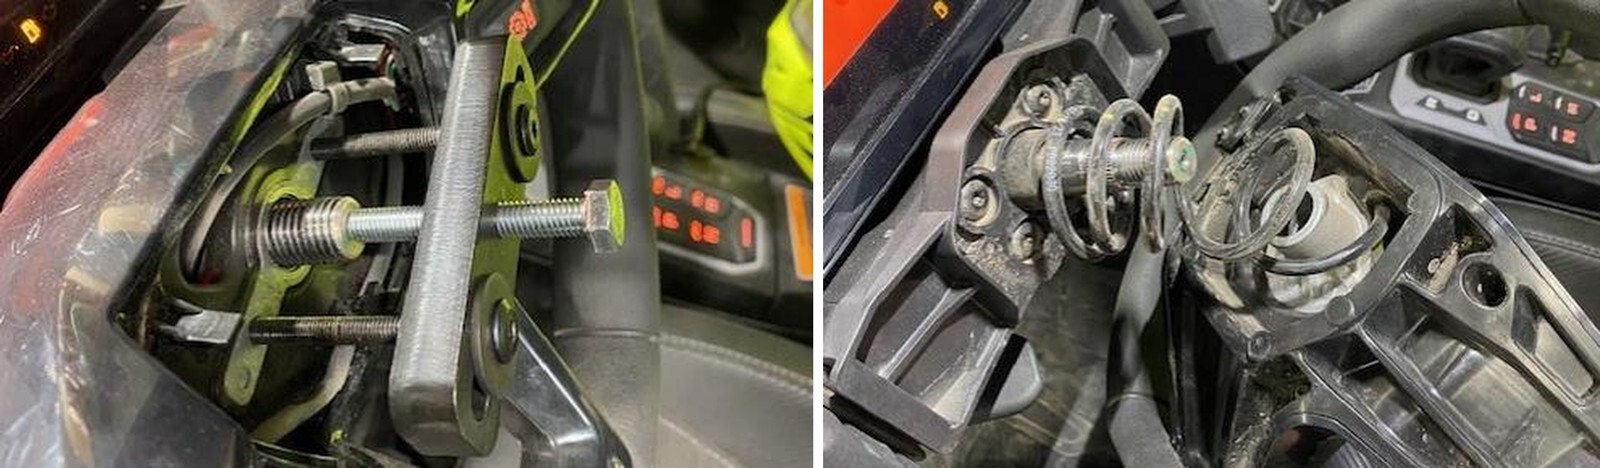
4
Install a steering wheel puller onto the wheel. Remove the wheel from the spline.

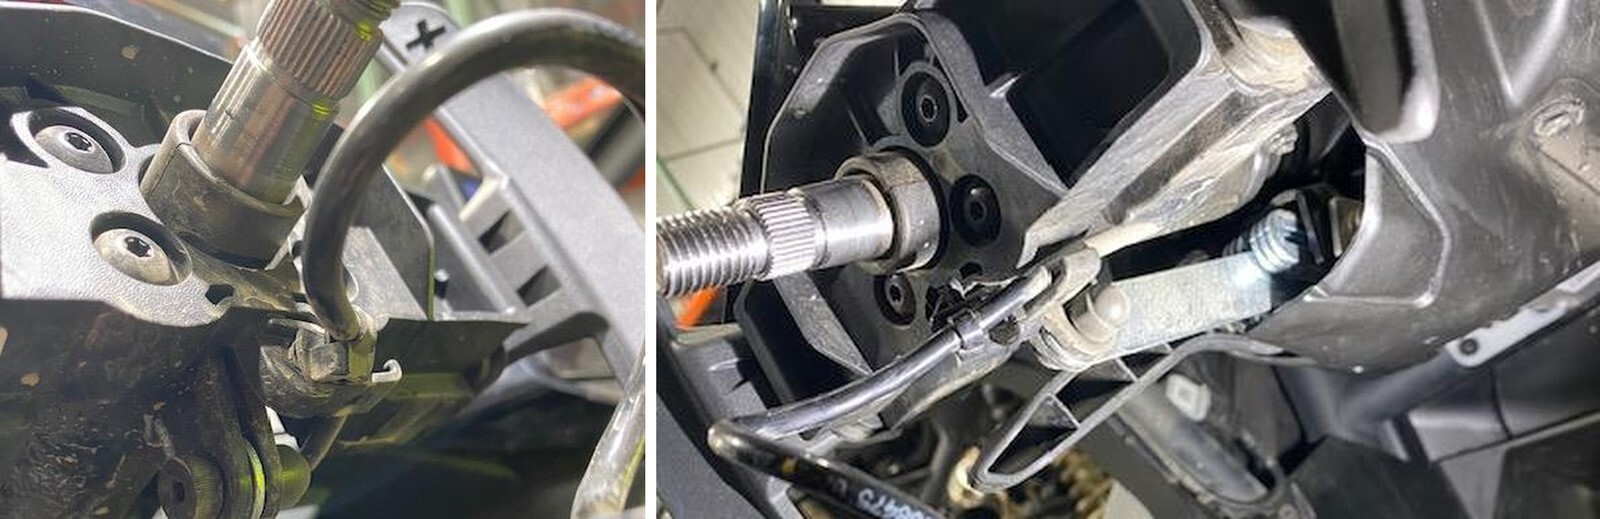
5
Remove the wheel from the spline and set on the driver seat.
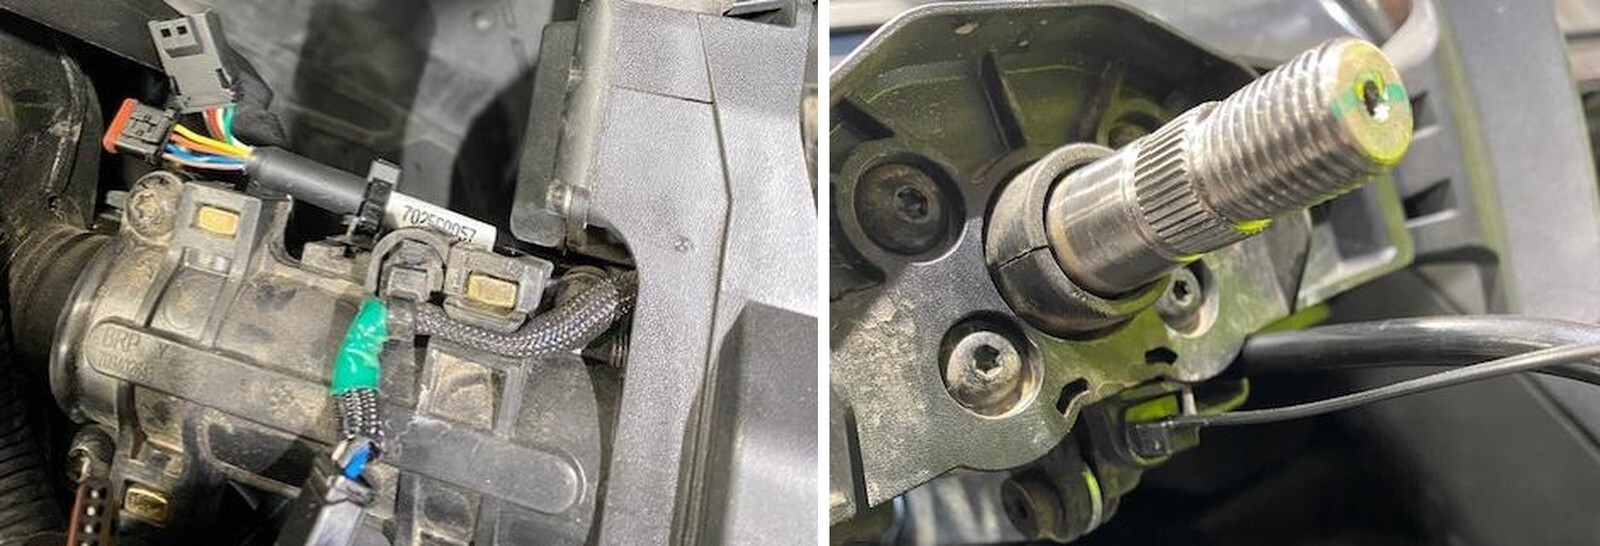
6
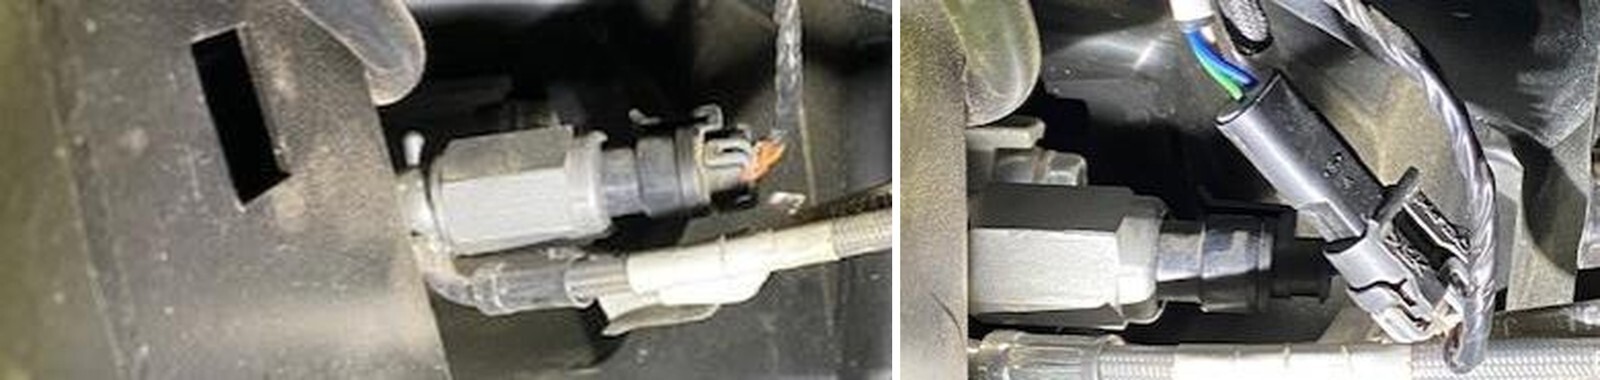
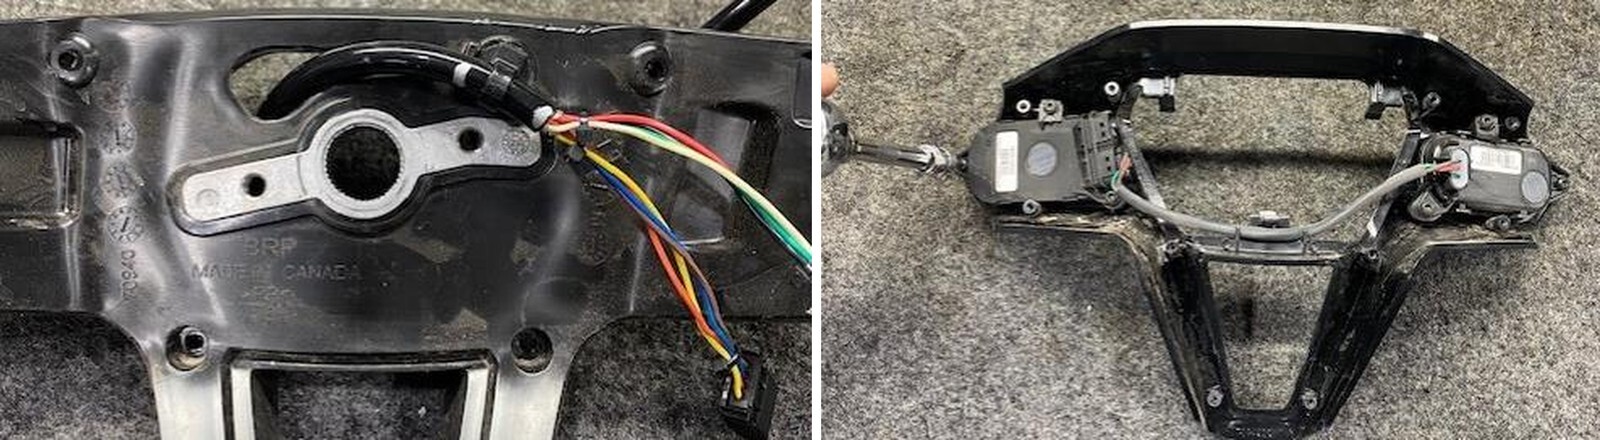
Directly underneath the steering shaft is a push mount tie, carefully remove this from the plastic. The harness and tie will stay together.
7
Carefully remove the OEM harness out of the plastic slot.
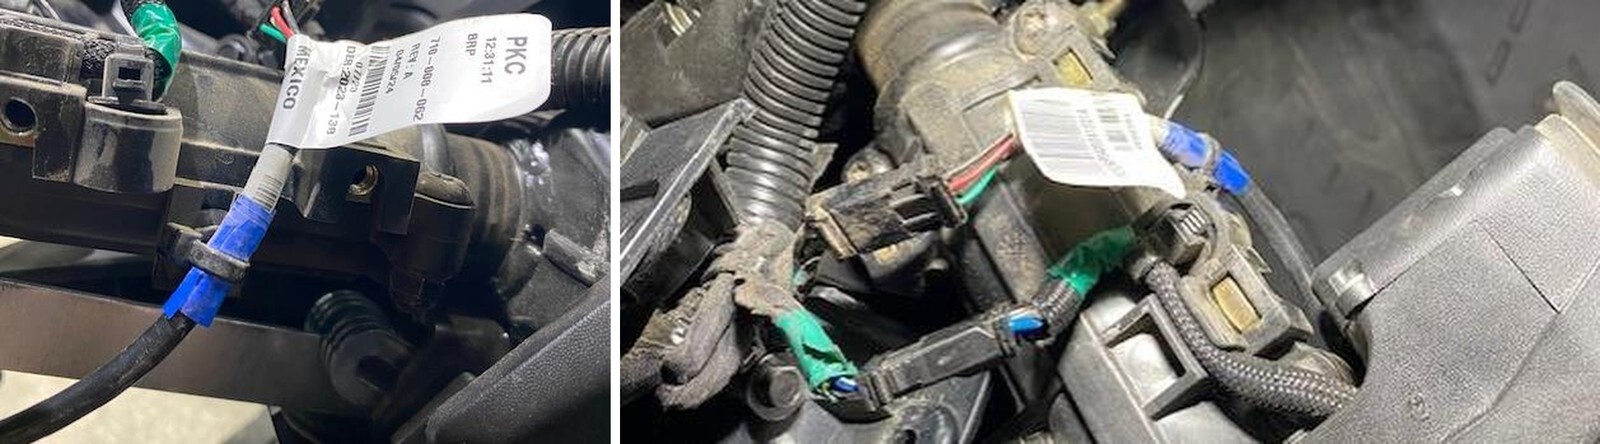
8
ONLY CUT THE ZIP TIE. Do NOT remove the push mount portion of this tie. This will be reused. Only cut the zip tie located on the blue tape.
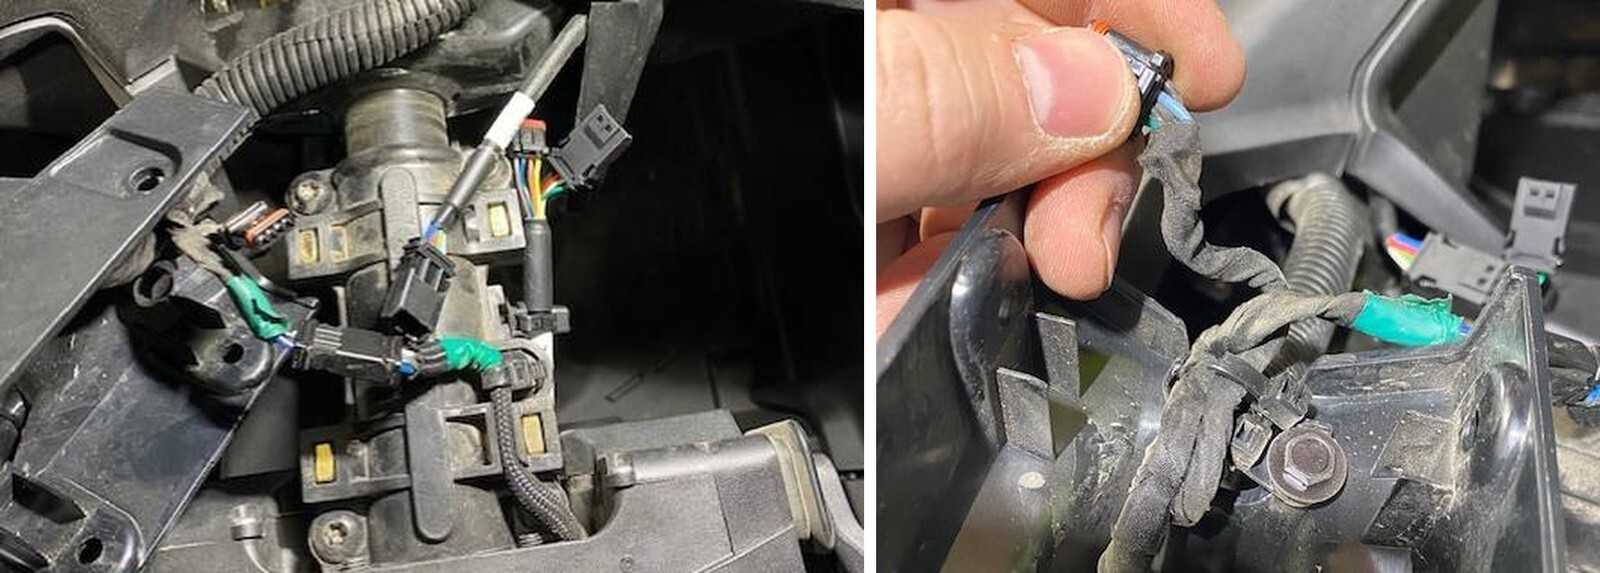
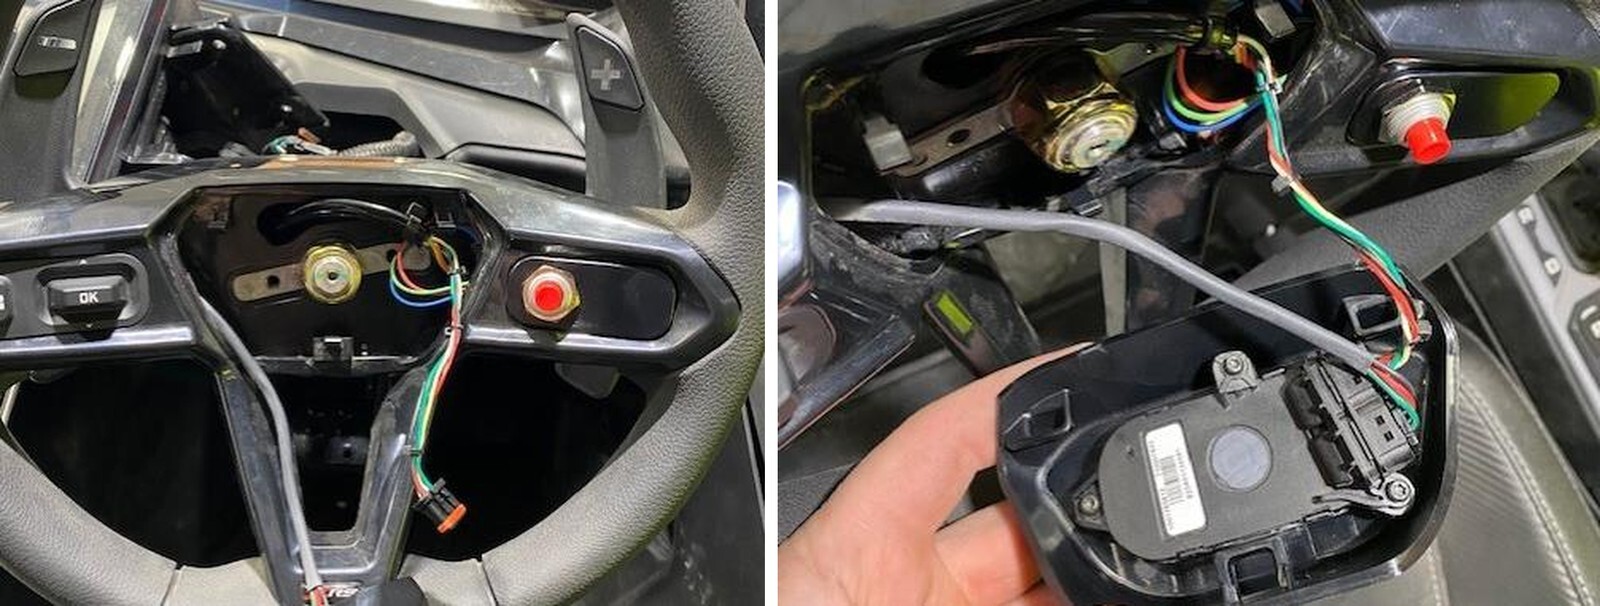
9
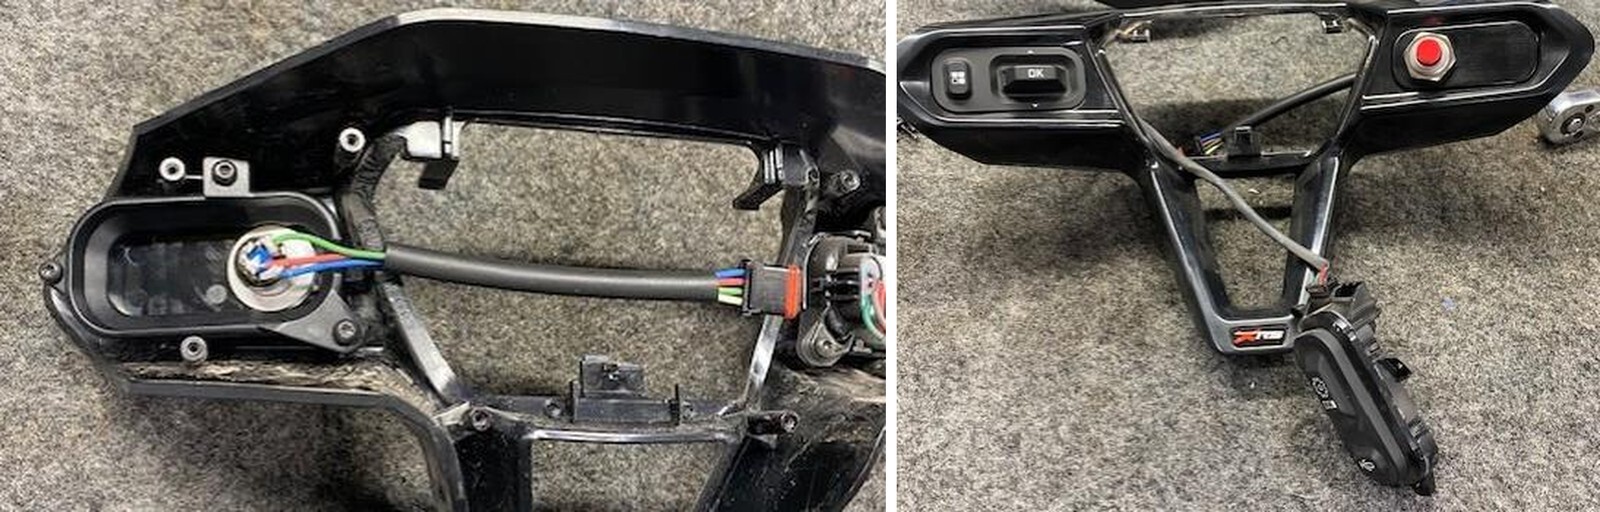
Move the gauge bezel to the side, underneath it you will find the multifunction harness connector. Disconnect this connector.
10
With the steering wheel on a work bench, flip it over and remove (10) T-10 screws holding the front faceplate on.
11
Flip the steering wheel back over, carefully pull up on the front faceplate. Unplug the hard coiled harness from the right-side multifunction button. You can remove the faceplate.
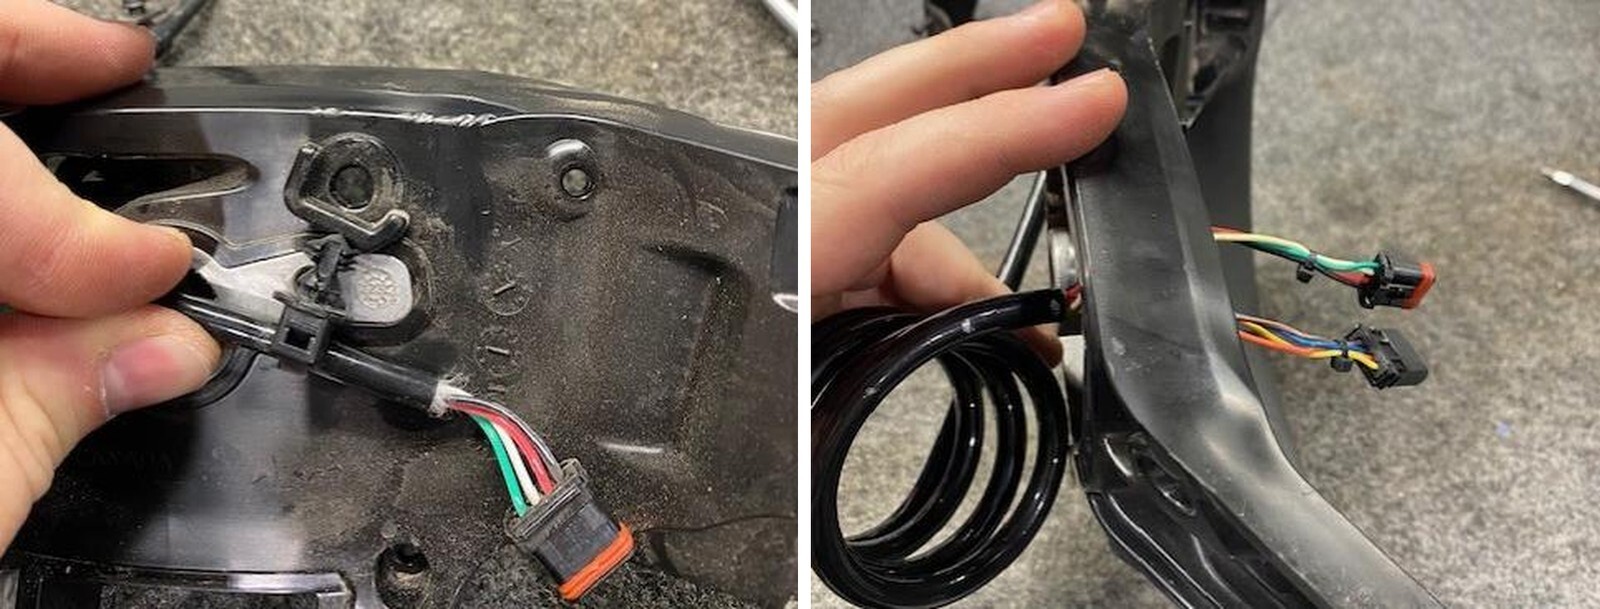
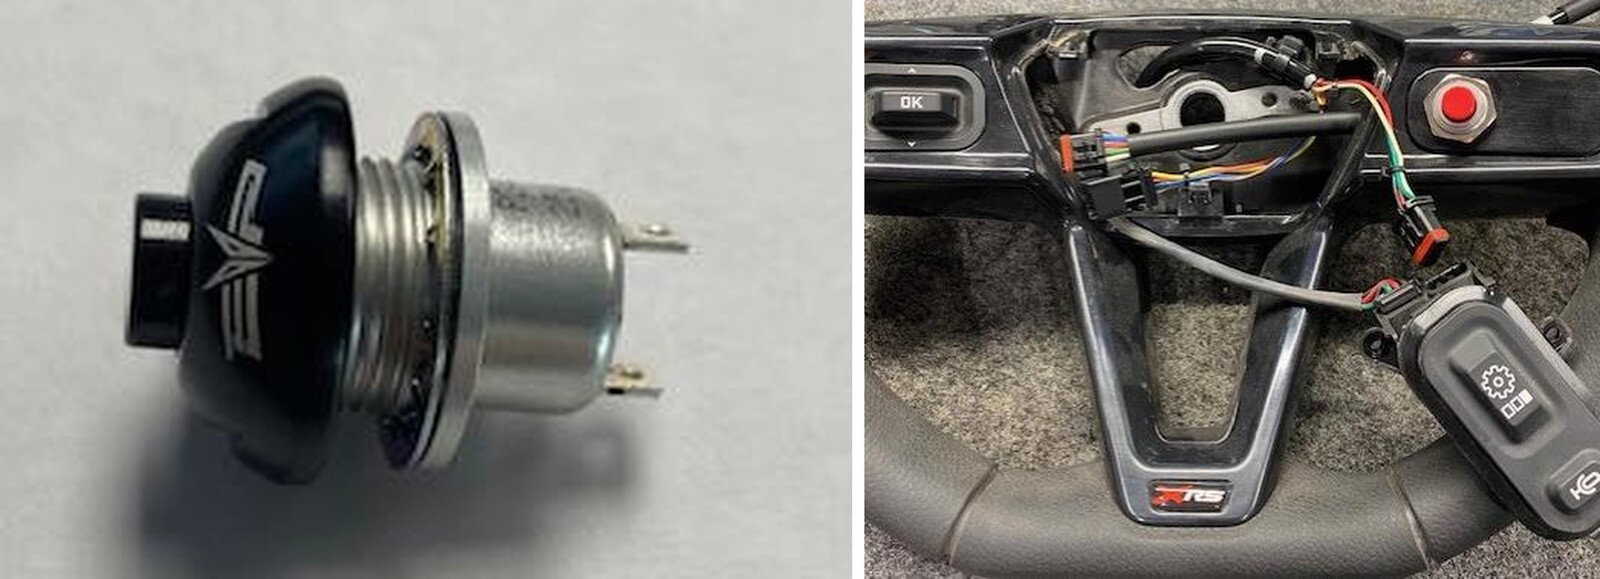
12
Remove the push mount from the steering wheel with harness attached.

13
Remove the OEM harness. Install the two loose ends through the steering wheel hole. Make sure the new harness is coiled clockwise.
14
Install a new supplied push mount tie to the steering wheel. Strap the tie right behind the large heat shrink on the harness. Make sure the mounting tie is tight.
15
Flip the faceplate over and remove (3) T-10 Torx screws holding the right-side multifunction switch on.
16
Install the push button into the fixture. Keep the serrated washer on the bottom, fasten down with the nut on top of the fixture. Make sure the wires on the backside are in the cutout.
17
Install the launch control fixture into the steering wheel faceplate. Use supplied M3 x 10mm screws. Do not overtighten.
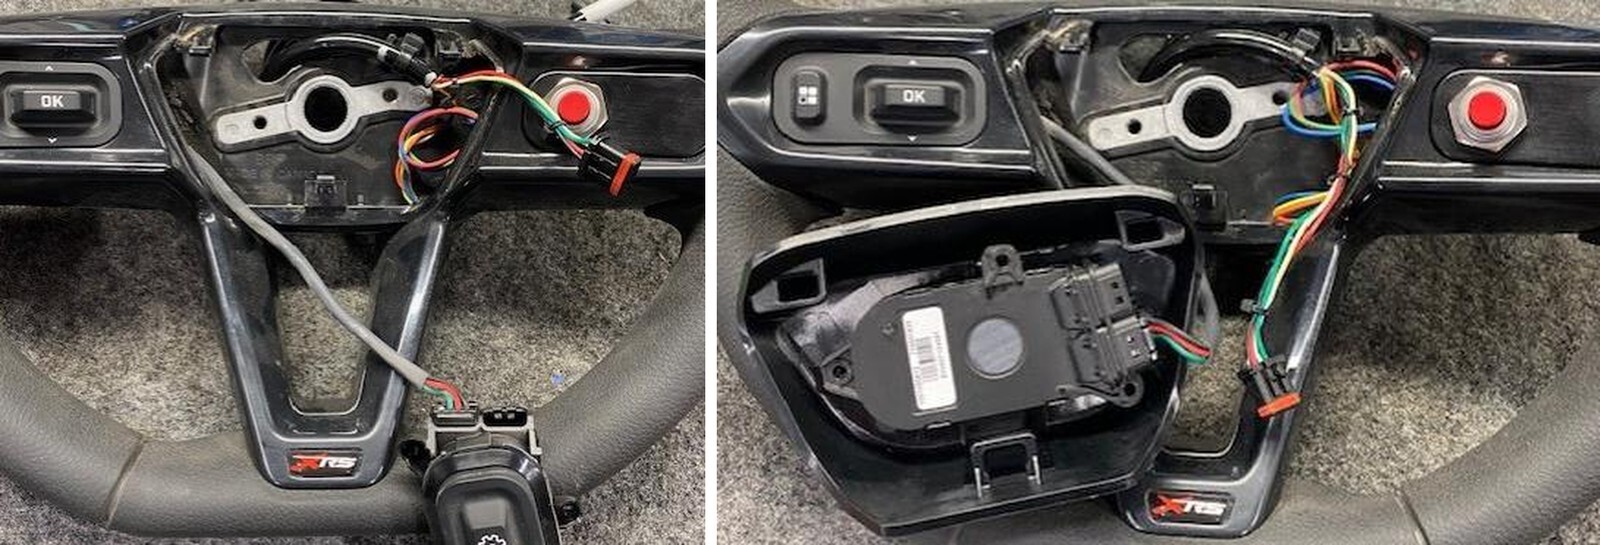
18
Make sure the right-side multifunction button is placed through the center opening before reinstalling the faceplate to the wheel.
19
Install the faceplate to the steering wheel, flip the wheel over and install all (10) T-10 screws.
20
Connect the button harness to the new hard coiled harness. Push the excess wire underneath the faceplate towards the button.
21
Install the right-side multifunction button to the new center cap. Reuse OEM hardware. Don’t overtighten.
22
Going back to the vehicle, rest the steering wheel on the driver seat. In reverse order from disassembly, install a new zip tie to the OEM mount on the steering column, right behind the heat shrink.
23
Install the new harness into the plastic slot. YOU MUST COME IN AT A HARD ANGLE FROM THE RIGHT AND IT WILL SNAP INTO PLACE. It will not fit perfectly because of the new 8 conductor wire vs the OEM 4 conductor wire.
24
Install a new push mount tie underneath the steering shaft. Bend the harness over and fasten the harness. Leave some room on the bend so it’s not too tight.
26
Align the wheel to the spline shaft. Watch the harness making sure it doesn’t catch on to anything.
27
Install the 24mm nut. Now or after the complete installation you can slowly drive your car and get the steering wheel straight. If you want to do it later, that’s fine. You will just need to remove the center cap again.
28
Install the new connector to the multifunction switch.
29
Pinch center cap on the upper/lower portions when installing. You will hear it click into place. Sometimes you had to give it a little tap.
30
Installing the brake switch harness.
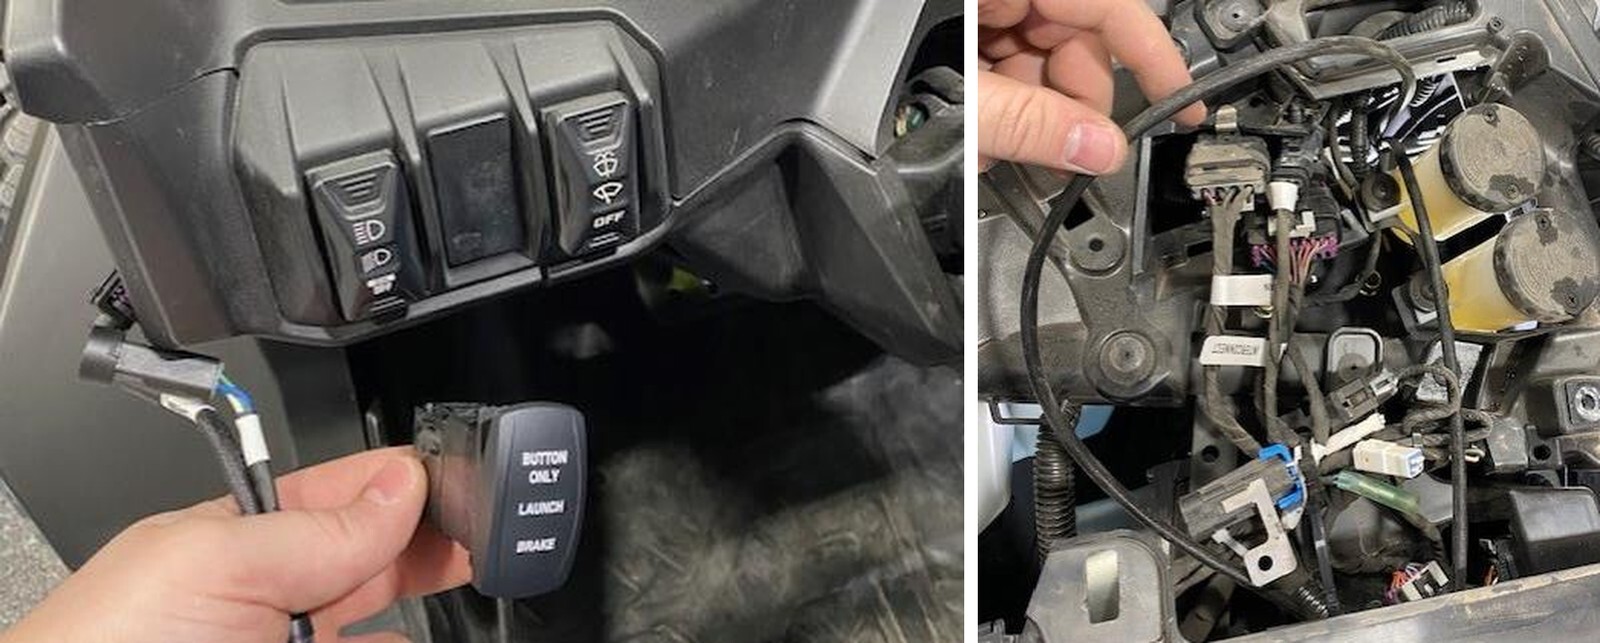
31
Locate where you want to mount the rocker switch. Remove the blank and install. Make sure the faceplate is mounted correctly and NOT UPSIDE DOWN.
32
You don’t need to remove the entire dashboard; we did for photos. Route the brake switch pigtail down to the brake pedal.
33
Unplug the OEM harness from the brake switch. Install the supplied harness.
34
Route the other pigtail to the gauge cluster and plug it into the new harness.