Installation
1
With a 10mm socket remove the heat shields over the top of the engine and heat shields attached to the header/turbocharger.
2
With an 11mm socket remove OEM charge tube, intake pipe and airbox.
3
Soak the bolts holding the down pipe (turbo exhaust pipe) to the turbocharger with PB Blaster or other penetrating lubricant and let sit for 30 minutes, then remove and clean with a shop rag. Save gasket.
4
Remove oil drain hose from turbocharger, but leave it connected to the engine.
5
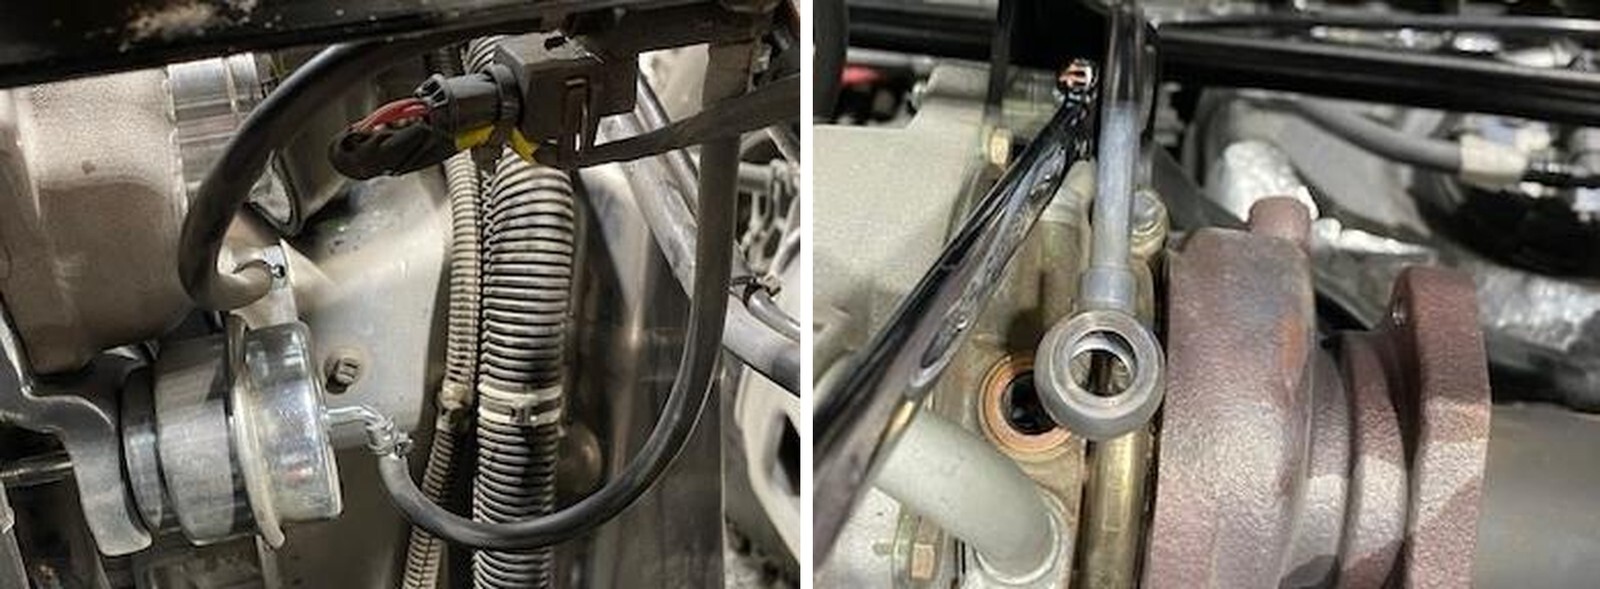
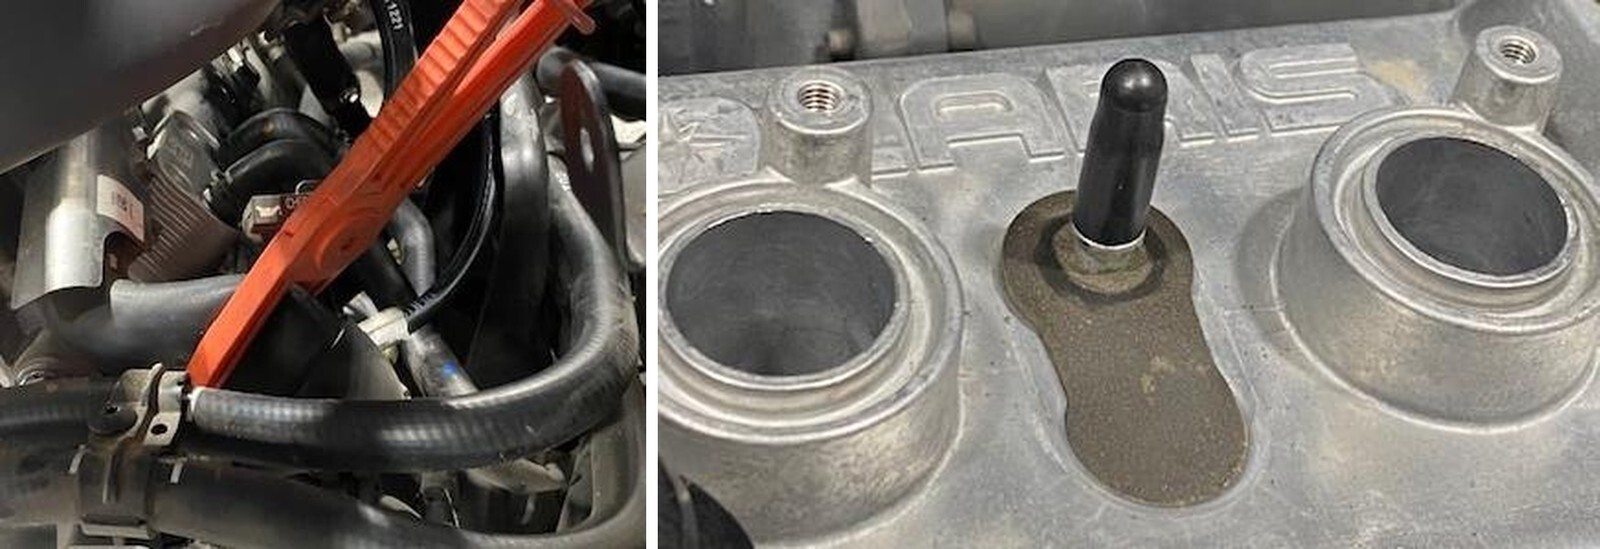
Label the vacuum lines going to the wastegate actuator and compressor cover turbo port and disconnect from turbocharger.
6
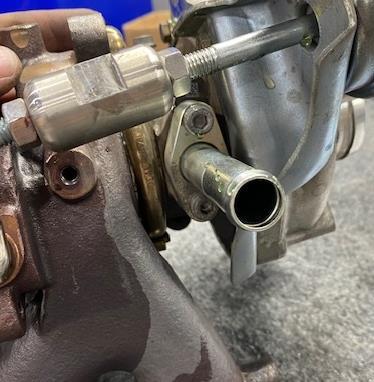
Remove the 13mm oil supply banjo bolt from the top of the OEM turbo. Make sure to save both copper washers as well as the banjo bolt.
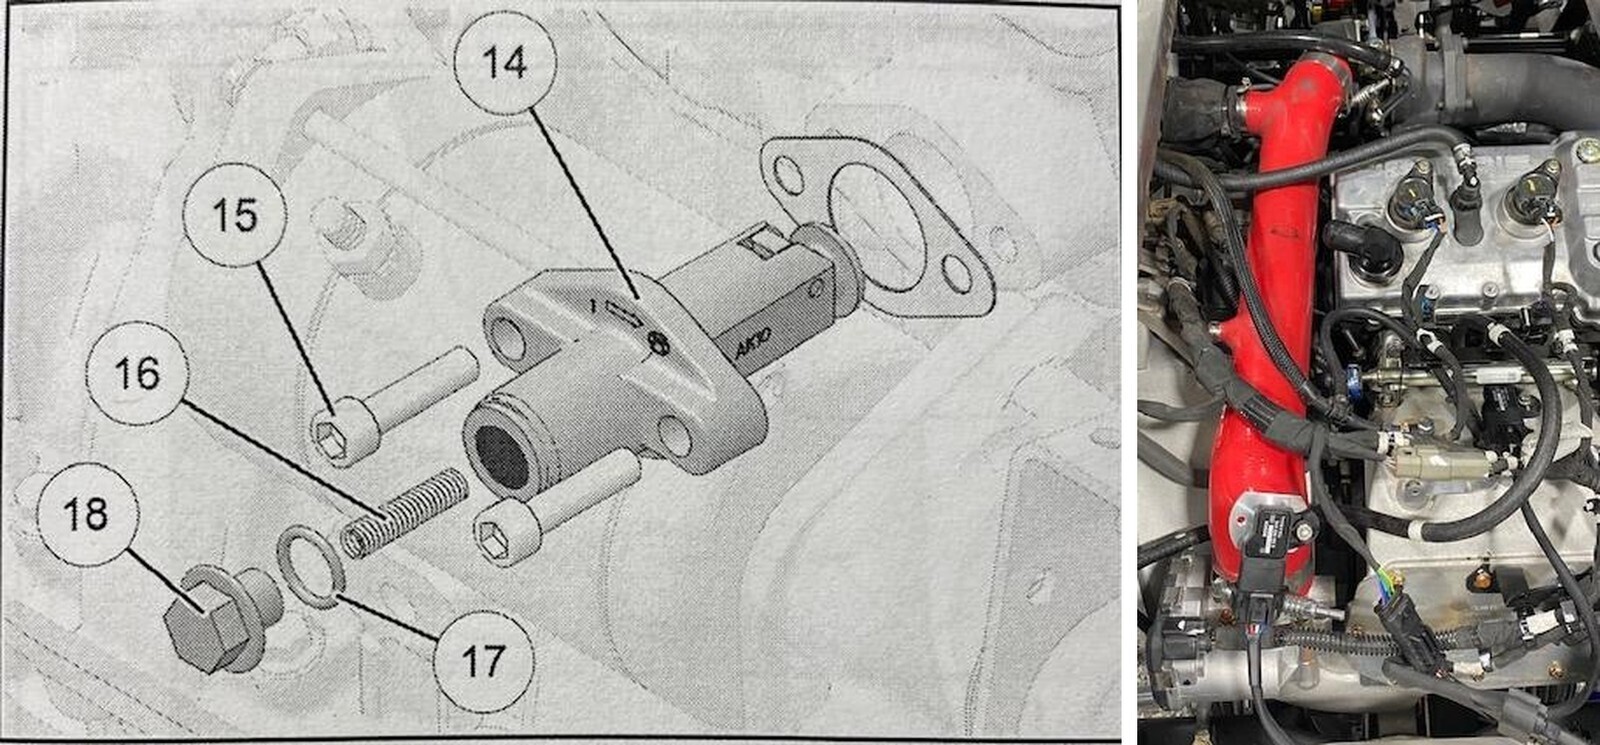
7
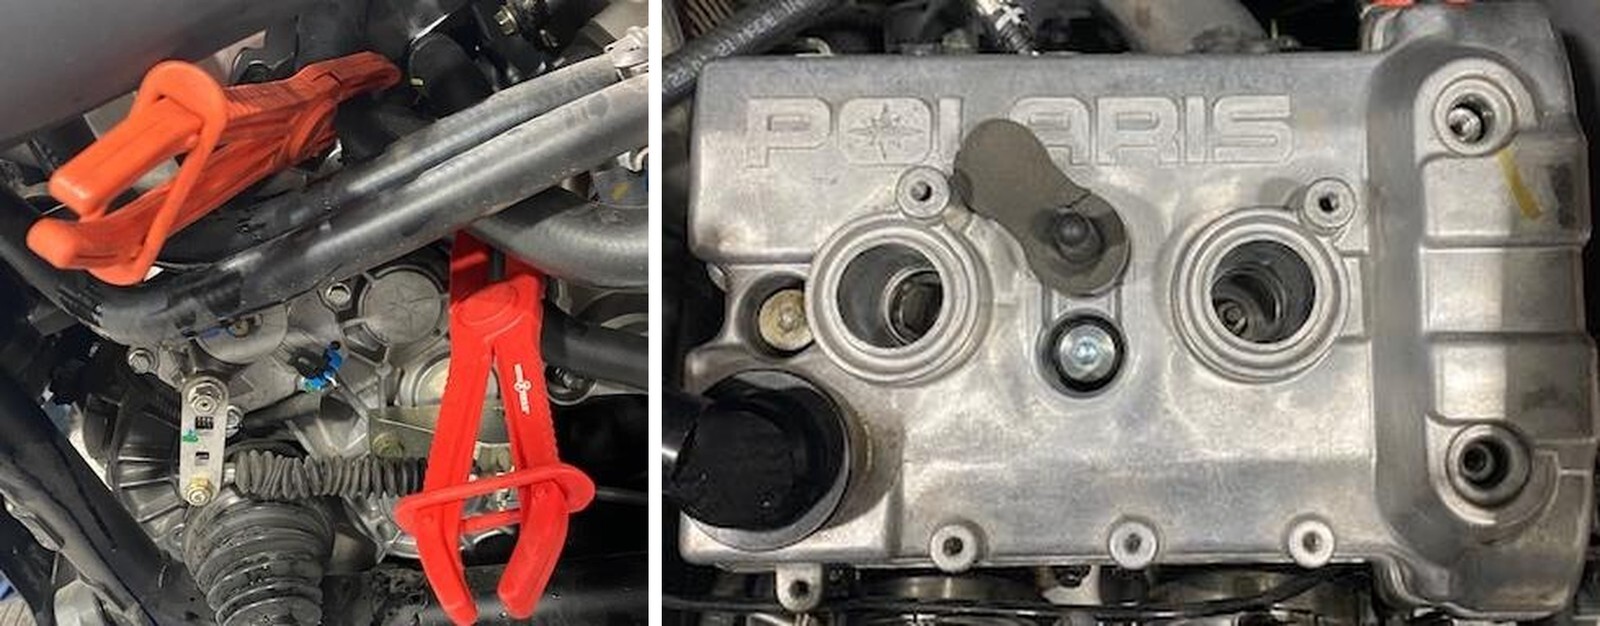
Remove the (2) fasteners connecting the turbo support bracket to the top of the turbocharger. Loosen the bottom (6) fasteners but only remove #14 shown below. Remove the oil feed line from the turbo support bracket. Remove the turbo support bracket from the vehicle.
8
Remove (4) 13mm nuts holding the turbocharger to the block. Remove (2) M6 Allen screws holding the turbocharger to the block. Remove turbocharger from the vehicle.
9
Remove the OEM oil drain tube from the OEM turbocharger and install onto EVP turbocharger. Use supplied gasket. Torque to 11 ft/lb.

10
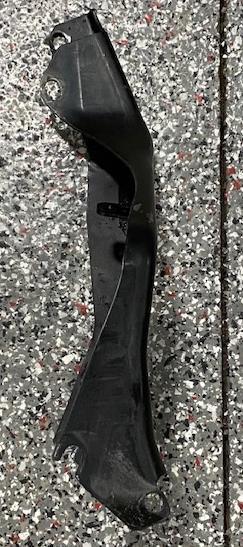
On the turbo support bracket, you will need to grind a larger radius around the top support hole. See photo below where the mark is located.
11
You will also need to grind a radius around the wastegate location on the turbo support bracket. See photo below.
12
Install the new turbocharger, if the head pipe gasket is damaged you must replace it. Torque specifications are below for turbo.
13
Install the turbocharger support bracket back into the car and check fitment before you bolt it back into place. Once fitment is correct, re use all OEM hardware. Torque lower turbocharger support bracket bolts to 42 ft/lb.
14
Install the oil line into the turbocharger. Reuse both copper washers and banjo bolt. Torque to 33 ft/lb.
14
Install both 26” turbo coolant lines onto the turbo “J” coolant fittings. Clamp them both with 19mm pinch clamps. NOTE: It is easier to slide the pinch clamp onto the fitting first, then the coolant hose.
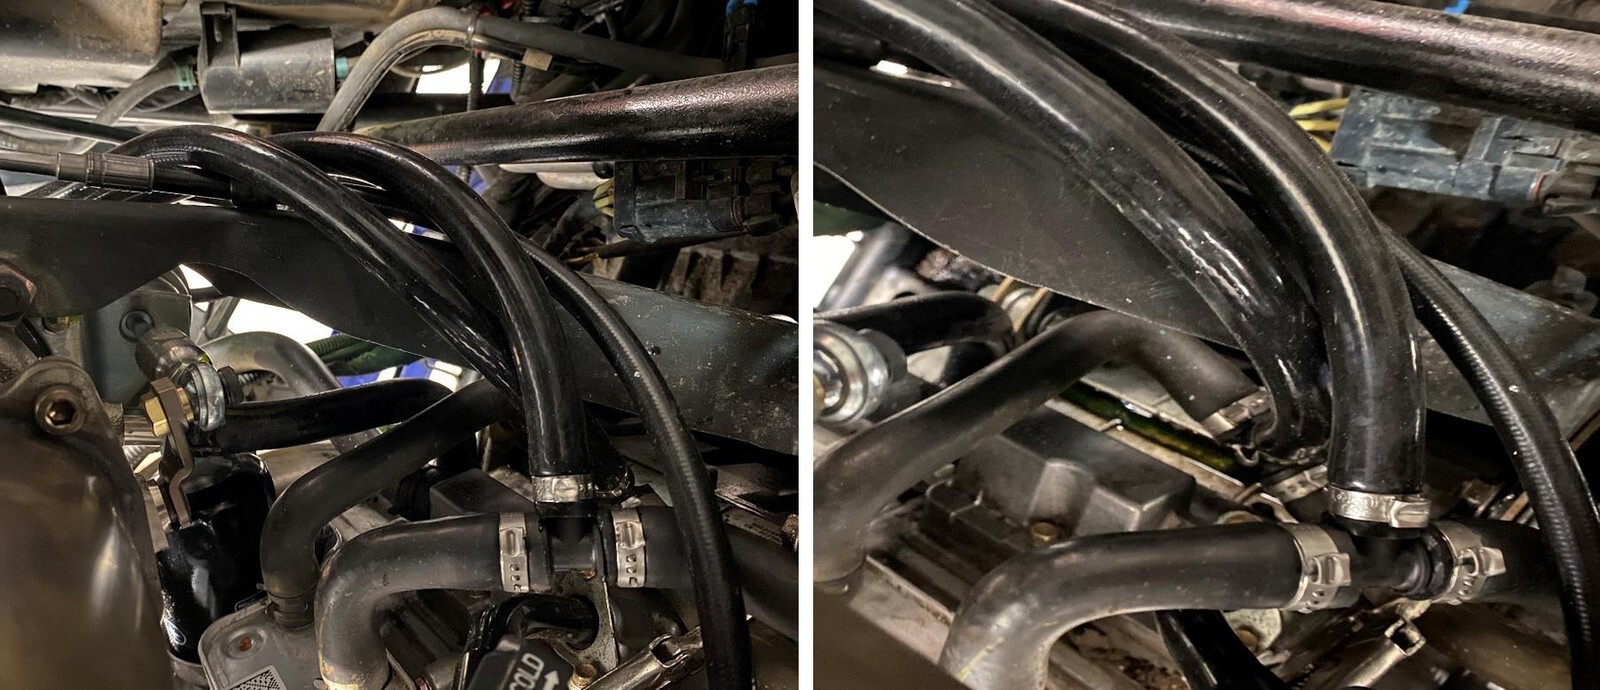
15
Install the (2) supplied “T” fittings into the coolant hoses leading to the oil cooler. The 3/8” fittings will slide into the OEM coolant hoses, clamp with (2) 22mm pinch clamps per hose. (Figure 10).
16
Route the (2) turbo coolant lines around the turbo and down to the “T” fittings. Slide both hoses onto the 3/8" fitting. Clamp with supplied 19mm clamps. (Figure 11).
17
Reinstall the OEM rubber oil drain hose to the oil drain pipe.
1
With the engine cold, spray the injector valleys and fuel rail with parts cleaner. Use compressed air to finish. If you don’t do this step and you remove the injectors, debris will fall into the engine and plenum.
2
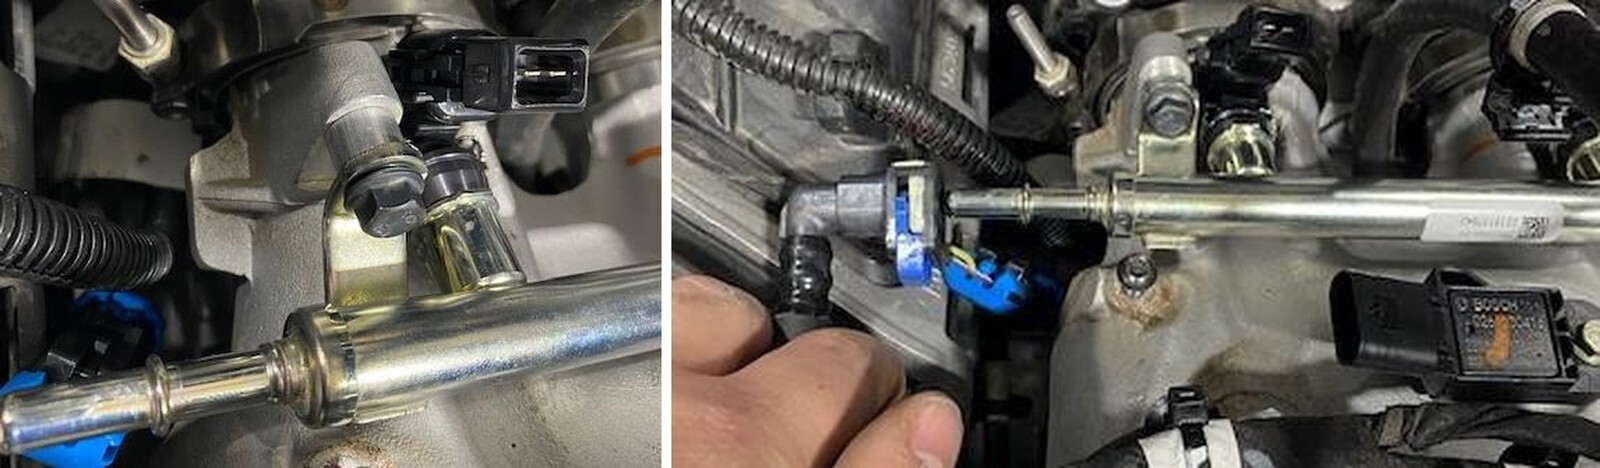
Remove the plastic safety retainer on the fuel rail. Remove the fuel line from the fuel rail (red arrow). Fuel may seep out of the fuel rail, and have rags close by.
3
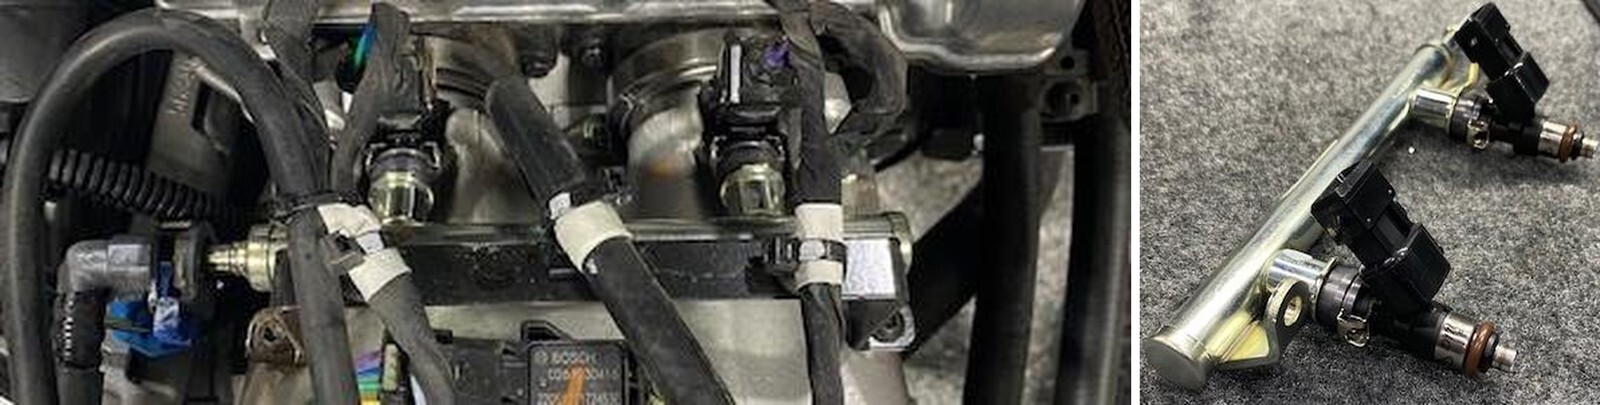
Remove the injector electrical adaptors (green arrow) and loosen the (2) fuel rail screws (yellow arrow). Remove the fuel rail with injectors attached.
4
Remove the old injectors and place in a plastic bag. Use dielectric grease on the O- rings on the new injectors and slide into the fuel rail.
5
Reinstall the fuel rail with supplied hardware. Place the spacers between the fuel rail and plenum. Torque down to 7 ft/lb. NOTE: the injectors will still move when torqued down, this is correct. They are sealed.
6
Reinstall the fuel hose to the fuel rail. Make sure the fuel line is all the way on.
1
Pinch off all coolant lines going to the engine and valve cover. Remove the coolant reservoir cap if you haven’t done that already. Once all coolant lines are pinched off remove the valve cover coolant line. NOTE: there may be pressure behind this hose, cap the barb off with a silicone cap.
2
Disconnect the spark plug coil packs and loosen the coil packs with a 8mm socket. Pull the coil packs out of the valve cover.
3
Remove the (4) valve cover screws using a T-40 torxs. Keep the rubber gromets. Remove the valve cover and gasket.
4
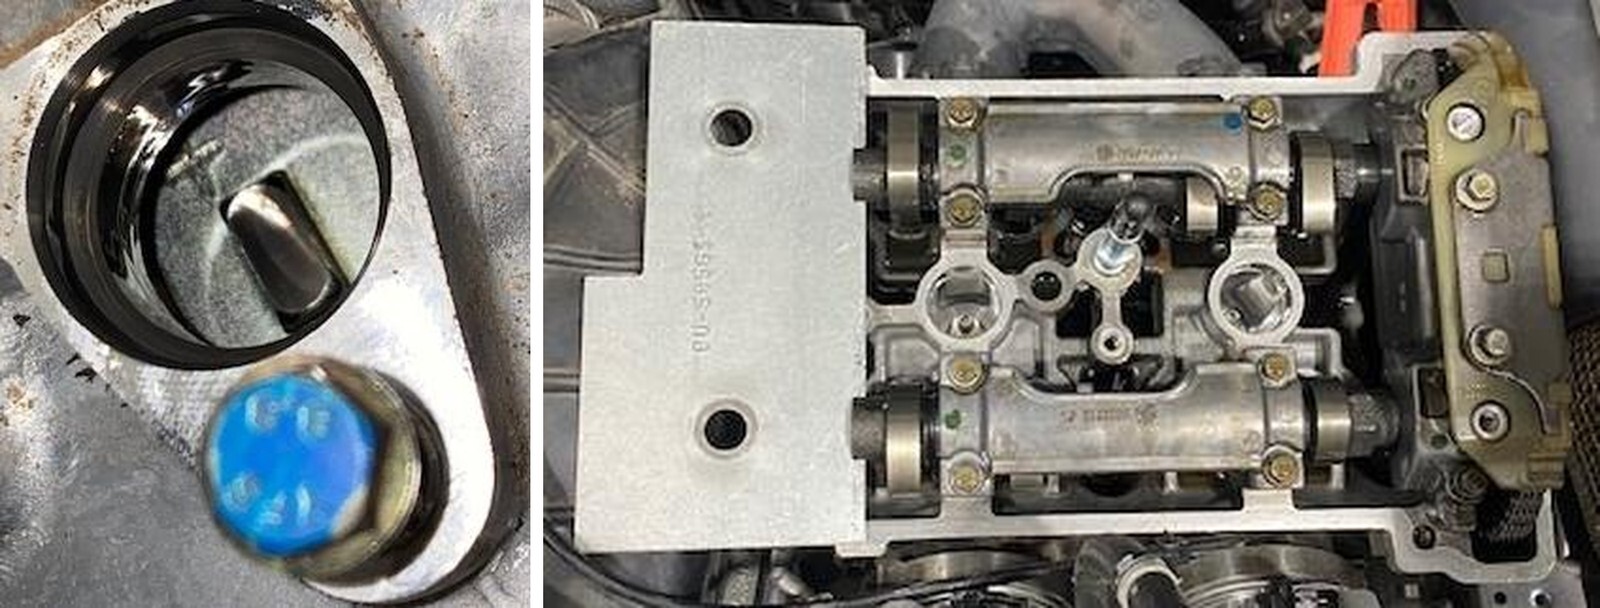
Remove the crankcase position sensor using an 8mm socket. Find TDC and slide the cam locking tool into place. Tool Number: PU-50563-1. To double check TDC you can find a (+) sign looking through the crankcase position sensor port.
5
Remove the cam chain tensioner using a M6 Allen. Check gasket for any tears.
6
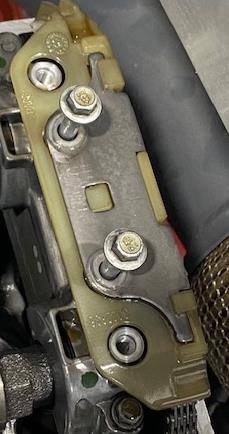
Remove the (2) retaining bolts holding the top guide in place, using a 8mm socket.
7
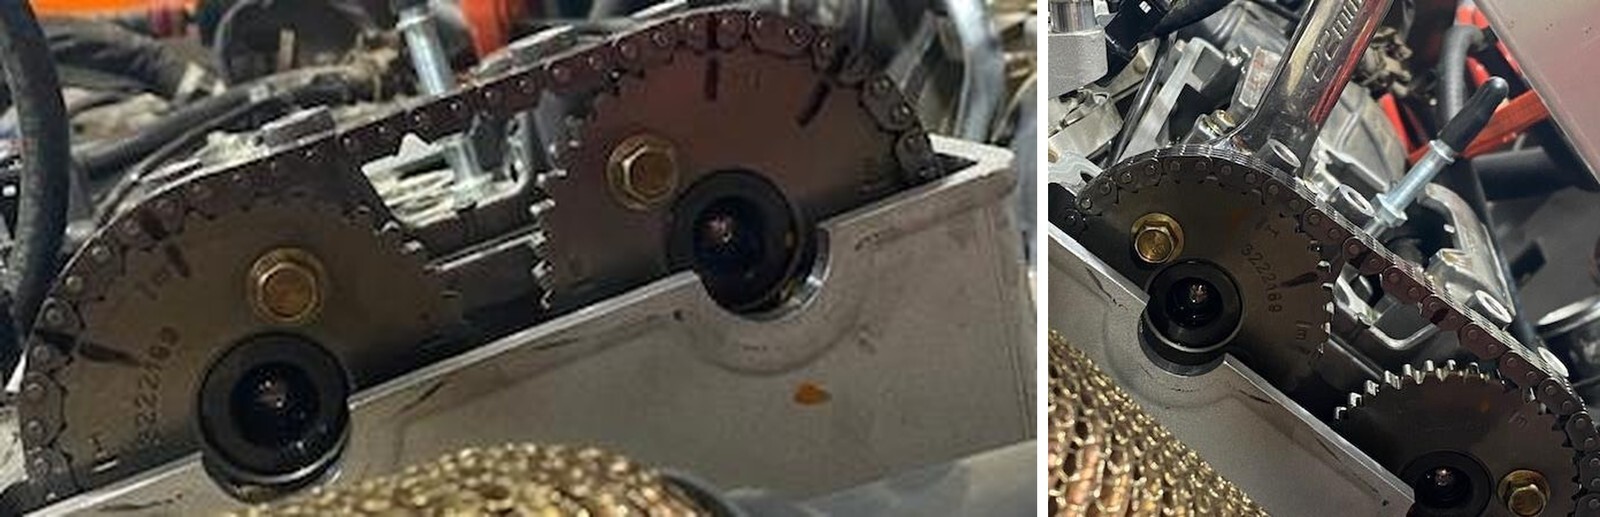
Clean the cam sprockets and chain. With a sharpie make (2) marks on each gear and chain for installation purposes.
8
Place a 22mm wrench on the intake cam, spin the clutch to release pressure off the valves while loosening the intake cam sprocket. Remove the sprocket once hardware is removed.
9
Loosen both camshaft carriers using a 8mm socket. Remove carriers and cam shafts from the engine. Zip tie the cam chain up to the bed mount so the chain doesn’t come off the crank.
10
Remove one head bolt and replace it with a stud at a time so the cylinder head never has more than one bolt/stud loose at a time. Lather both ends of the stud with supplied ARP assembly lube. Hand tighten the stud until it bottoms out. Place assembly lube on both sides of the washer, place the washer on the stud. Finger tighten the nut onto the stud and torque to 50 ft/lbs. See torque sequence and specifications below.
1
50 ft/lb 50 ft/lb.
2
68 ft/lb 72 ft/lb.
3
85 ft/lb 95 ft/lb.
1
10 ft/lb 10 ft/lb.
11
Reinstall the camshafts and camshaft carriers. Snug up the camshaft carriers. Install cam shaft timing plate back into the camshafts. Verify TDC mark on the flywheel making sure the engine is still timed. Install the intake sprocket back onto the intake camshaft. Make sure your sharpie marks align properly. Apply red Loctite to the sprocket hardware and torque camshaft sprocket to 14 ft/lb. Reinstall the outer camshaft carrier and chain guide. Torque all camshaft carrier bolts to 7 ft/lb.

12
Remove the spring retainer bolt out of the spring tensioner and push the adjuster all the way in. Install the cam chain tensioner into the block and torque the mounting bolts to 7 ft/lb. Install the tensioner spring, washer and retainer bolt. Torque spring tensioner bolt to 12 ft/lb.
13
Rotate the crankshaft two full revolutions to verify camshaft timing.
14
Reinstall the valve cover gasket, place a silicone based liquid gasket around the two lobes before installing. Place the valve cover over the camshafts and torque (4) valve cover screws to 7 ft/lb.

15
Remove the spark plugs and install supplied EVP spark plugs. EVP gapped plugs are .016-.018”. Torque plugs to 9 ft/lb.
1
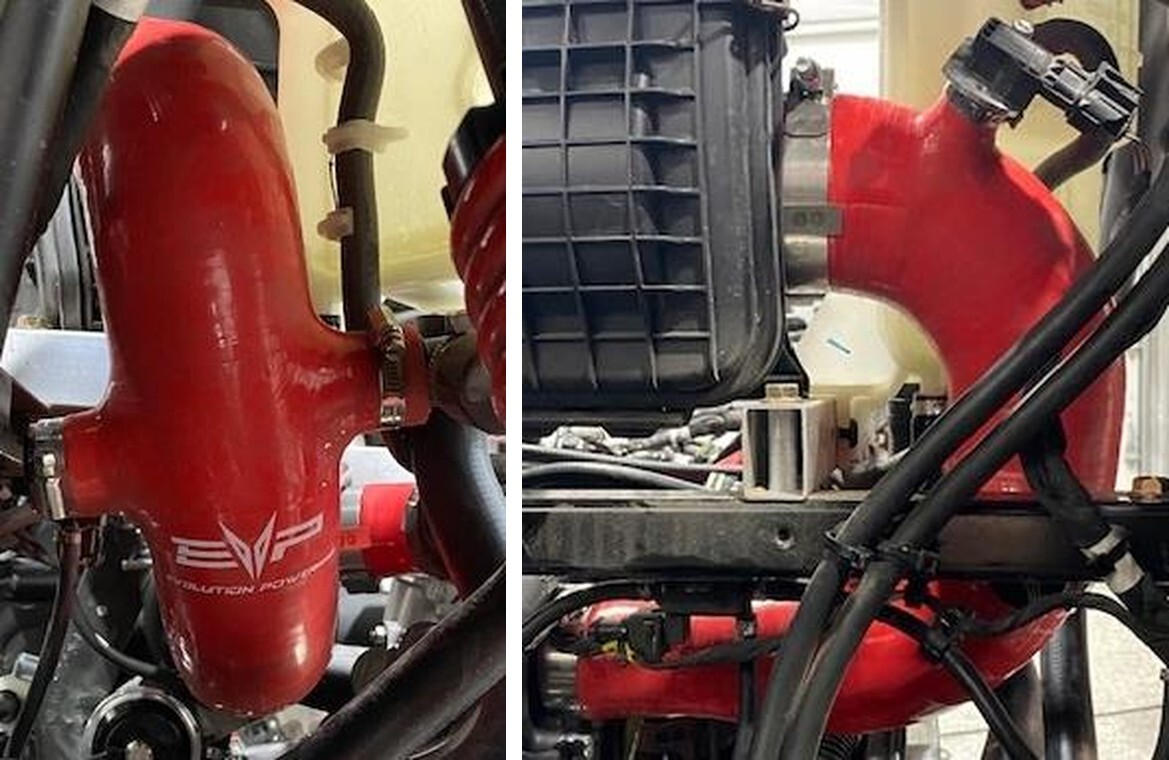
Install the supplied 4 bar MAP sensor into the charge tube. Apply dielectric grease to the O-ring for installation. Use suppled M5 screw to fasten down MAP sensor. Install the charge tube onto the turbocharger and throttle body. Reuse OEM hardware, use an 11mm deep well socket. Install EVP blow off valve or boost recirculation valve. Run supplied vacuum hose back to the plenum barb and “T” into the OEM hose.
2
Before installing the EVP V-Flow its easier to block off the crankcase vent and boost recirculating valve ports before installation. If you aren’t running a catch can or blow off valve you can keep the ports open. Install the V-Flow onto the turbocharger and air box. Tighten down with a 11mm socket. Reinstall the OEM MAF sensor in the stock location.
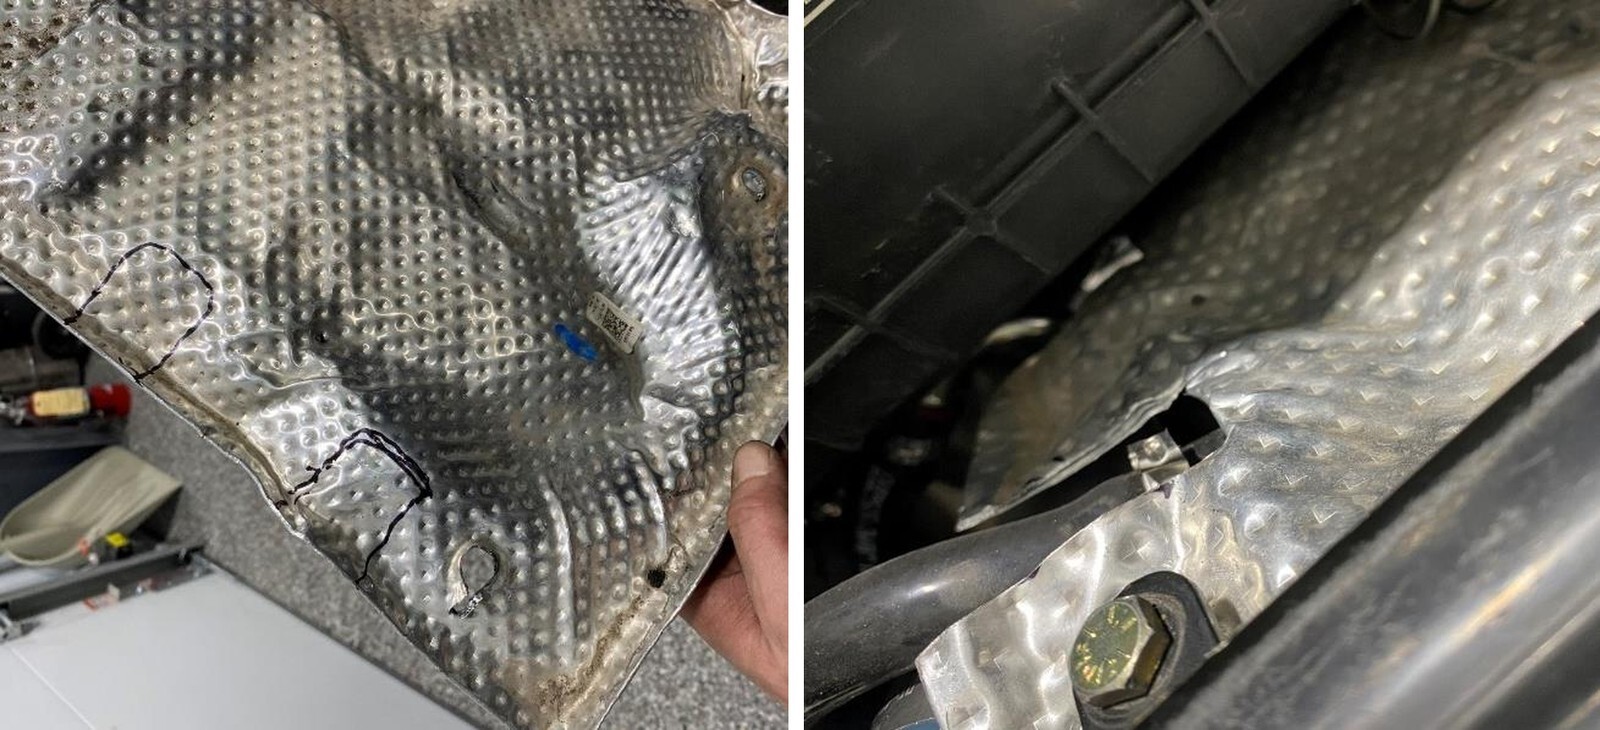
1
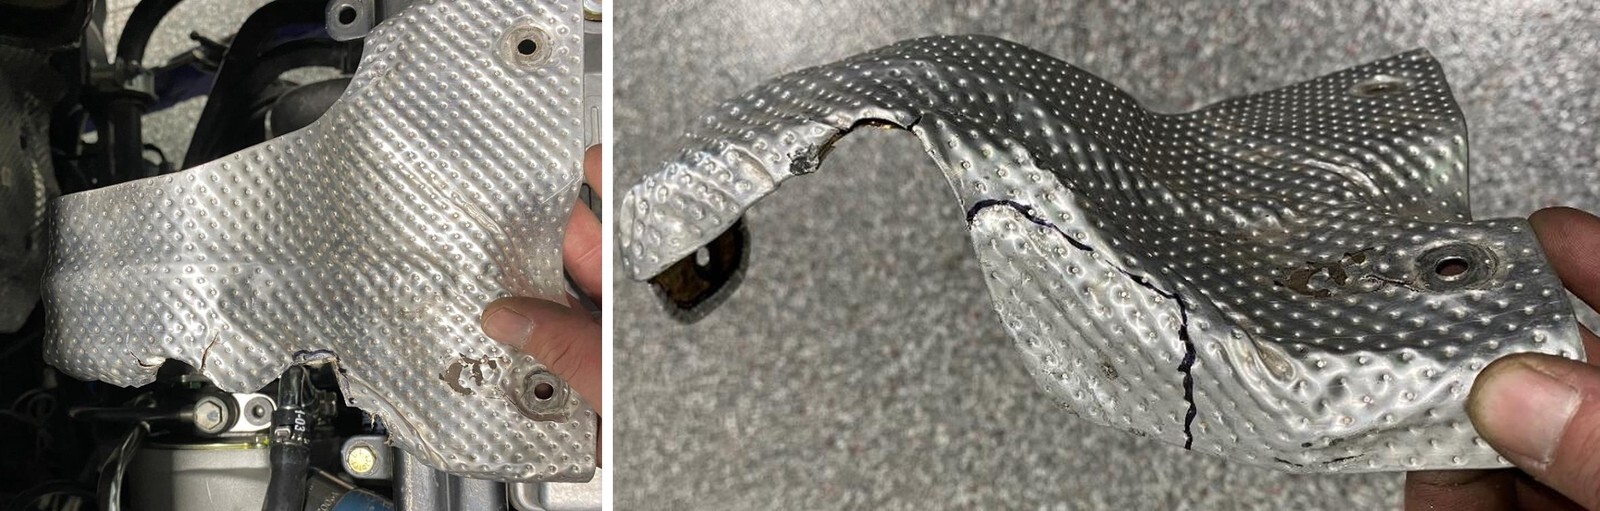
Grab the turbo heat shield, you will have to grind (2) areas away now that the turbo has coolant lines. See figure 4-5.
2
Grab the exhaust to bed heat shield, you will need to make square cut outs on it for the new turbo coolant hoses to pass. See figure 6-7.
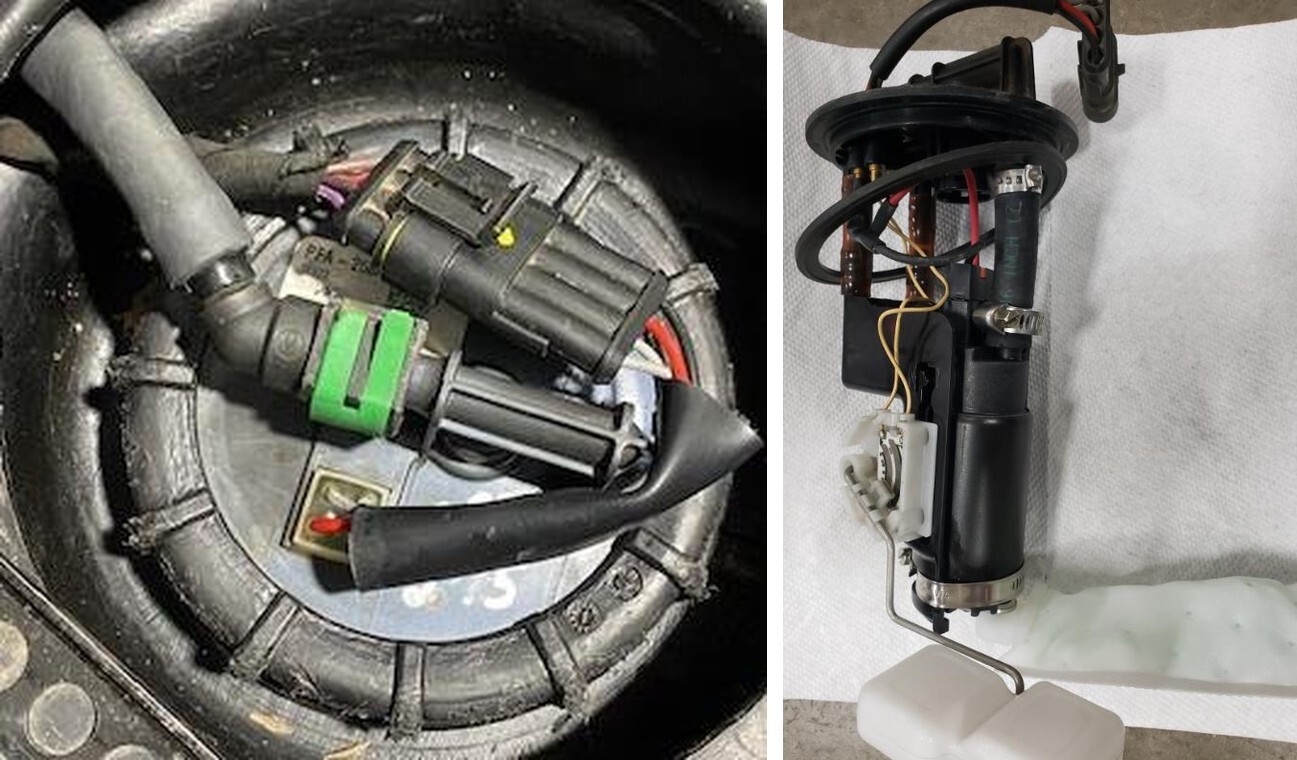
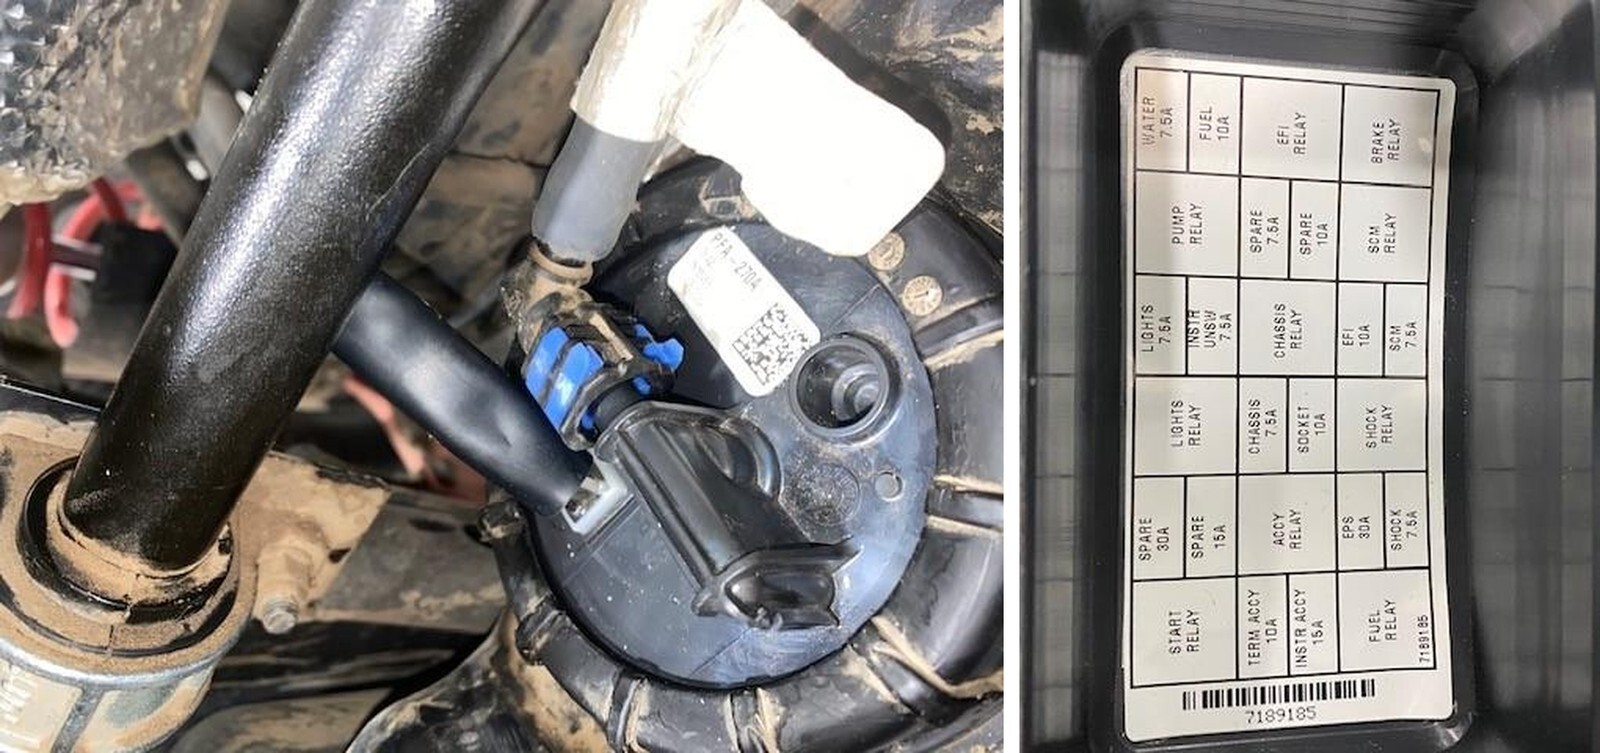
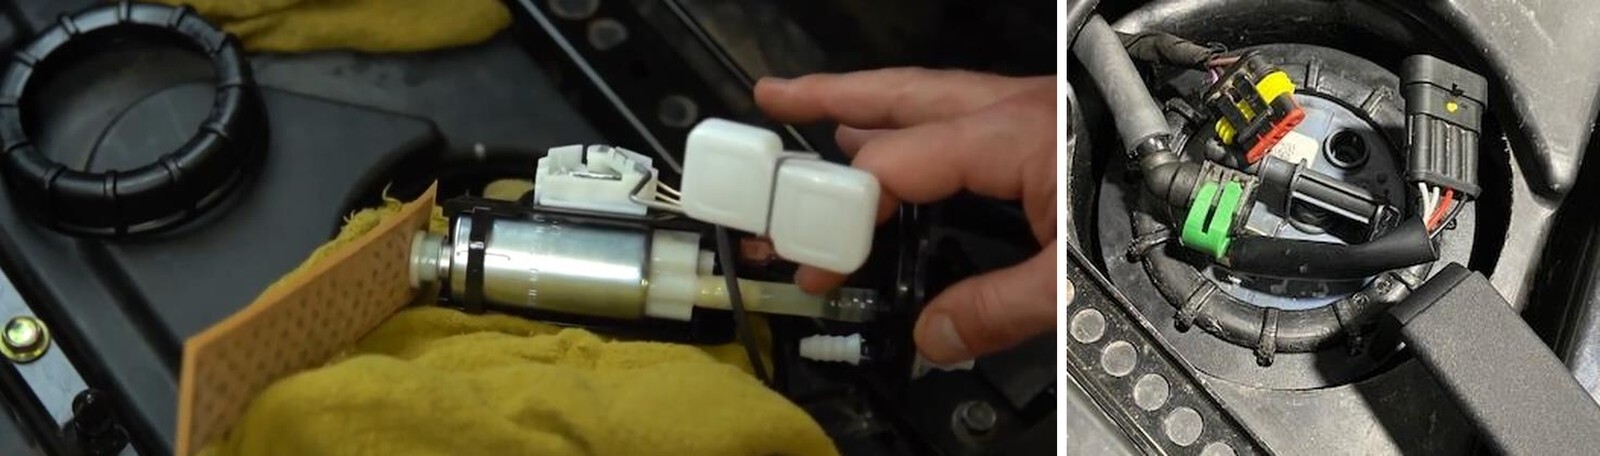
1
Find the fuel pump assembly underneath the passenger seat (rear passenger seat on a 4 seater). Remove the 4 pin connector and fuel hose retaining clip (sometimes blue or green). It is best to use EVP fuel pump tool 953RU0305 so you don’t mar up the nut.
2
Genteelly remove the entire fuel pump assembly. Turning the pump at a 90-degree angle will help not damage the float and pre pump filter while removing.
3
Once the OEM fuel pump assembly is removed, place it on a clean dry surface. With a flathead screwdriver, remove the OEM pre filter. Also remove both positive (+) and negative (-) terminals off the OEM fuel pump.
4
With a razor blade, cut the hose down the ribs of the OEM fuel pump fitting. Do the same on the assembly side. Remove the hose completely and discharge.
5
Pull the top of the fuel pump away from the fuel pump assembly and push up on the bottom of the fuel pump, and the pump will release. Now the fuel pump assembly stands alone.
6
Install the 3 1/8” fuel hose onto the AEM fuel pump. Fasten down with a 14.5 pinch clamp.
7
Install the AEM fuel pump back into the OEM assembly. This is a direct replacement for the OEM fuel pump. Push the pump down until it seats into the fuel pump assembly. Slide the second 14.5 pinch clamp onto the fuel hose and connect it to the fuel pump assembly. Clamp it down. Figure 40.
8
Reconnect the positive (+) and negative (-) terminals onto the AEM fuel pump. The positive (+) terminal is larger than the negative (-) so they can only go on one way.
9
Install the new pre filter onto the bottom of the AEM fuel pump.
10
Start by holding the fuel pump assembly at a 90- degree angle. Place the float and filter in the tank first. Slide the rest of the assembly into the tank. Make sure the O-ring is sitting flush on top of the fuel tank. Place fuel pump nut ring on the fuel tank threads and torque to 70 ft/lbs. Verify that the fuel line connections are free of debris. Connect the fuel lines onto the pump module. Slide the green clip towards the driver’s side of the vehicle to lock it into place. Re-connect the 4-pin sending unit.
11
Underneath the dash, remove the fuse box cover. On the back of the fuse box, you will see a diagram showing a 10AMP fuse in the fuel spot. Switch this fuse out with a 20amp fuse.
12
Test the fuel pump by turning on the key and listen for the pump to activate. Do this several times to prime the fuel system. Check for leaks. If there are no leaks, re-install the access cover and passenger seat.